1")

Ever wonder why the best murukku tastes like it came from a festival sweet stall?
It’s all in the texture: light, crisp spirals with a delicate snap. If you want a snack that’s crunchy, slightly spiced and endlessly munchable, this urad dal murukku / chakli is the one to master.
What it tastes like
Golden, nutty, with a whisper of spice from ajwain and chilli — crisp on the outside, slightly tender inside. The roasted urad gives a subtle lentil aroma that makes every bite addictive.
Where it comes from
Murukku (aka chakli in many parts of India) is a traditional South Indian and Maharashtrian festival snack made for Diwali, Krishna Janmashtami and other celebrations.
The basic idea is simple: a dough of rice flour (often mixed with a roasted lentil powder), shaped into spirals and deep-fried. Each region (and household) has its little twist — different flours, spices or pressing patterns.
Why you should make this at home
- Freshness matters: Homemade murukku stays crisp way longer than store bought.
- Control the flavours: adjust spice, salt and sesame to your taste.
- Gluten-free: naturally so (rice + urad), great for guests with gluten needs.
- Make-ahead friendly: great for gifting or storing in airtight jars during festivals.
Ingredients Breakdowns
- Urad dal (roasted & powdered): adds body, a nutty flavor and helps crunchy texture.
- Rice flour: creates the crisp structure and light crumb.
- Ghee: adds aroma and makes the murukku flaky. You can replace with oil if you want neutral flavor.
- Sesame seeds & ajwain: tiny flavor bombs — sesame gives toasty notes; ajwain aids digestion and adds that classic murukku perfume.
- Chilli powder & salt: basic seasoning — control these to tune heat.
Vegan Swap 🌿: Replace ghee with neutral-flavored oil (light sesame oil or sunflower) in the dough. The texture remains excellent; the aroma will be slightly different but still delicious.
The process — explained like we’re cooking together
You’ll start by roasting urad dal to a light golden — this step is essential because it removes rawness and gives the flour an aromatic backbone. Grind the roasted dal into a fine powder and mix it with rice flour, spices, sesame and a touch of ghee. Add water slowly and knead to a soft, slightly moist dough — it should hold together but not be sticky.
Now comes the fun: fit the murukku press with a star plate, grease it and pipe spirals on a greased ladle (or directly on a greased plate). The key frying trick is medium-low heat: you want the oil hot enough to seal the exterior quickly but not so hot that the murukku browns before cooking through. Fry until the oil calms down (bubbles reduce) and the murukku turn a light golden brown.
That’s it — drain, cool, and store.
Pro Tip 💡: If the dough dries while you’re shaping, sprinkle a teaspoon of water and knead briefly — never add a lot at once. Also, check oil temperature by dropping a small dough scrap; it should rise slowly and crisp evenly. If it browns too fast, lower the heat.
What goes along
- Masala chai or filter coffee — classic teatime pairing.
- Coconut chutney or green chutney for a fusion twist.
- Pack them with dry fruit biscuits for festive snack boxes.
How to serve
Serve at room temperature on a platter. For parties, present with small bowls of chutney and tea. For kids, a simple ketchup dip works too — but traditional murukku really shines on its own.
Packing & Storage
- Cool completely before storing — warmth breeds sogginess.
- Store in an airtight jar at room temperature; they stay crisp for up to 2 weeks if dry.
- If they soften, re-crisp in an oven/air-fryer at 150–160°C for 3–5 minutes.
Party / Bulk preparation tips
- Batch workflow: roast & grind urad in one go, prepare multiple dough balls and press in sessions.
- Keep a small bowl of water handy to rehydrate slightly dried dough.
- Fry in small batches to keep oil temperature steady. Use two pans if you’re hosting — one for frying, one kept warm at low oven temp for finished murukkus.
- For gifting, pack in greaseproof paper inside tins—looks festive and keeps them crisp.
Troubleshooting
- Too greasy? Oil was too cool when frying.
- Soggy/soft later? Stored before completely cool or humid storage conditions.
- Breaks apart? Dough too dry — add a little water and knead.
Other Related Recipes You Might Like:-
- Ragi Murukku — crispy, crunchy murukku made with nutritious ragi flour — perfect festive snack.
- Thattai (Indian Rice Crackers) — thin, crispy rice flour crackers — traditional South Indian snack.
- Kaara Bonda — spicy, golden-brown fritters — ideal tea-time or festive treat.
- Crispy Vegetable Cutlet — savory and crisp cutlets loaded with vegetables — a crunchy snack alternative.
- Crispy Andhra Punugulu — crunchy, deep-fried snack made from fermented idli batter — great evening munch.
- Green Gram Vada — protein-rich lentil fritters — delicious South Indian tea-time snack.
- Peanut Ladoo — simple, sweet and nutty ladoos — festive pairing with savory snacks.
Murukku (Chakli)
Description
Crispy, golden, and absolutely addictive — this Urad Dal Murukku (also known as Chakli) is a must-have Diwali snack that’s as traditional as it is delicious. Made with a mix of rice flour and roasted urad dal, this savory treat has the perfect crunch and a subtle hint of spice from chili powder and ajwain. It’s light, flavorful, and keeps beautifully in an airtight jar, making it ideal for festive gifting or everyday snacking. Whether you’re making murukku for the first time or carrying on a family tradition, this simple recipe ensures perfect results every time — crisp on the outside, tender inside, and impossible to stop at just one!
Ingredients
Instructions
Prep Work
-
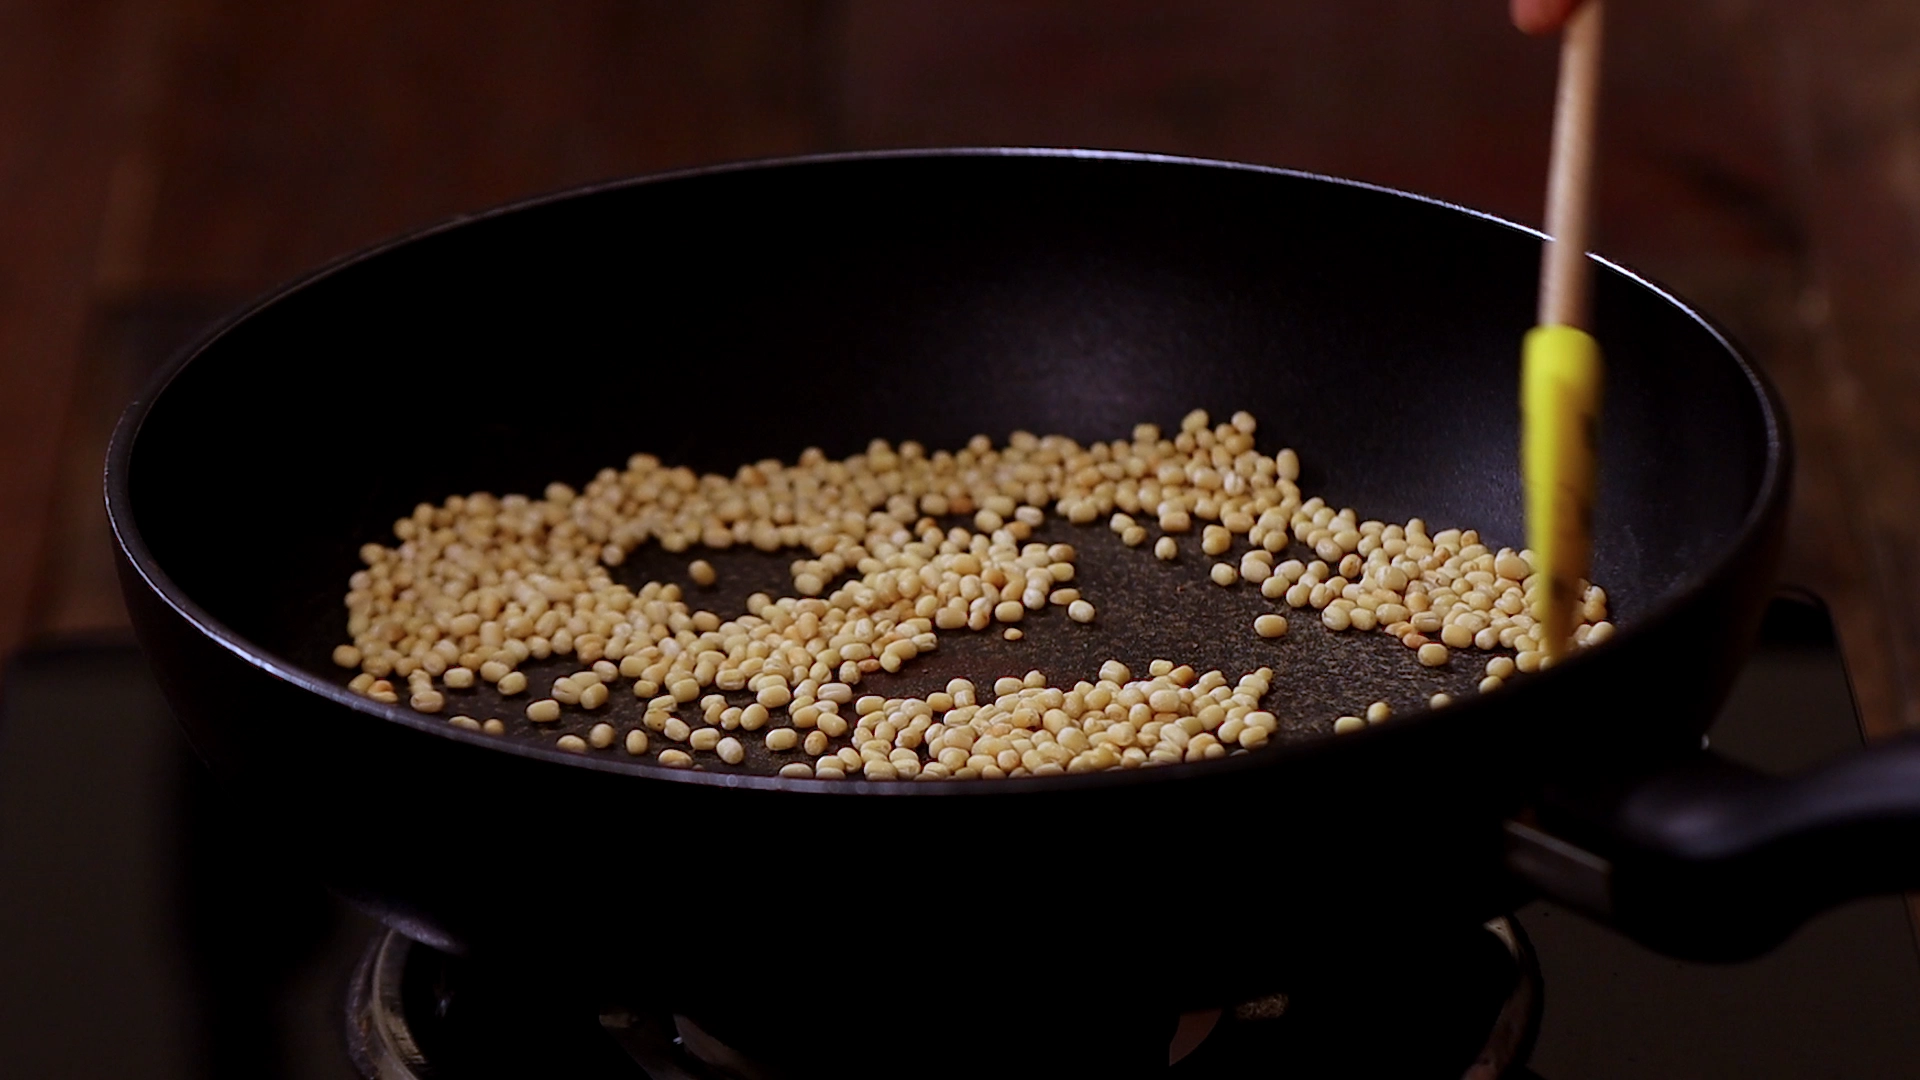
Roast and cool urad dal
Roast urad dal in a pan until it turns a light golden brown, then remove from heat and let it cool completely.
-
Grind urad dal
Grind the cooled roasted urad dal into a fine powder in a mixer. -
Measure and mix dry ingredients
Add rice flour to a bowl and add the ground urad dal, salt, chilli powder, sesame seeds, ajwain and asafoetida; mix well.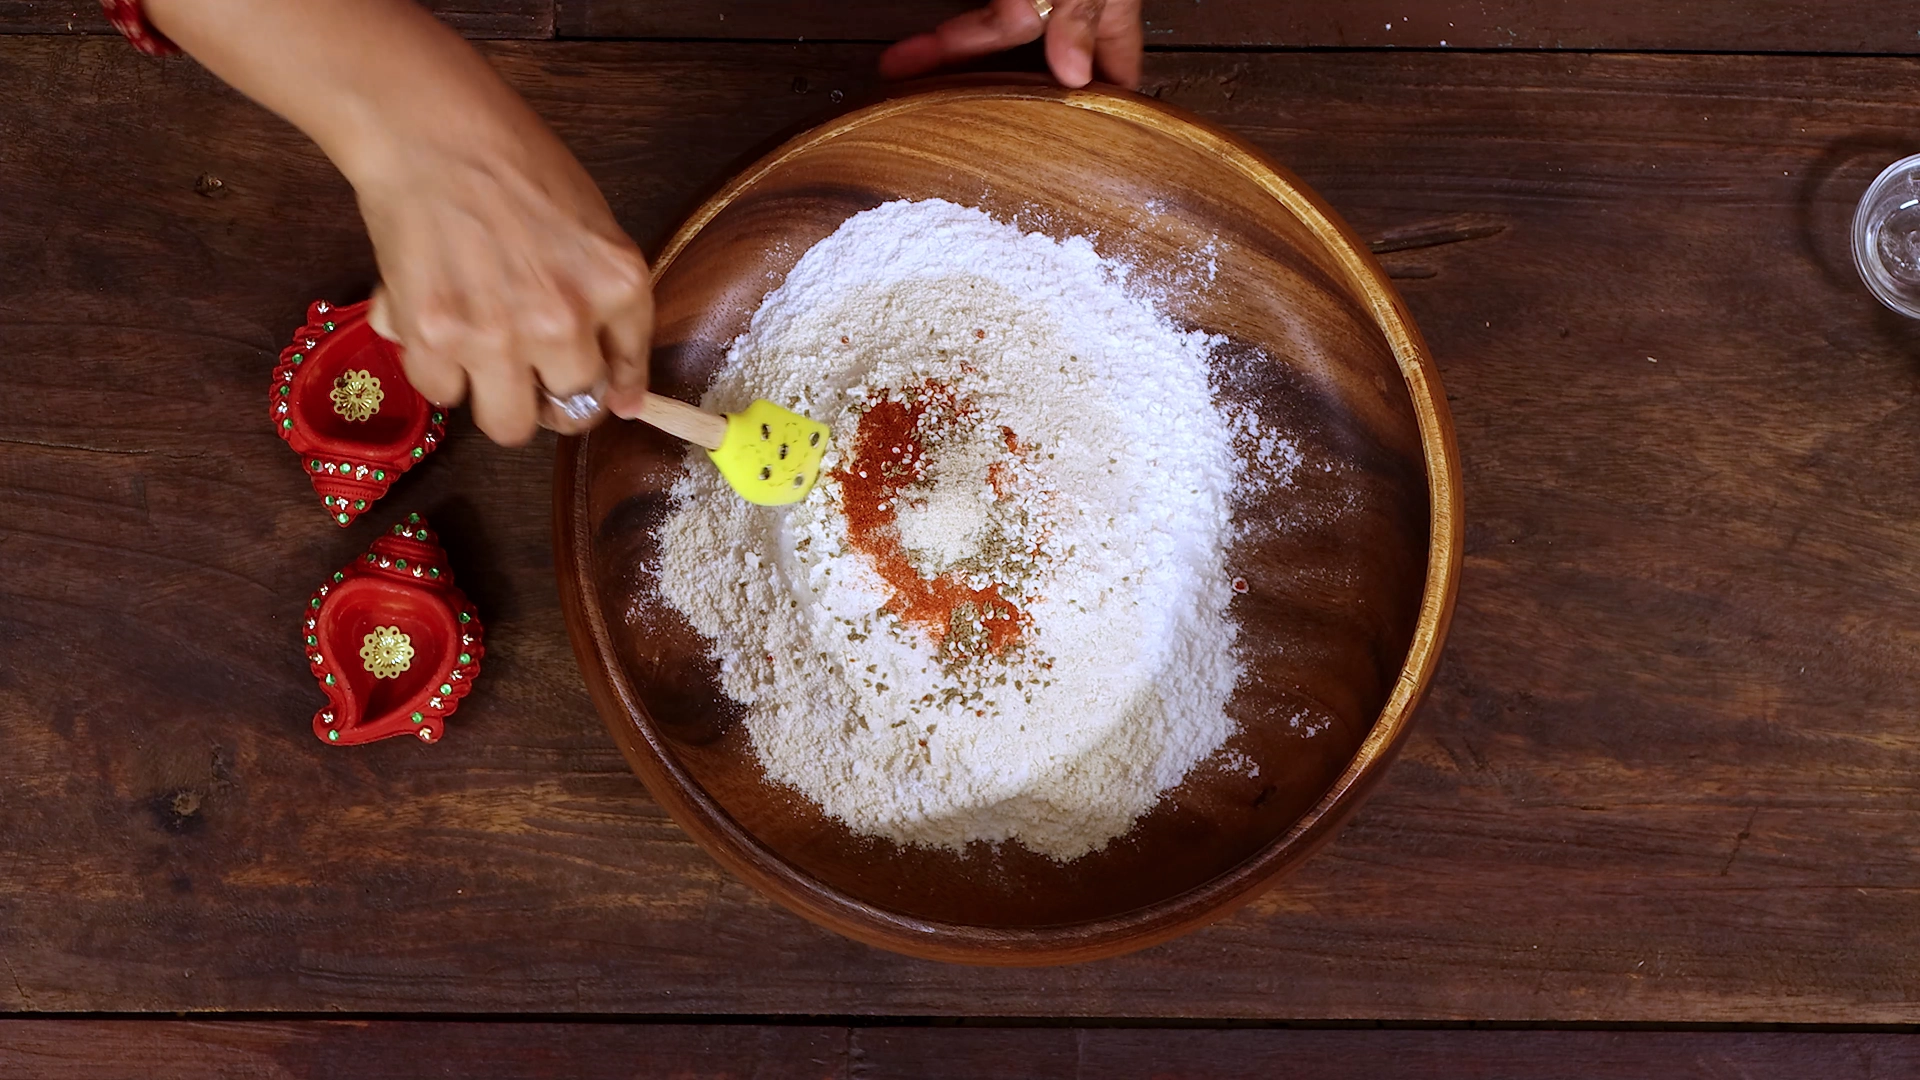
-
Melt ghee
Melt the ghee and have it ready to mix into the flour mix.
Method
-
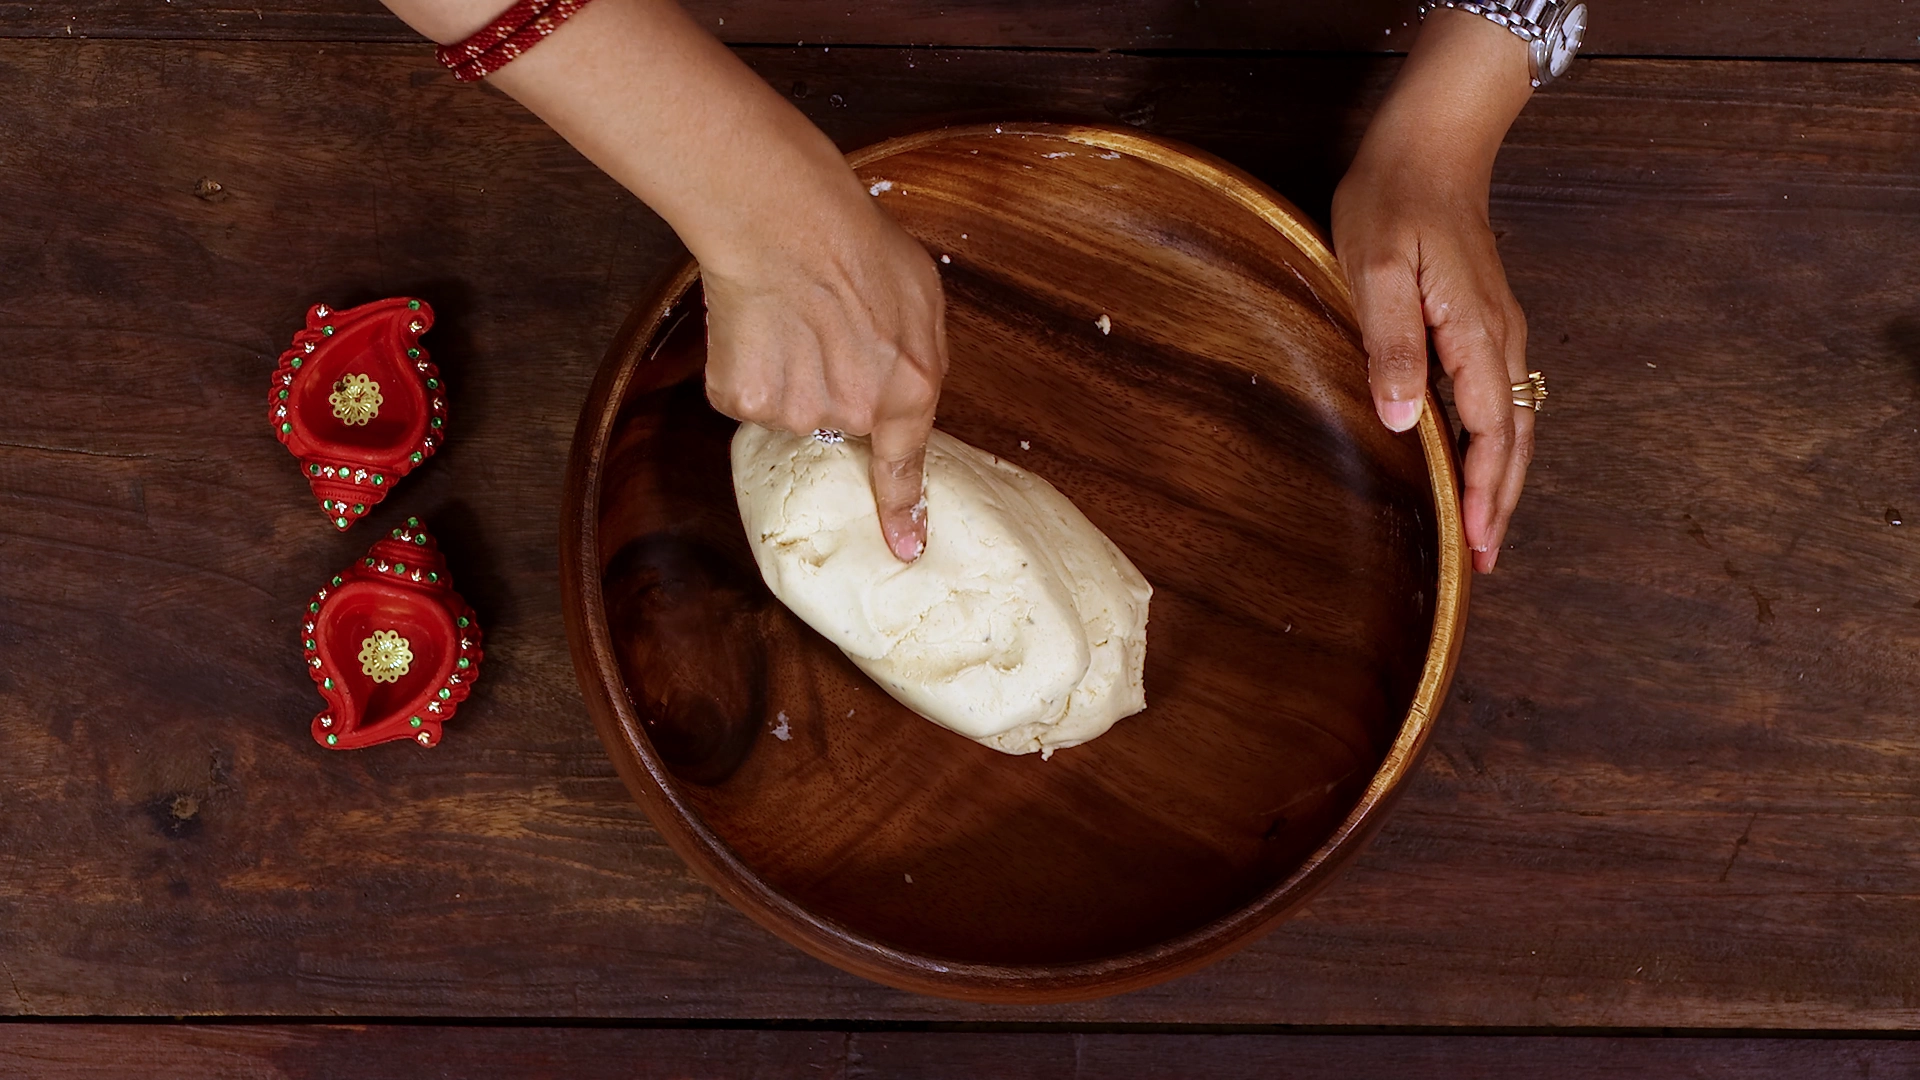
Make the dough
Add the melted ghee to the dry mix and gradually add water little by little, kneading to form a soft, moist dough. Do not let the dough sit for long once ready.
-
Prepare the murukku press
Grease the inside of the murukku press and fit the plate with your chosen pattern. Grease the back of a spatula.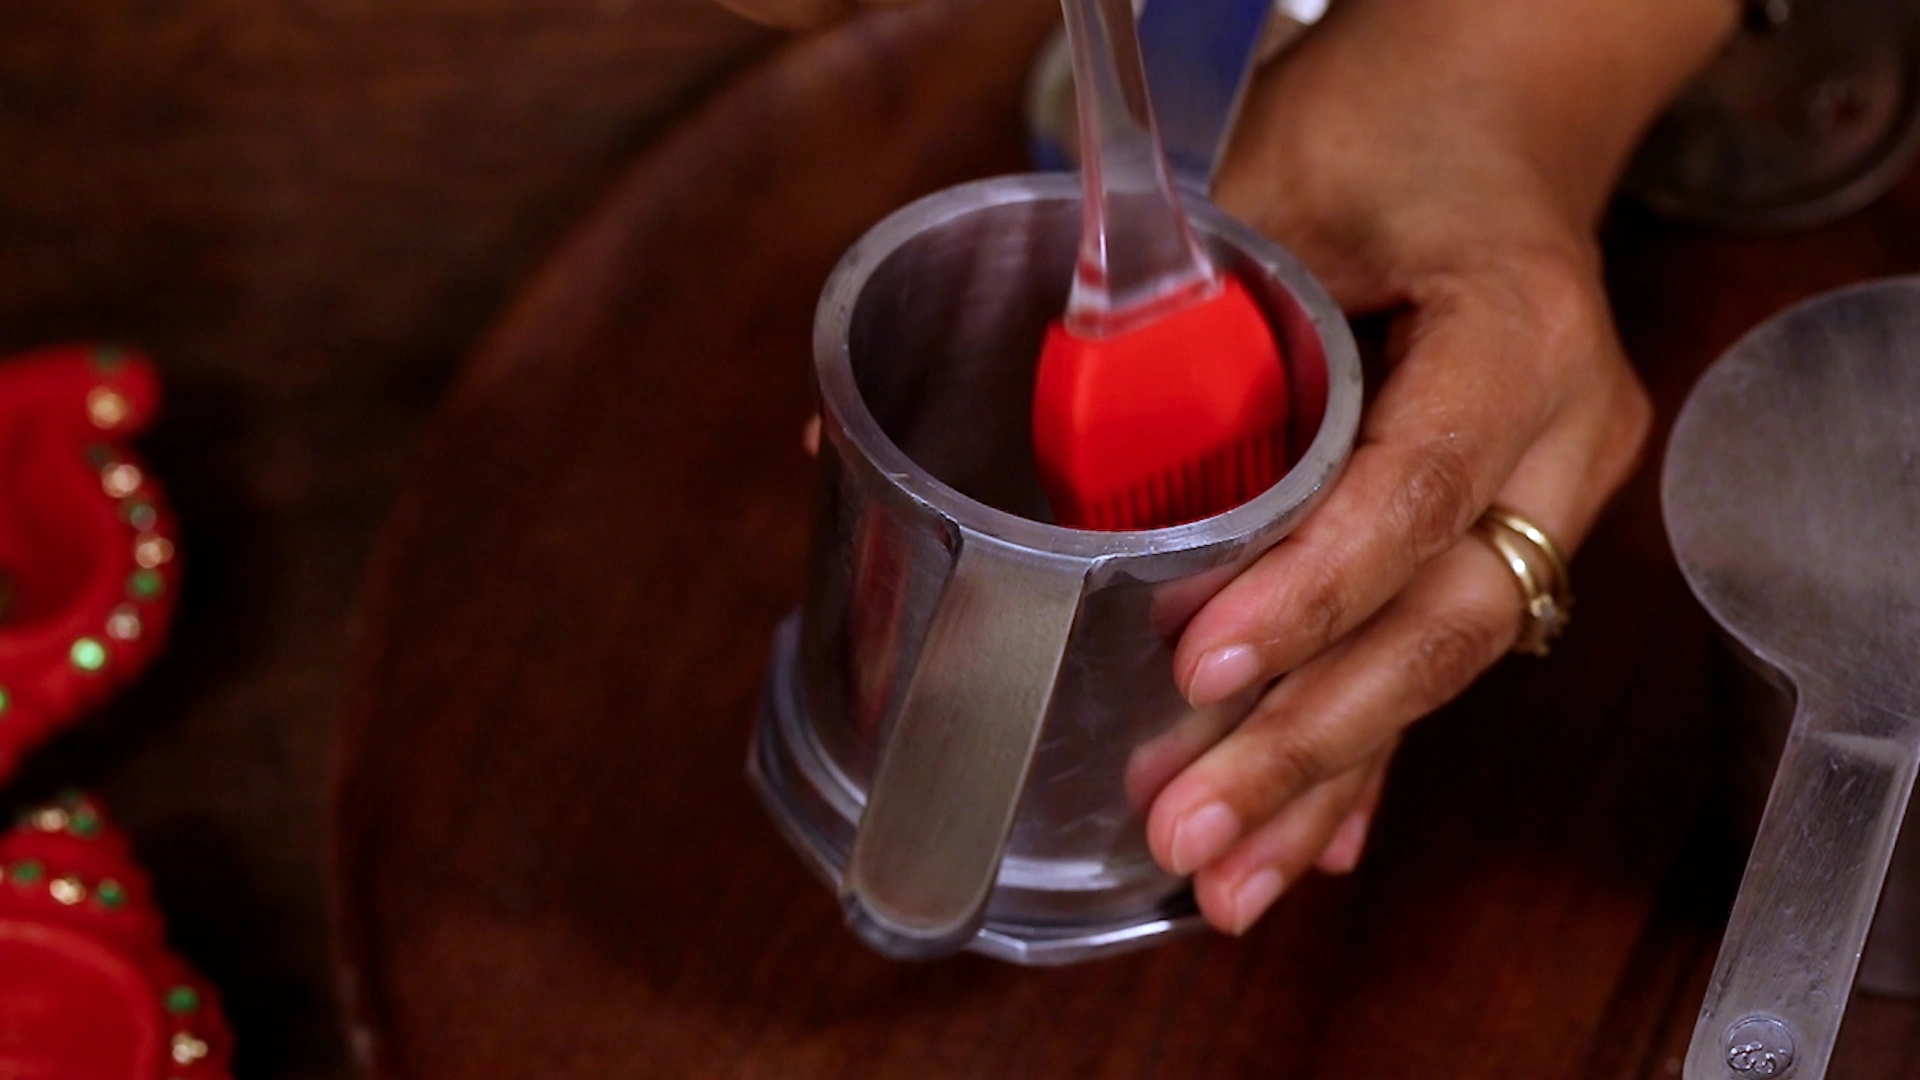
-
Pipe the spirals
Press spirals of dough onto the greased spatula onto a greased surface to form coils.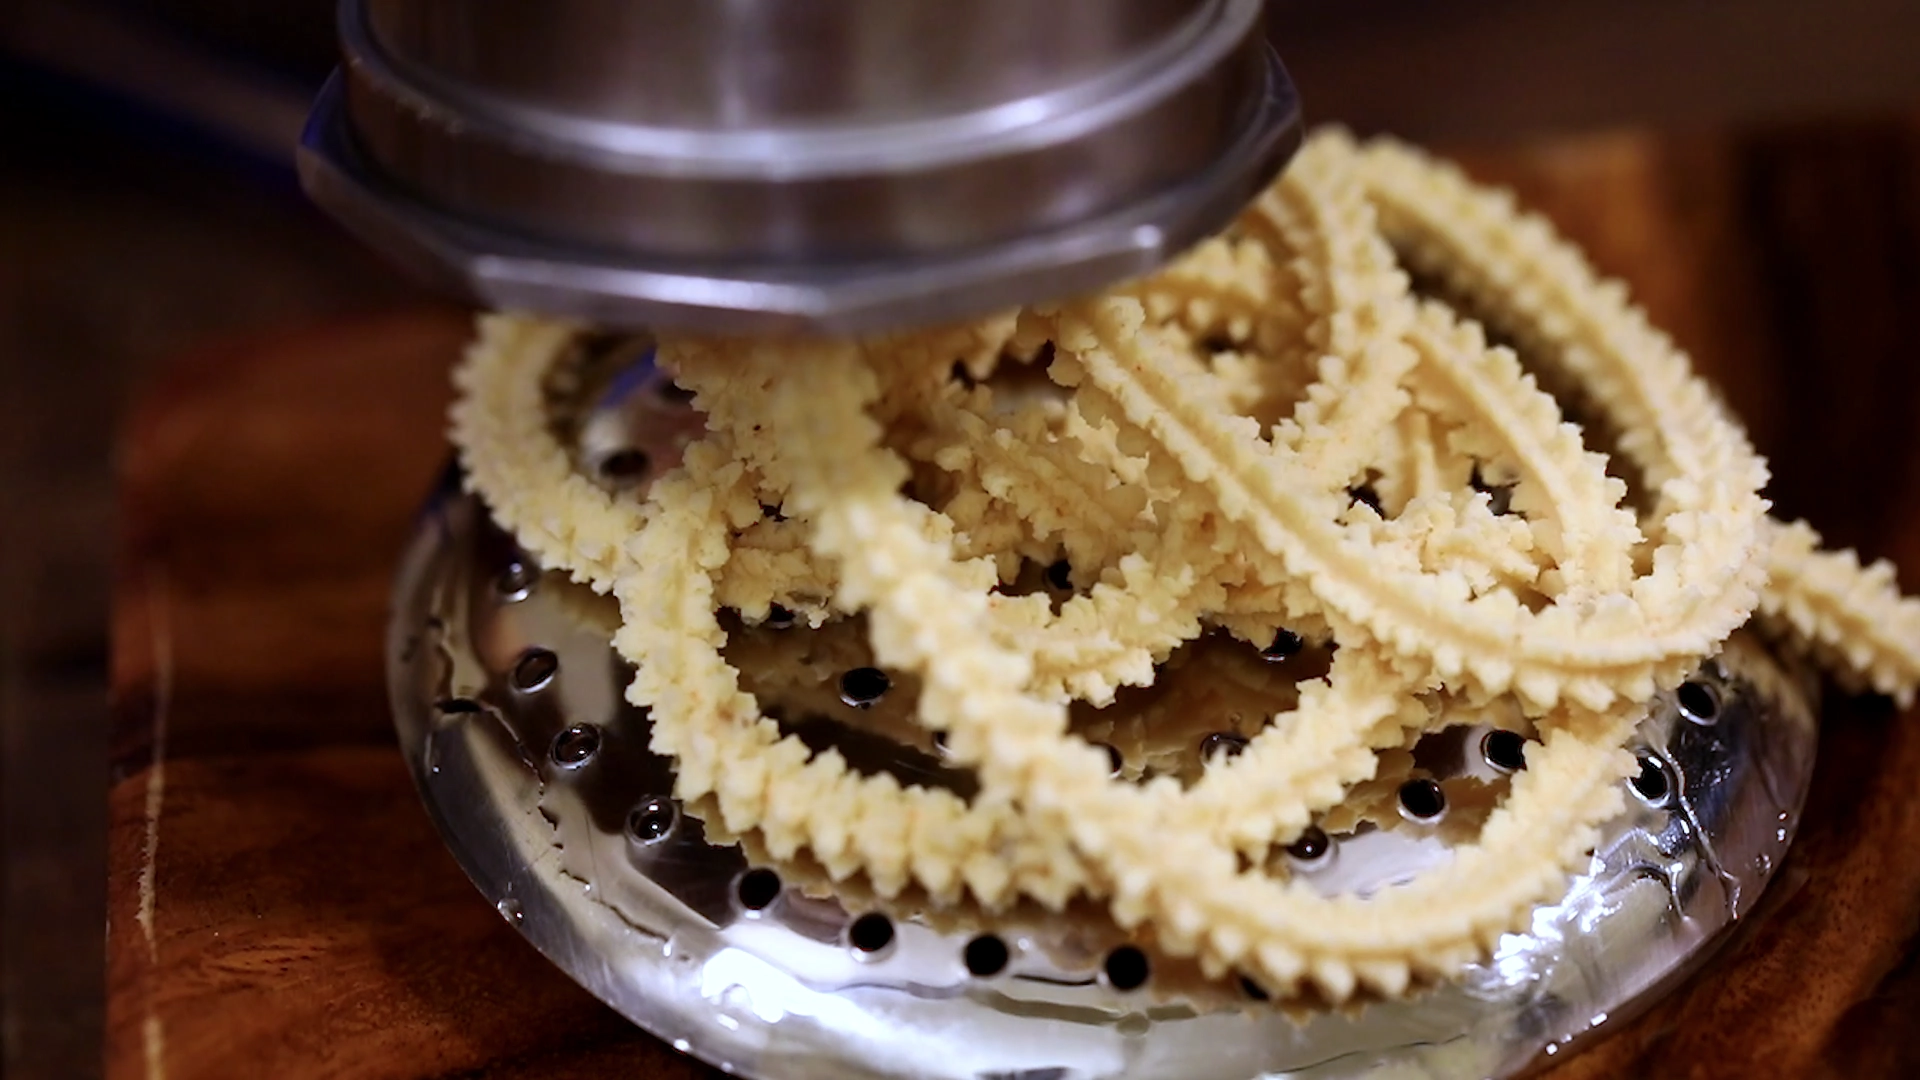
-
Heat the oil
Heat oil in a deep pan to medium-hot temperature for deep frying. Test with a small drop of dough to check readiness. -
Slide into oil and fry
Gently slide the prepared spirals into the oil and fry on medium-low heat. Fry until the oil bubbling reduces and the murukku turns golden with a light brown tinge.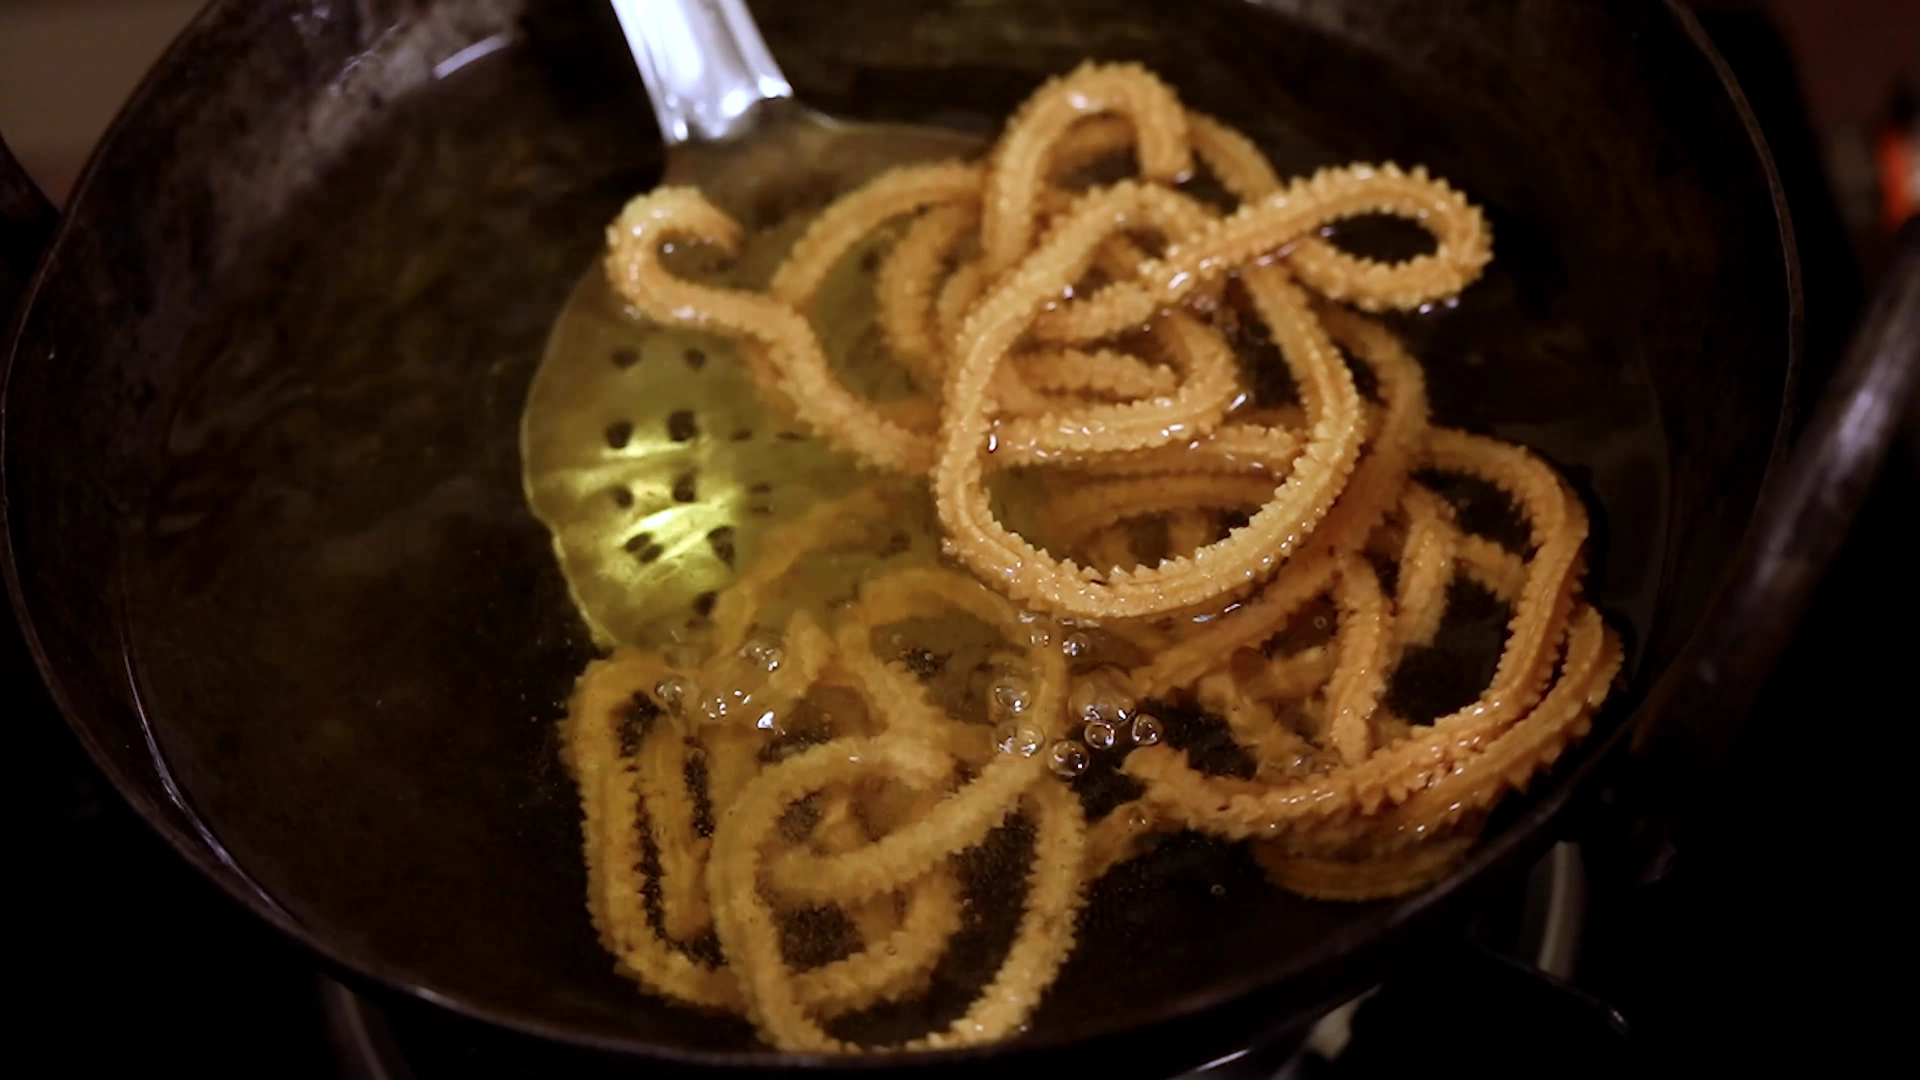
-
Finish and cool
Remove the murukku once cooked, drain on paper, let them cool fully, then store in an airtight container.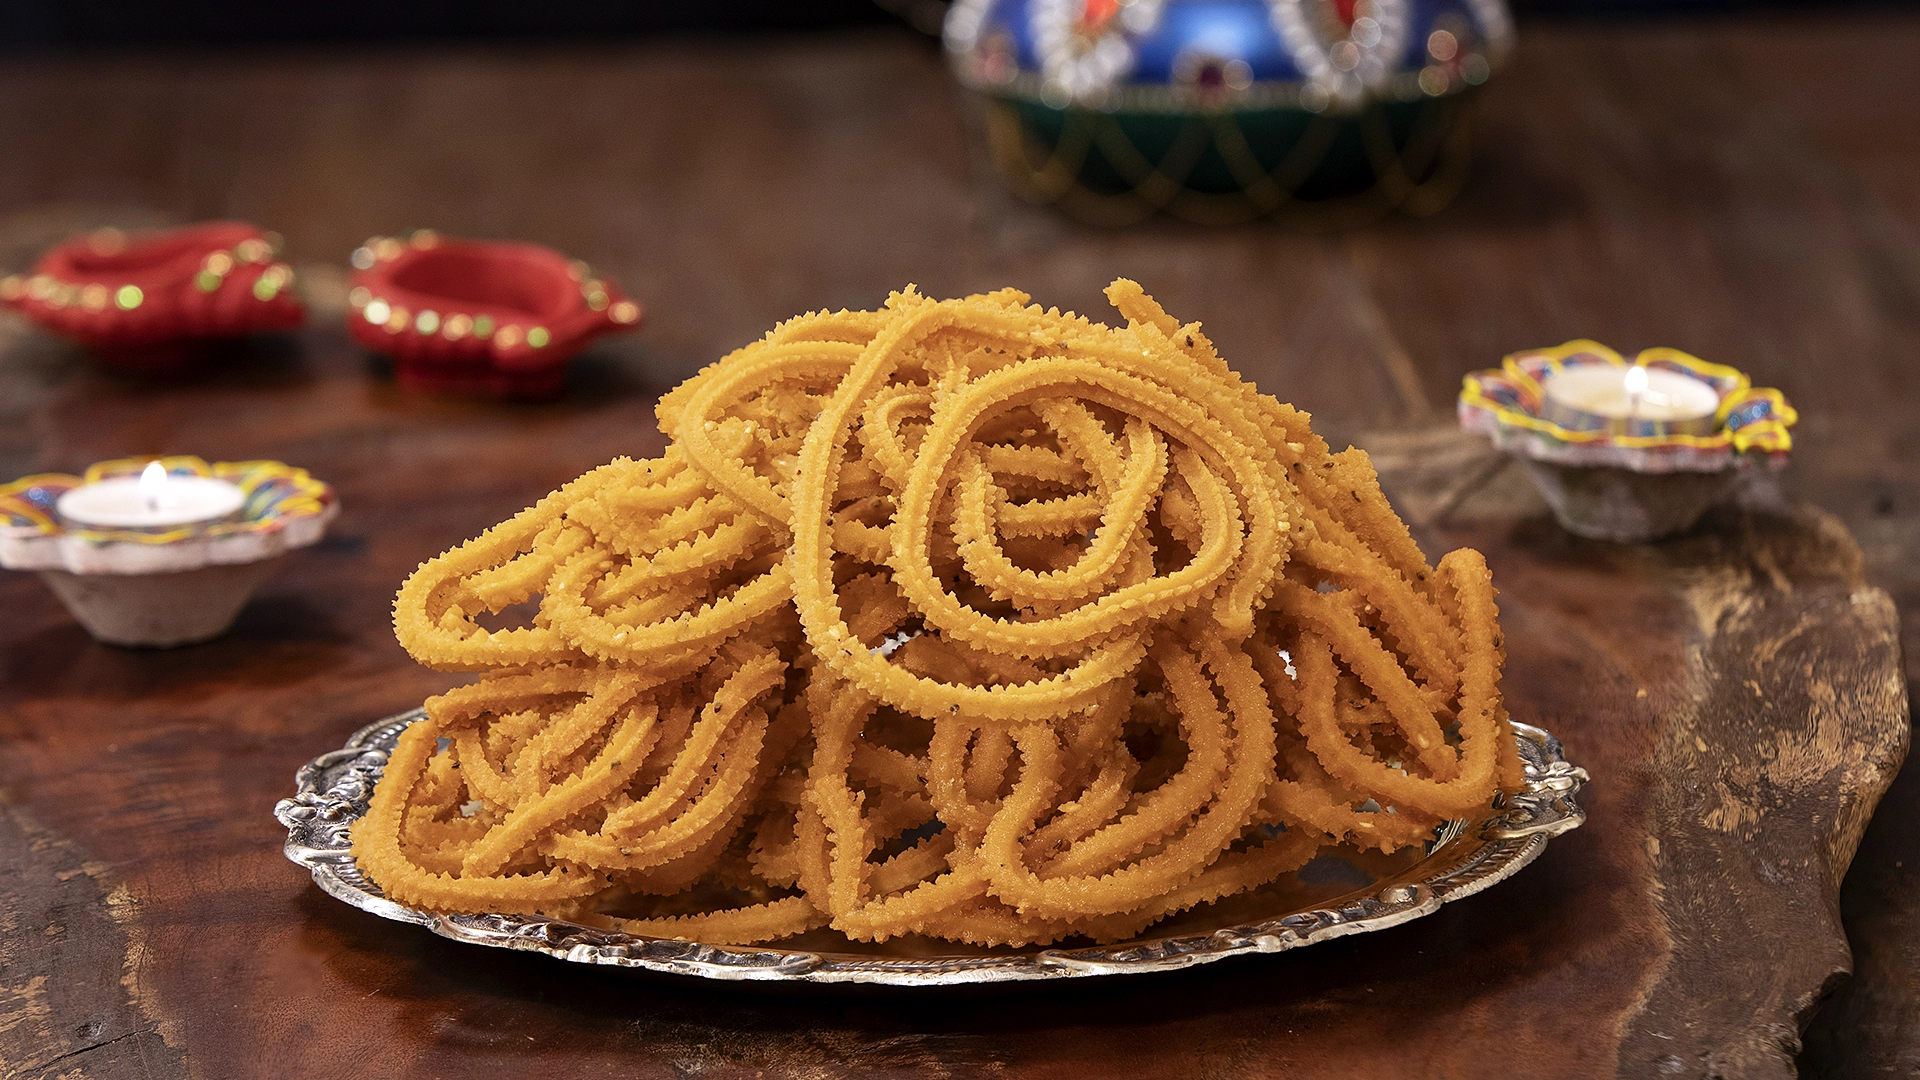
-
Troubleshoot drying dough
If the dough dries while you work, dab a little water and mix back to the right consistency before pressing again. -
Batch cooking tip
Work in batches — press and fry a few spirals at a time so the oil temperature remains steady.
Equipment

 4")
 5")
Affiliate Disclosure: This post contains Amazon affiliate links, i.e., when you buy any product using the links below, we get commissions. but it doesn’t cost you anything extra. If you do purchase any product using the given links, we thank you in advance!
Nutrition Facts
Servings 5
- Amount Per Serving
- Calories 81kcal
- % Daily Value *
- Total Fat 3.2g5%
- Saturated Fat 1.1g6%
- Cholesterol 3.6mg2%
- Sodium 1.3mg1%
- Potassium 36mg2%
- Total Carbohydrate 11.6g4%
- Dietary Fiber 0.7g3%
- Sugars 0.1g
- Protein 1.5g3%
- Calcium 6 mg
- Iron 0.4 mg
- Phosphorus 33 mg
- Zinc 0.2 mg
* Percent Daily Values are based on a 2,000 calorie diet. Your daily value may be higher or lower depending on your calorie needs.