There's something deeply satisfying about transforming yesterday's forgotten rice into soft, pillowy chapatis that are somehow better than regular wheat rotis. These aren't your standard flatbreads—they're softer, more pliable, with a subtle sweetness from the rice and a texture that stays tender even after cooling. The rice breaks down and integrates into the wheat flour, creating a dough that's easier to roll and more forgiving than pure wheat dough. When you cook them, they puff up beautifully, developing golden-brown spots, and that ghee hitting the hot chapati releases an aroma that makes everyone in the house come running to the kitchen. They're perfect for using up that bowl of leftover rice sitting in your fridge, turning potential food waste into a delicious, nutritious meal. Great for lunch boxes, dinner rotis, or even as a creative breakfast wrap.
The concept of adding cooked grains to flatbread dough isn't new—frugal home cooks across India have been doing variations of this for generations, born from the practical wisdom of never wasting food. In South India, leftover rice often becomes akki roti (rice flatbread), while in the North, it might be mixed into paratha dough. This particular version—blending cooked rice with wheat flour—bridges both traditions, creating something that's familiar yet different. It's the kind of recipe that grandmothers perfected out of necessity and we're now rediscovering as "innovative meal prep." I stumbled upon this technique by accident when I had leftover rice and not enough wheat flour to make regular chapatis, and the results were so good that now I sometimes cook extra rice just to make these.
Ingredients
For these clever chapatis, you'll need leftover rice—plain white rice works best, though brown rice adds a nuttier flavor and more fiber. The rice should be cooked and cooled, not steaming hot. Wheat flour (atta) forms the structure and gives you that classic chapati texture and taste. Salt seasons the dough and enhances all the flavors. Oil keeps the dough smooth and pliable during kneading and resting. Ghee is what you brush on the cooked chapatis for that rich, aromatic finish—it's not optional if you want that authentic taste.
How It All Comes Together
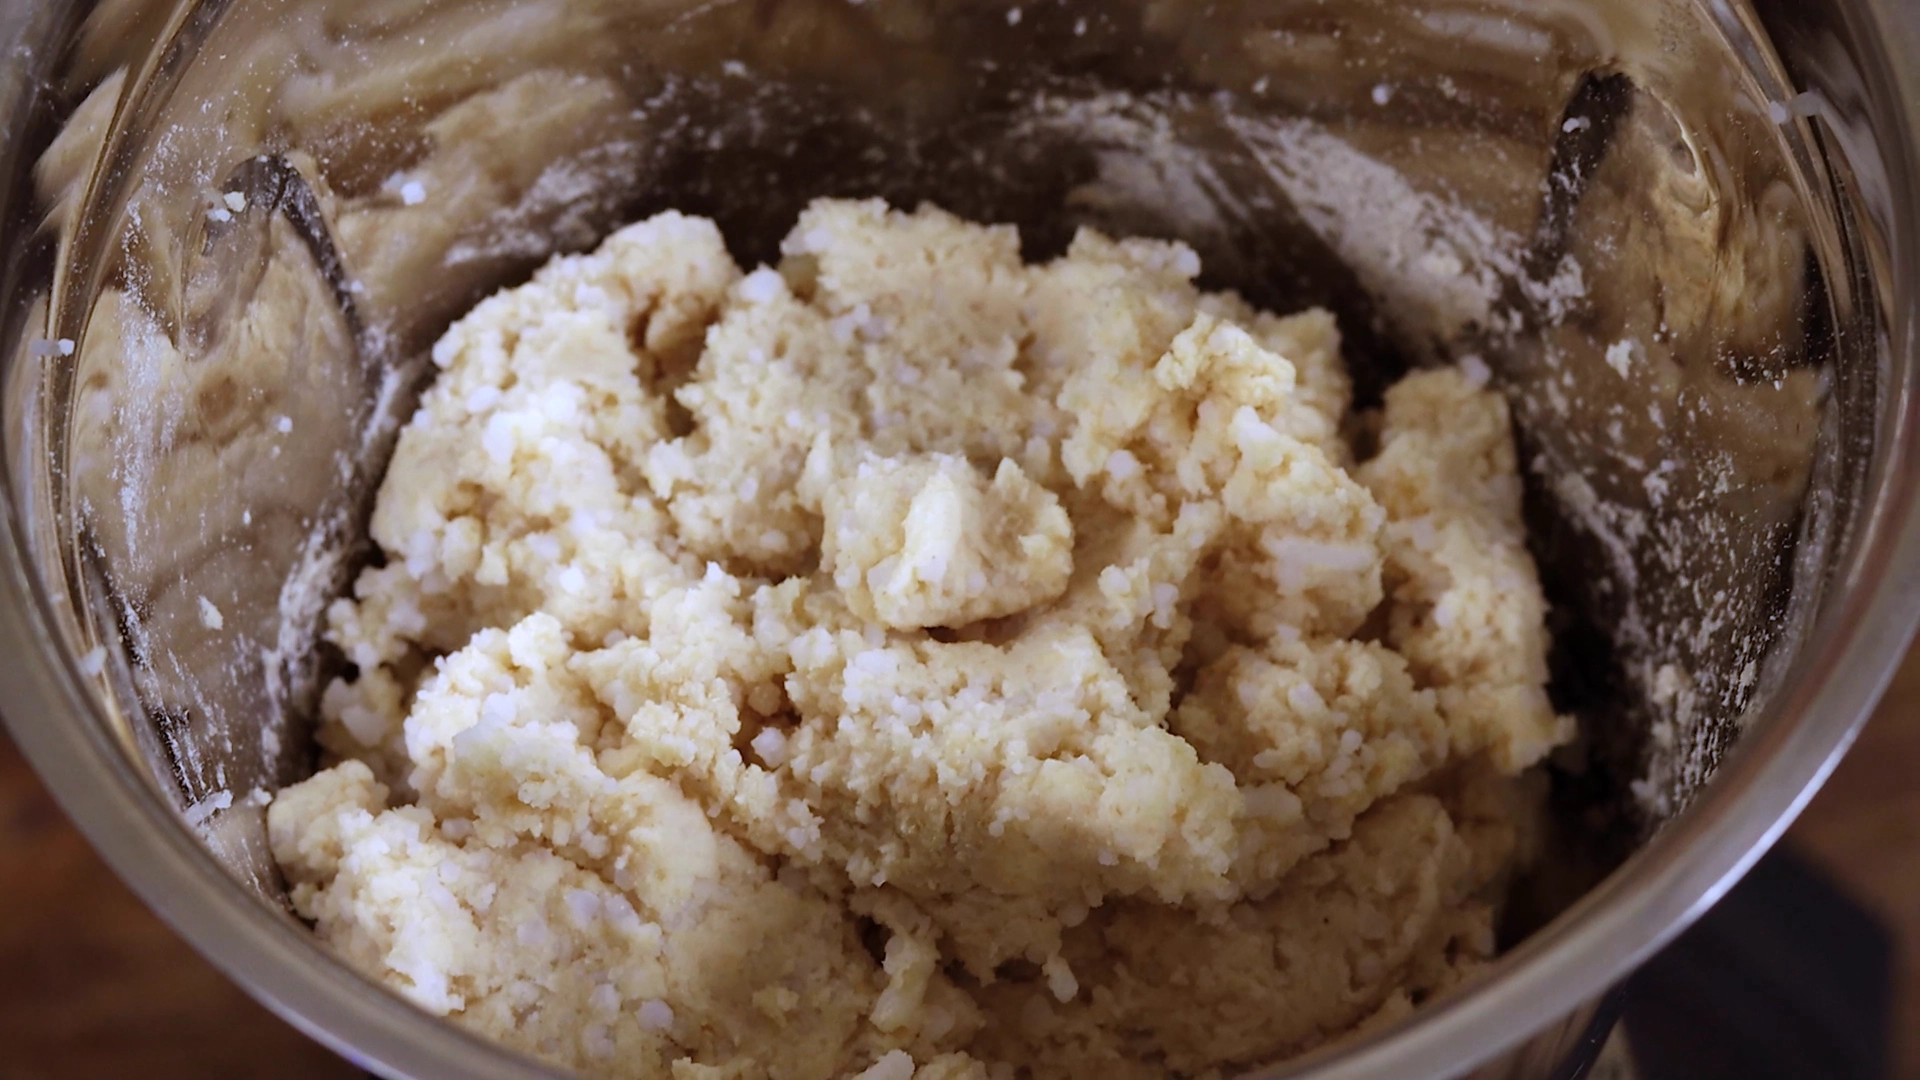
Let's start by dealing with that leftover rice. If it's straight from the fridge and clumped together, break it up with your hands or a fork first. You want the grains somewhat separated so they blend better. Take your leftover rice and wheat flour and combine them in a large mixing bowl. Add salt and a teaspoon of oil. Now comes the slightly unusual part—you need to work the rice into the flour, essentially mashing and kneading it together until the rice breaks down and integrates with the flour.
This initial mixing takes a bit of elbow grease. Use your hands to press and squeeze the rice grains against the flour, breaking them down. As you work the mixture, the rice will start to bind with the flour, creating a cohesive dough. If your rice was very dry, you might need to add a splash of water—just a tablespoon or two at a time. If it's too sticky from moist rice, dust in a bit more wheat flour. The goal is a soft, pliable dough that's slightly softer than your regular chapati dough.
💡 Pro Tip: The texture of your leftover rice matters. Day-old refrigerated rice works better than fresh rice because it's drier and firmer. If you're using fresh rice, let it cool completely and even refrigerate it for 30 minutes before using.
Once your dough starts coming together, transfer it to a clean work surface and knead it properly for 4-5 minutes. This kneading is important—it develops the gluten in the wheat flour and ensures the rice is completely incorporated. The dough should be smooth, soft, and slightly tacky but not sticky. If it's sticking to your hands or the counter, add a bit more wheat flour. If it feels dry and is cracking, add a few drops of water or oil.
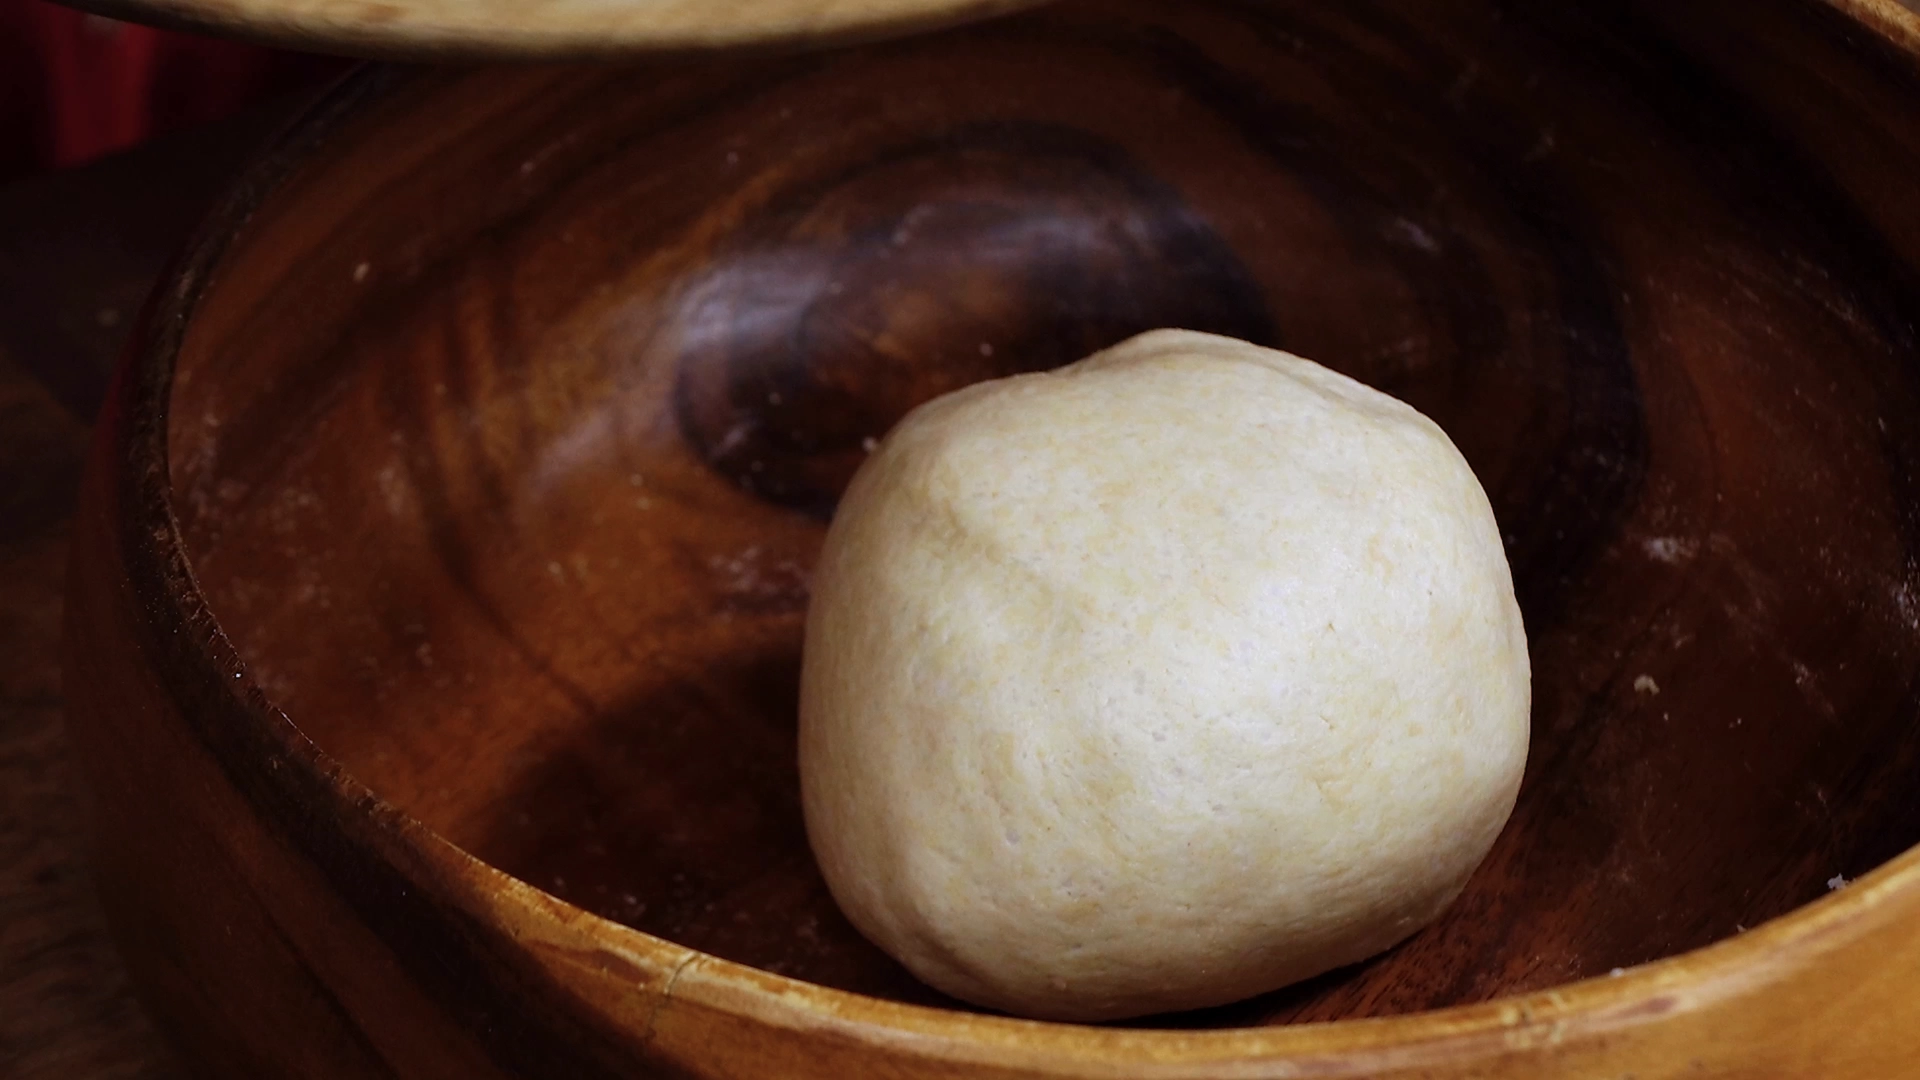
Form the dough into a ball, smear a little oil all over it to prevent it from drying out, cover it with a damp cloth or place it in a covered bowl, and let it rest for 30 minutes. This resting time is crucial—it allows the wheat flour to fully hydrate and the gluten to relax, making the dough much easier to roll out. The rice also absorbs moisture during this time, creating a more uniform texture.
💡 Pro Tip: Don't skip the resting time. Rested dough rolls out thinner, doesn't spring back, and creates softer chapatis. Use this time to prep your curry or side dishes.
After resting, divide the dough into equal portions—about the size of a small lime or golf ball, depending on how large you want your chapatis. Roll each portion between your palms to create smooth balls with no cracks on the surface. Keep them covered with a damp cloth as you work so they don't dry out.
Take one dough ball, dust it lightly with flour on both sides—just enough to prevent sticking—and place it on your rolling surface. Using a rolling pin, roll it out into a thin circle, about 6-7 inches in diameter. The rice in the dough actually makes these easier to roll than regular chapatis because it adds moisture and makes the dough more pliable. Try to maintain even thickness throughout so they cook uniformly. If the edges crack, your dough might be a bit dry—just pinch them together and continue rolling.
Heat a tawa or flat griddle over medium flame. You want it hot but not smoking—test by sprinkling a few drops of water on it; they should sizzle and evaporate within a couple of seconds. Place your rolled chapati on the hot tawa. Within 20-30 seconds, you'll see small bubbles forming on the surface. This is your cue to flip it over.
Cook the second side for another 20-30 seconds until you see brown spots developing. Flip it back to the first side, and now you can press gently around the edges with a clean cloth or spatula—this encourages the chapati to puff up. Once you see nice golden-brown spots on both sides and the chapati has puffed (or at least attempted to), it's done. The whole cooking process takes about a minute to a minute and a half per chapati.
Immediately brush the hot chapati with a little ghee—the heat will melt it instantly, and it will soak into those beautiful layers. Stack the finished chapatis in a covered container or wrap them in a clean kitchen towel to keep them soft and warm.
💡 Pro Tip: Maintain medium heat throughout. Too hot and the chapatis will brown too quickly on the outside while remaining raw inside. Too cool and they'll turn hard and crispy instead of soft and pliable.
These rice chapatis are incredibly versatile—they pair beautifully with any curry you'd normally eat with regular rotis. Dal (lentil curry), paneer butter masala, chicken curry, vegetable korma, aloo gobi—anything goes. They're also fantastic with simple yogurt-based sides like raita or just plain curd. Some people love them with pickle and a dollop of butter for a simple meal. They work wonderfully as wraps too—stuff them with leftover sabzi, some onions and chutney, roll them up, and you've got a portable lunch.
Serve these chapatis hot and fresh, stacked in a covered container to keep them soft. They're meant to be torn with your hands and used to scoop up curry or dal. If you're serving a crowd, keep them warm in a roti basket or wrapped in a clean kitchen towel. The ghee brushed on top makes them shine and adds incredible flavor.
How to Store
Store cooked chapatis in an airtight container at room temperature for up to 24 hours, or refrigerate them for 2-3 days. The dough can be refrigerated for up to 2 days—just bring it to room temperature before rolling. These chapatis actually stay softer longer than regular wheat chapatis because of the moisture from the rice.
How to Reheat
To reheat, warm them directly on a hot tawa for a few seconds on each side until they're soft and pliable again. You can also microwave them for 10-15 seconds wrapped in a damp paper towel, or steam them briefly. Sprinkling a few drops of water before reheating helps restore softness.
Common Substitutions
No leftover rice? You can actually cook rice specifically for this—just make sure it's completely cooled before using. Any type of cooked rice works: white rice, brown rice, even leftover biryani rice (just remove any whole spices first). Can't use wheat flour? Try a mix of all-purpose flour and whole wheat, though it won't be as nutritious. Want to make it more interesting? Add some chopped herbs like coriander or mint to the dough, or mix in some ajwain (carom seeds) for flavor. No ghee? Butter works just as well, or use oil if you want to keep it vegan.
🌿 Vegan Swap: Simply replace the ghee with coconut oil or any neutral vegetable oil. Everything else is already plant-based, so it's an easy modification that still tastes delicious.
Packing for a Party / Bulk Preparation
This recipe is fantastic for meal prep. Make a big batch of dough, portion it into balls, and refrigerate or even freeze them. When you need chapatis, just thaw, roll, and cook. Cooked chapatis also freeze beautifully—stack them with parchment paper between each one to prevent sticking, freeze in a ziplock bag, and reheat directly from frozen. For lunch boxes, these stay softer than regular chapatis and don't get too hard even when cold. For parties, you can make the dough ahead, keep it refrigerated, and roll and cook chapatis fresh as needed—or make them all ahead and keep them warm in a slow cooker on low, covered with foil.
Leftover Rice Chapati transforms yesterday’s rice into soft, pliable flatbreads that are delightfully chewy and subtly nutty. Simply pulse cooled, cooked rice with a pinch of salt and warm spices—like cumin or carom seeds—then knead it into dough using just enough water or yogurt to bind. Roll the dough into thin rounds and cook on a hot griddle until light golden spots appear, brushing each chapati with a touch of ghee for sheen and flavor. These innovative rotis stay tender longer than wheat, making them perfect for wrapping curries or serving alongside chutneys and pickles for a quick, zero‑waste meal.
Ingredients
1cup rice (leftover)
1cup wheat flour
1tsp salt
1tsp oil
1tsp ghee (per chapati)
Instructions
Method
1
Grind Rice and Flour
Smear some oil on the dough, cover, and let it rest for 30 minutes.
2
Knead the DoughTransfer the dough to a bowl, add a little oil, and knead it for 4-5 minutes until smooth.Adjust the wheat flour in case it is too sticky.
3
Rest the DoughSmear some oil on the dough, cover, and let it rest for 30 minutes.
4
Shape Dough BallsDivide the dough into equal portions and roll them into small balls.
5
Roll the ChapatisDust each dough ball with a bit of flour and roll it out into thin chapatis.
6
Cook on PanHeat a pan and cook each chapati on both sides until golden brown, applying a little ghee for extra flavor.Maintain the flame on medium.
7
Serve HotOnce brown spots appear on both sides, remove the chapati from the pan and serve warm with your favorite curry or dip.
Nutrition Facts
Servings 3
Amount Per Serving
Calories180kcal
% Daily Value *
Total Fat4g7%
Saturated Fat1g5%
Cholesterol2mg1%
Sodium200mg9%
Potassium85mg3%
Total Carbohydrate30g10%
Dietary Fiber2g8%
Sugars1g
Protein4g8%
Calcium 12 mg
Iron 1 mg
* Percent Daily Values are based on a 2,000 calorie diet. Your daily value may be higher or lower depending on your calorie needs.
Pin this recipe to share with your friends and followers.
Hema Subramanian
Food and Lifestyle Blogger
I love to cook! And through Home Cooking Show, I hope to make cooking fun, easy, and approachable for everyone.
My way of sharing recipes is all about keeping it simple and delicious—no complicated steps, no fancy ingredients, just real home-cooked food that anyone can make. Cooking should be a joy, not a chore! Whether you’re a beginner or a seasoned cook, you’ll find something here to inspire you. If you love good food made with love, then you’re in the right place!

 Smear some oil on the dough, cover, and let it rest for 30 minutes.
 Divide the dough into equal portions and roll them into small balls.
 Dust each dough ball with a bit of flour and roll it out into thin chapatis.
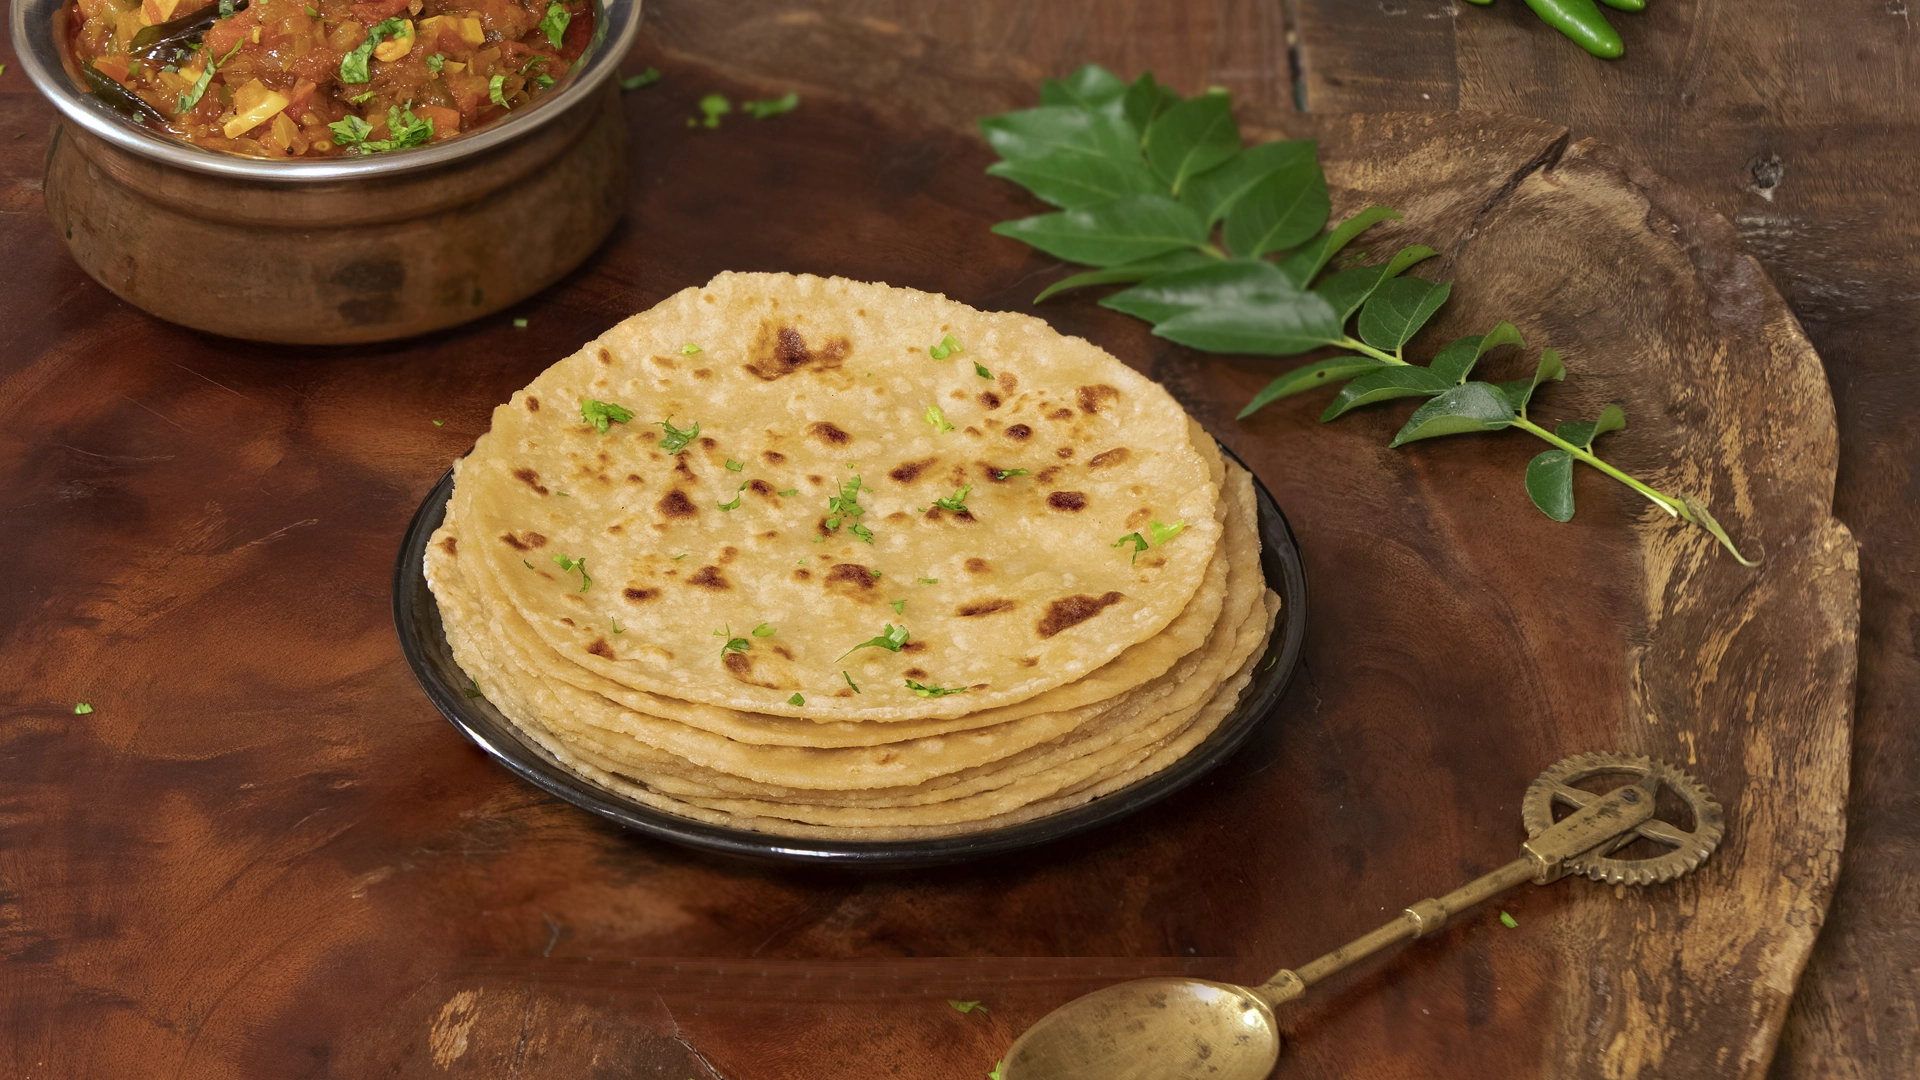 Once brown spots appear on both sides, remove the chapati from the pan and serve warm with your favorite curry or dip.