Ever looked at brinjal in your fridge and thought, “What can I make that’s not boring?”
This brinjal fry with peanut masala is the answer.
It’s soft on the inside, lightly crisp on the edges, coated in a nutty, spicy masala that clings to every piece. No deep frying. No heavy gravy. Just a slow pan roast that brings out the best in brinjal.
If you enjoy simple rice meals, rasam, sambar, and curd rice, this is the kind of side dish that quietly becomes the highlight.
Why This Brinjal Fry Works Every Single Time
Brinjal can go wrong easily. Too much oil, it turns greasy. Too little patience, it stays raw and bitter.
This recipe fixes that.
- Peanuts add body and richness without heaviness
- Slow roasting keeps the brinjal soft, not mushy
- Homemade masala gives control over heat and flavor
- No deep fry means it’s lighter and more everyday-friendly
It’s the kind of dish you can make on a weekday and still feel proud of.
A Quick Note on the Cuisine Style
This brinjal fry leans South Indian home-style, where dry vegetable sides are meant to:
- balance a simple main dish
- Add texture to soft rice meals
- Use pantry staples, not store-bought mixes
The peanut masala is what gives it that rustic, slightly coarse texture you expect from proper home cooking.
Why Peanuts Make All the Difference Here
Peanuts do three important things in this recipe:
- Add natural creaminess without grinding into a paste
- Balance brinjal’s slight bitterness
- Make the dish filling, even in small portions
That’s why this fry tastes satisfying even with plain rice and a thin rasam.
Ingredient Breakdown
- Brinjal Soft, absorbent, and perfect for soaking up masala when cooked patiently.
- Peanuts Nutty, slightly sweet, and grounding. They give the fry its backbone.
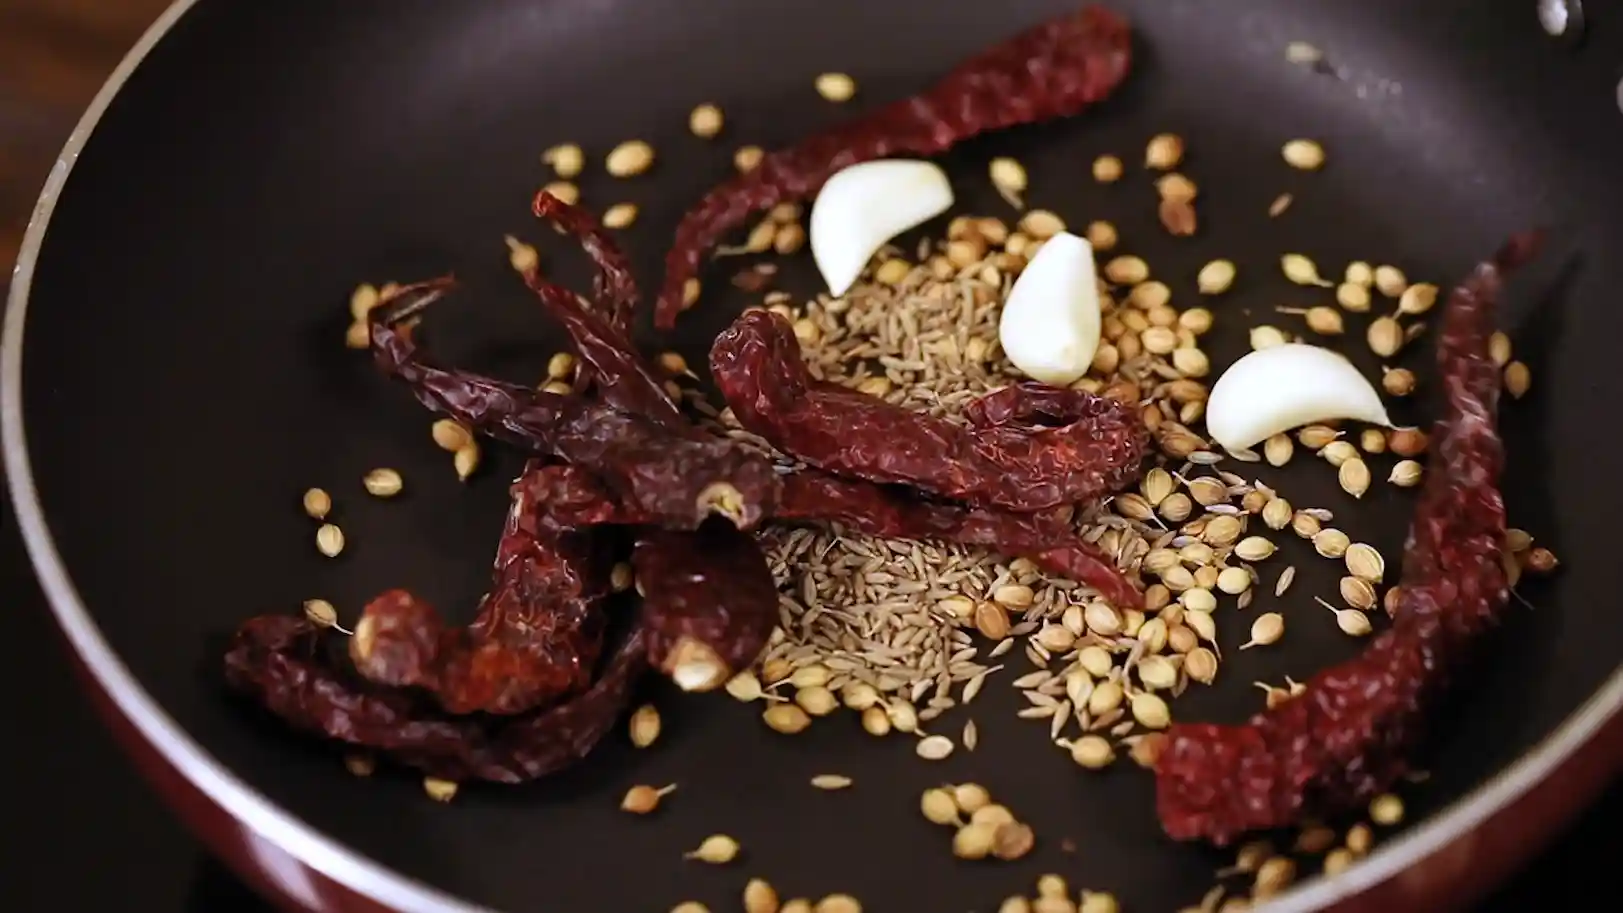
- Coriander and cumin seeds Earthy and warm, these form the base flavor of the masala.
- Byadagi chilli and garlic Color, aroma, and gentle heat that doesn’t overpower the dish.
- Onion and curry leaves They add sweetness and that unmistakable South Indian tempering aroma.
How This Brinjal Fry Comes Together
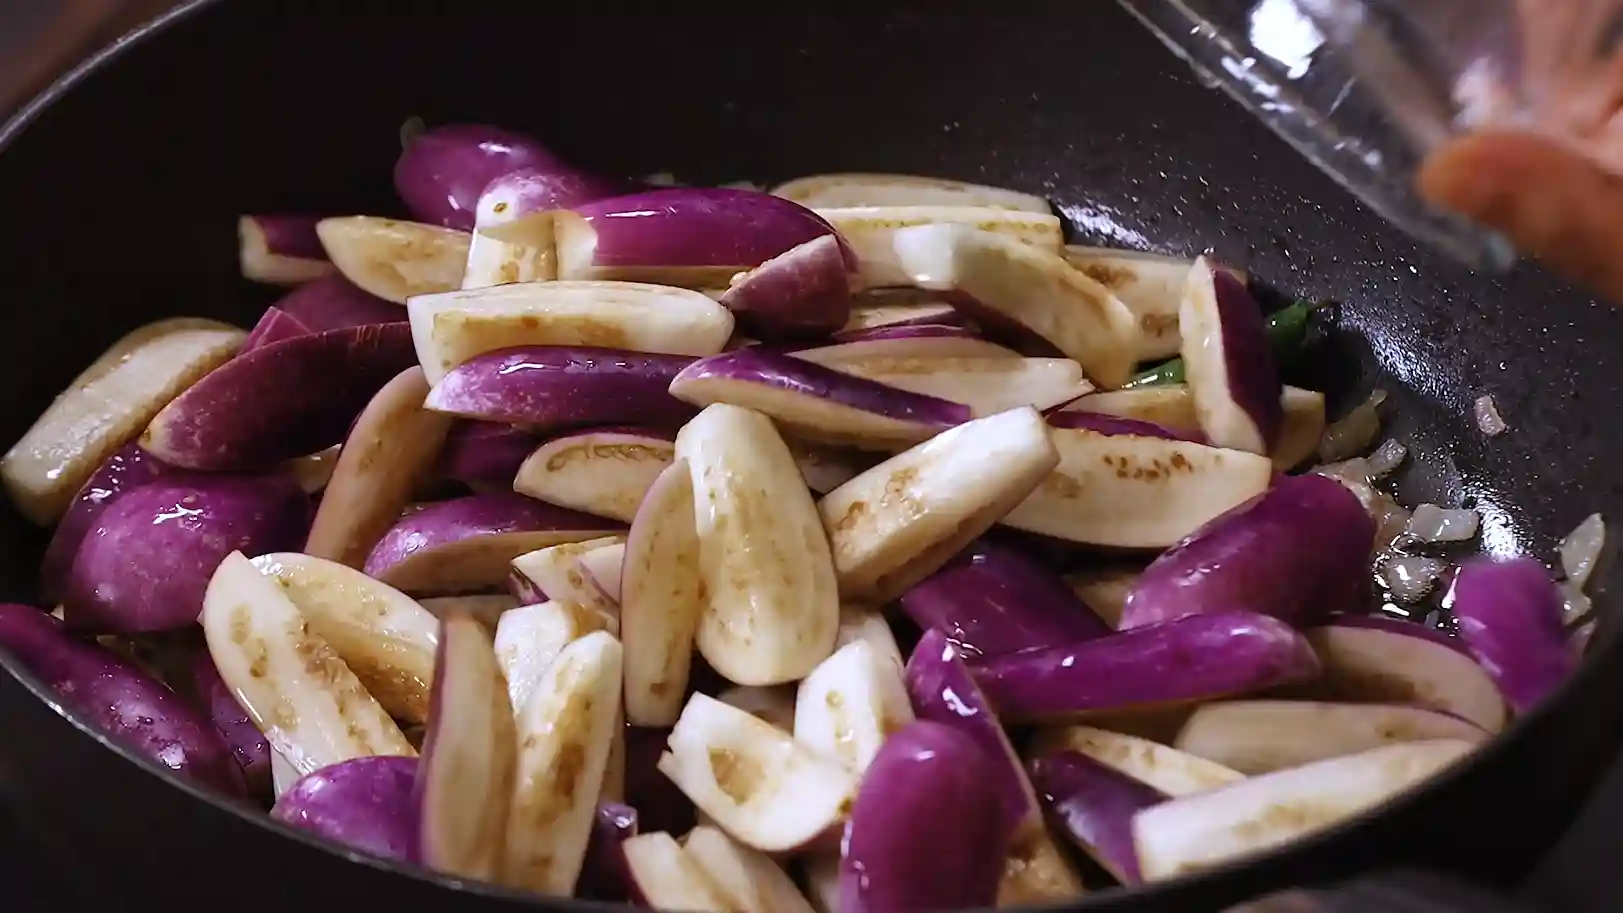
You start by prepping the brinjal properly, small pieces soaked briefly so they stay fresh and cook evenly.
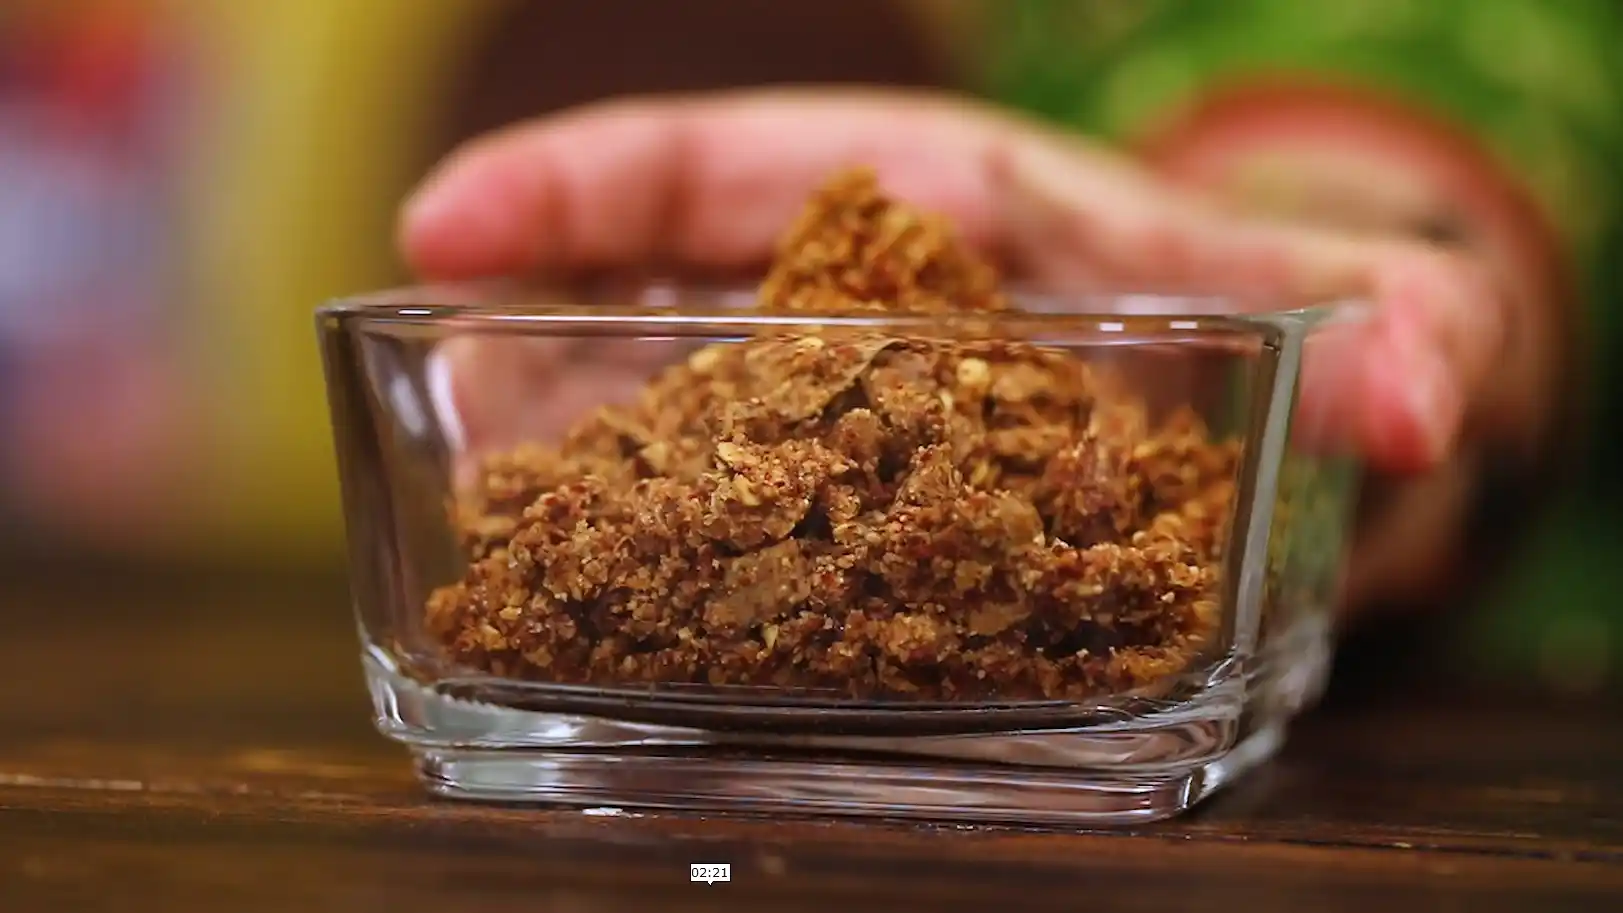
Meanwhile, peanuts and whole spices are dry roasted until aromatic. Once cooled, they’re ground into a masala that smells nutty and bold, and that’s where the magic starts.
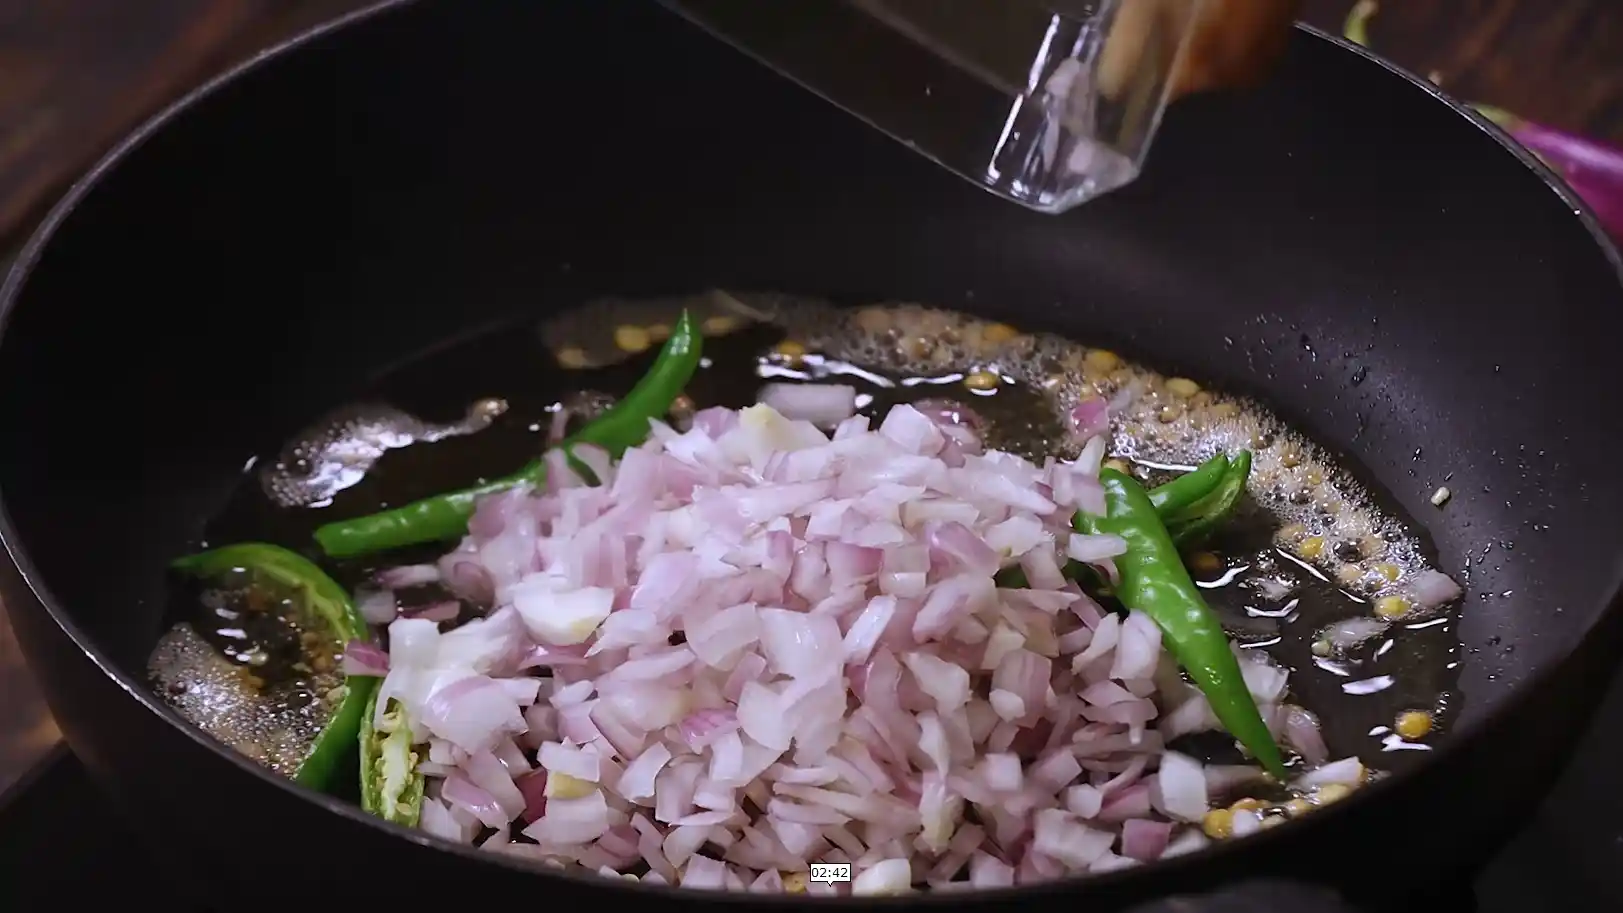
In the pan, the tempering goes in first. Mustard seeds crackle, dals turn golden, and suddenly your kitchen smells like a proper lunch being made. Onions are roasted slowly until golden, not rushed.
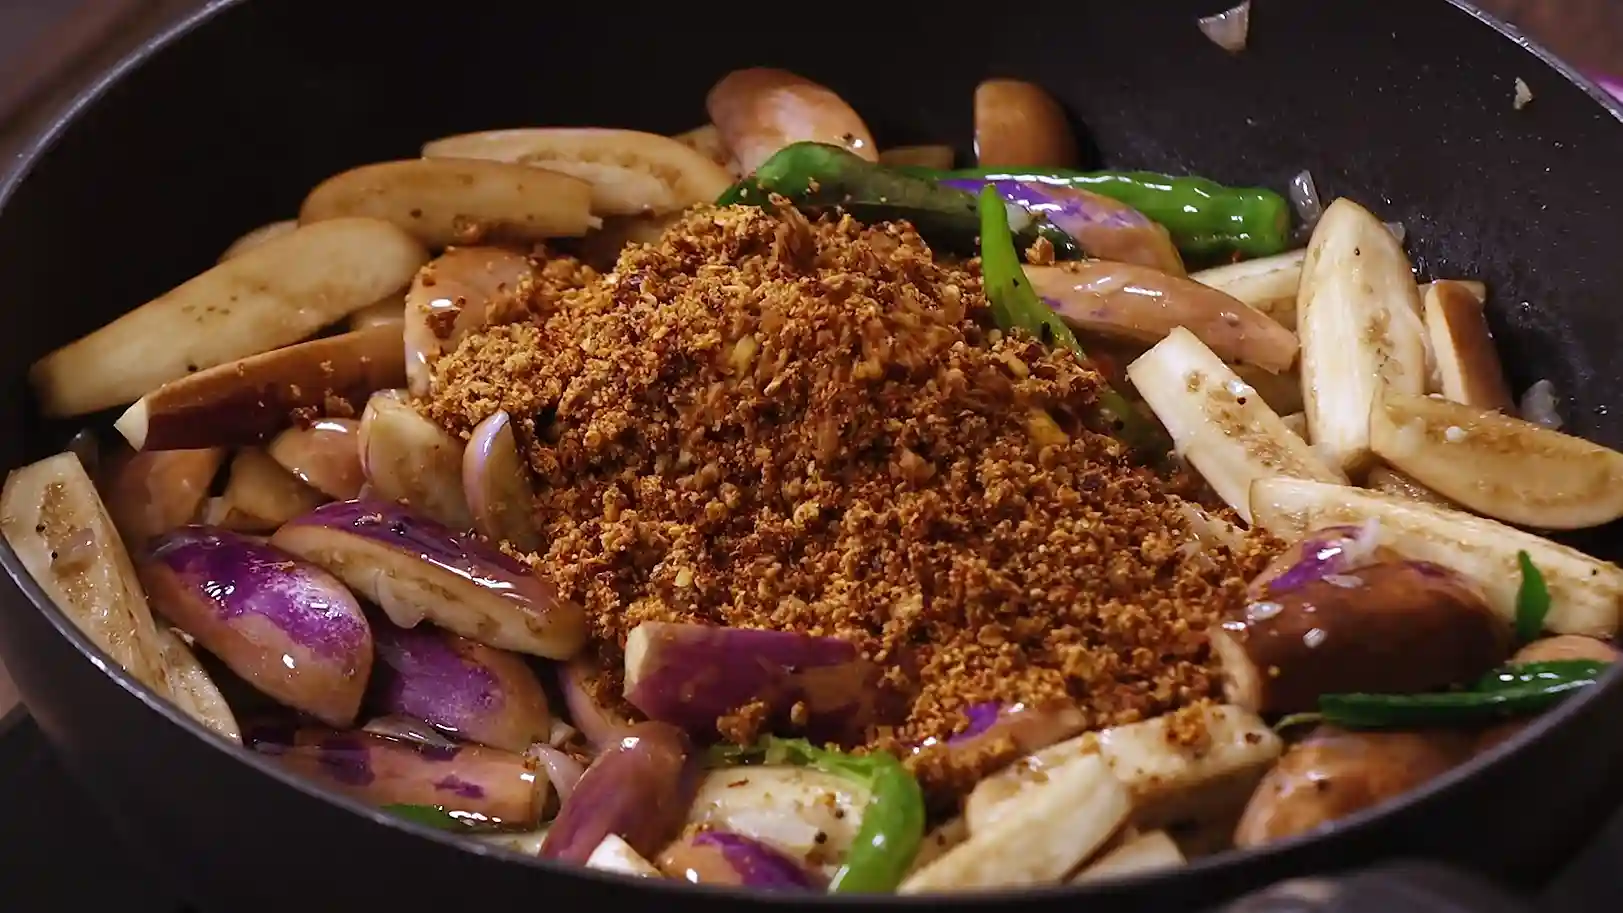
Then comes the brinjal, followed by the peanut masala. From here, it’s all about slow roasting and frequent stirring. No rushing. No covering the pan. Just letting the brinjal soften and absorb the masala naturally.
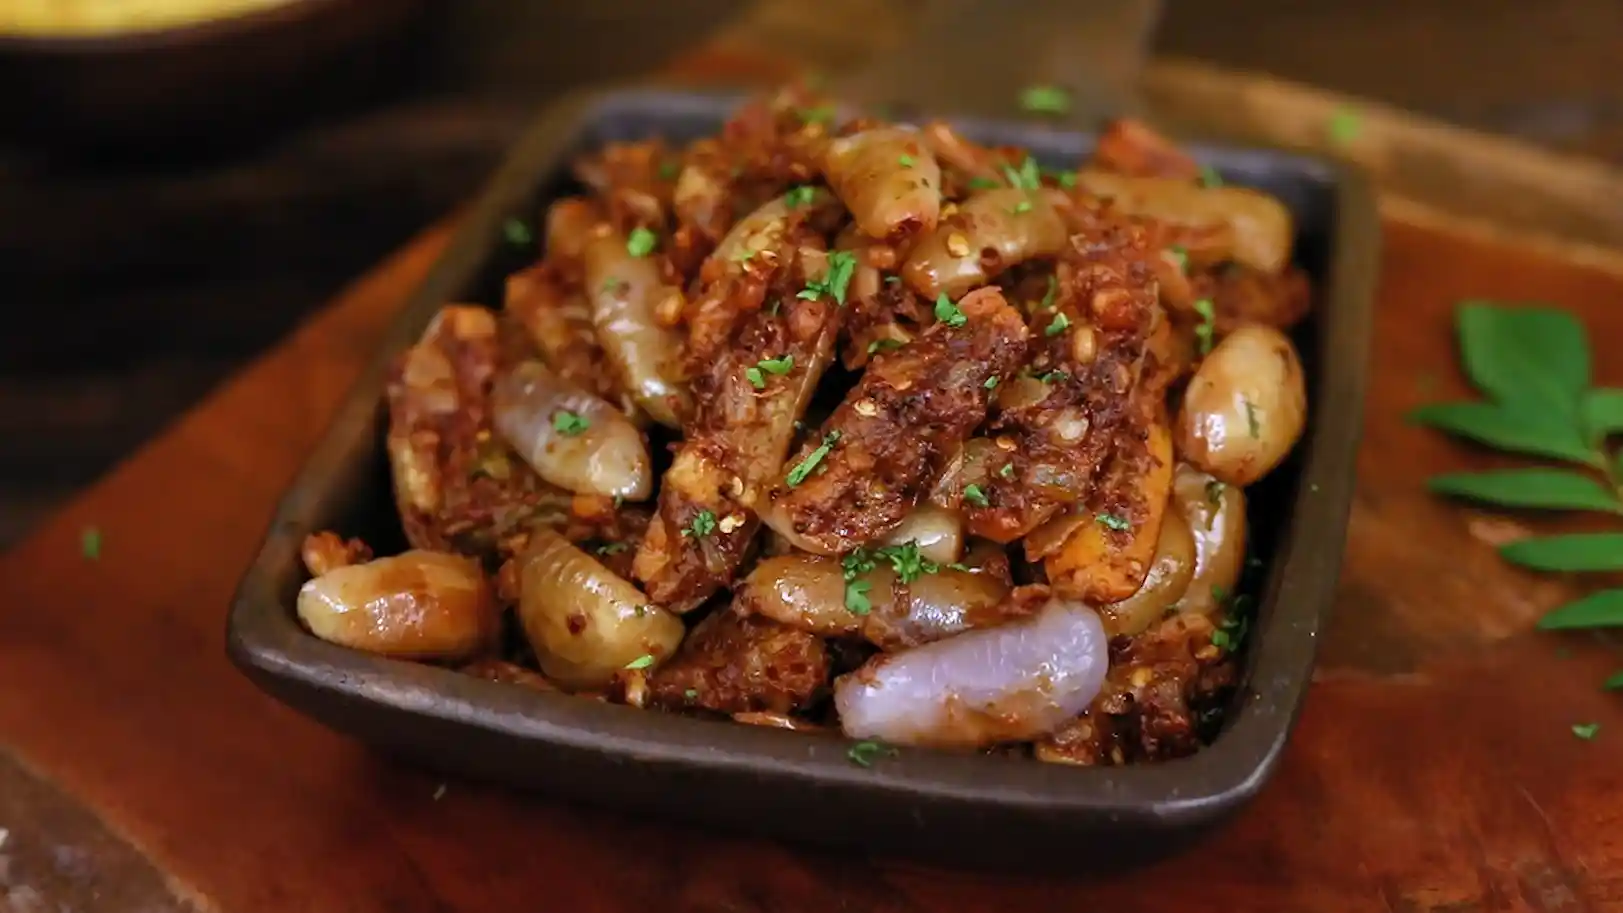
By the end, the fry looks dry, glossy, and evenly coated, exactly how it should be.
Pro Tip 💡: If the masala starts sticking, don’t add water immediately. Lower the flame, stir gently, and let the brinjal release its natural moisture.
What This Recipe Solves for You
- Don’t want deep-fried brinjal?
- Need a quick lunch side?
- Want something flavorful without gravy?
- Cooking for everyday meals, not festivals?
This is one of those recipes that fits real life.
What to Serve This Brinjal Fry With
This fry shines alongside:
It also works surprisingly well as a stuffing inside a dosa or sandwich.
How to Pack for Lunch or Meal Prep
- Let the fry cool completely
- Pack in a dry container
- Keeps well for a few hours without turning soggy
It actually tastes better once the flavors settle.
How to Store Brinjal Fry
How to store
- Refrigerate in an airtight container
- Best consumed within one day
How to reheat
- Reheat in a pan, not a microwave
- Add a few drops of oil if needed
- Stir gently to avoid breaking the brinjal
Common Pitfalls to Avoid
- Cutting the brinjal too large
- Cooking on a high flame
- Adding water too early
- Not stirring and letting the masala burn
Other Related Recipes You Might Like:
- Ennai Kathirikai Kuzhambu – classic South Indian brinjal gravy with rich tamarind flavour.
- Brinjal Drumstick Curry (Kathirikai Murungakkai Kuzhambu) – traditional spicy curry with brinjal and drumstick.
- Potato Fry – simple, crispy stir-fried potatoes that pair well with rice meals.
- Cabbage Poriyal – mild South Indian stir fry, perfect as a side dish.
Brinjal Fry
Description
Crispy South Indian Brinjal Fry made with homemade peanut masala. This easy 20‑minute recipe is vegetarian, meal‑prep friendly, and pairs perfectly with rice varieties. Hema Subramanian’s authentic home‑style brinjal fry with no deep frying and simple pantry spices.
Ingredients
To make masala powder
To make brinjal fry
Prep Work
-
Chop brinjal
Cut brinjals into small pieces and soak in salt water
-
Roast peanuts
Dry roast peanuts until aromatic and keep aside
-
Roast spices
Roast coriander seeds, cumin seeds, chillies, and garlic
-
Grind masala
Grind roasted ingredients with rock salt into fine powder
-
Prep vegetables
Slice onions and slit green chillies
Method
-
Heat oil
Heat oil in a pan and add mustard seeds, urad dal, and chana dal
-
Add aromatics
Add hing, green chillies, curry leaves, and onions
-
Roast onions
Roast onions until golden brown
-
Add brinjal
Add chopped brinjal and roast for a few minutes
-
Add masala
Add ground peanut masala and mix well
-
Slow roast
Roast on medium flame, stirring often to avoid burning
-
Check texture
Cook until brinjal turns soft and well coated
-
Garnish
Garnish with chopped coriander leaves
-
Serve
Serve hot with rice varieties
Equipment
 3")


Affiliate Disclosure: This post contains Amazon affiliate links, i.e., when you buy any product using the links below, we get commissions. but it doesn’t cost you anything extra. If you do purchase any product using the given links, we thank you in advance!
Nutrition Facts
Servings 4
- Amount Per Serving
- Calories 260kcal
- % Daily Value *
- Total Fat 18g28%
- Saturated Fat 3g15%
- Sodium 420mg18%
- Potassium 480mg14%
- Total Carbohydrate 18g6%
- Dietary Fiber 6g24%
- Sugars 5g
- Protein 8g16%
- Calcium 55 mg
- Iron 2.8 mg
- Magnesium 65 mg
* Percent Daily Values are based on a 2,000 calorie diet. Your daily value may be higher or lower depending on your calorie needs.