Ever wish your roti could feel like a hug with every bite, crisp edges, soft layers inside, and a whisper of ghee?
That’s the plain paratha for you: humble wheat dough that transforms into flaky, layered goodness with a couple of kitchen moves. If you want reliable, restaurant-style parathas at home, you’re in the right place.
Why this paratha works (and why you should make it)
Simple ingredients, big payoff. Just wheat flour, hot water, a little ghee, and salt — but the technique gives you flaky layers and a soft interior.
Versatile: Pair it with curries, pickles, raitas, or make a stuffed roll later.
Make-ahead friendly: Dough holds well, and you can cook or freeze parathas for quick meals.
Better texture than chapati:the ghee + folding step gives those delicate layers (lachha-style feel) while staying soft.
A little context
Parathas are a North Indian classic, but every region has its twist, from layered lachha parathas to stuffed aloo or paneer versions. The “saada” or plain paratha is the canvas: minimal ingredients, maximum comfort. It’s the everyday bread that elevates breakfast, tiffin, or a lazy weekend brunch.
Ingredients breakdown — what each does
Wheat flour: the body. Use fresh atta for the best texture.
Salt: flavor enhancer — don’t skip.
Ajwain (optional): gives a gentle carom-bitterness that aids digestion and adds aroma.
Ghee: the secret for flaky layers and great mouthfeel. Use in dough and to finish on the tawa.
Hot water: makes the dough soft and helps relax the gluten fast — that’s how you get tender parathas with minimal kneading.
Vegan Swap 🌿: Replace Ghee with plant-based olive oil or melted coconut oil, both in the dough and for shallow frying. Brush lightly while cooking to get a similar flaky finish.
How the process actually plays out
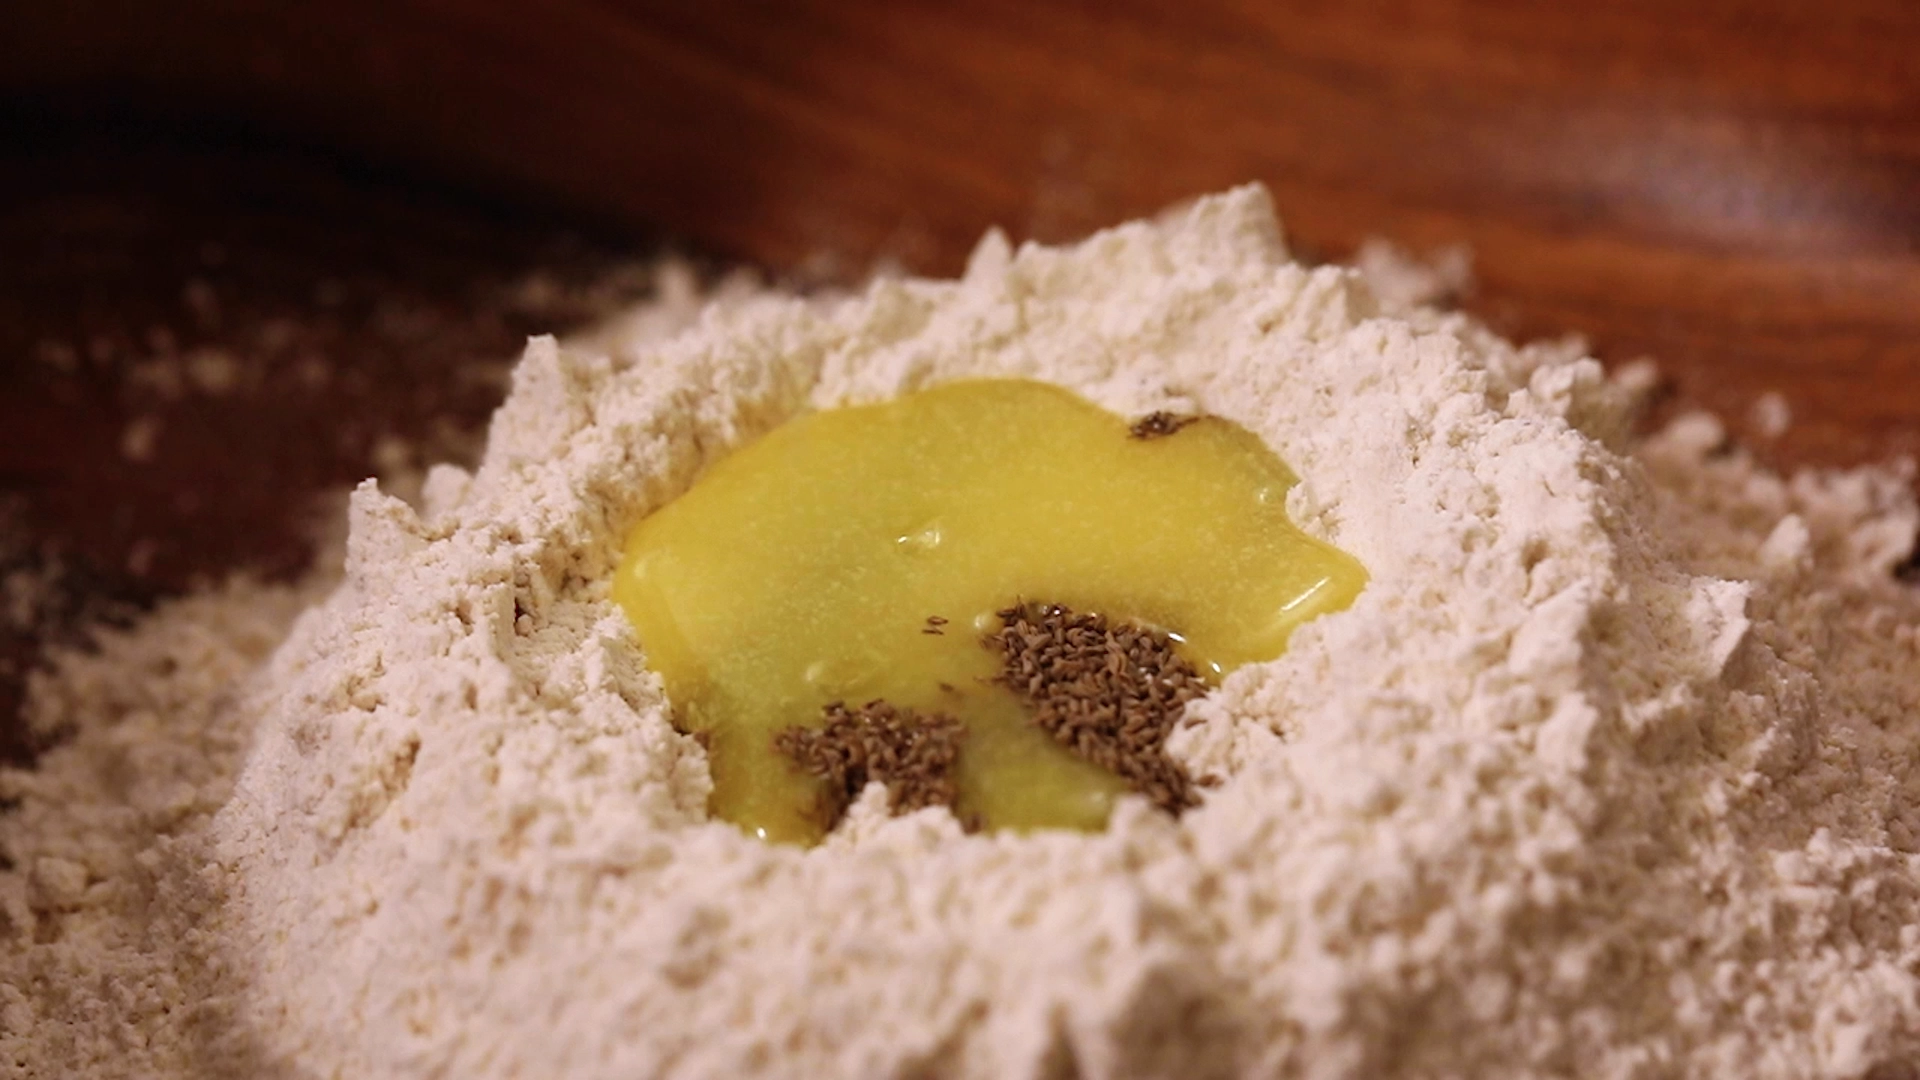
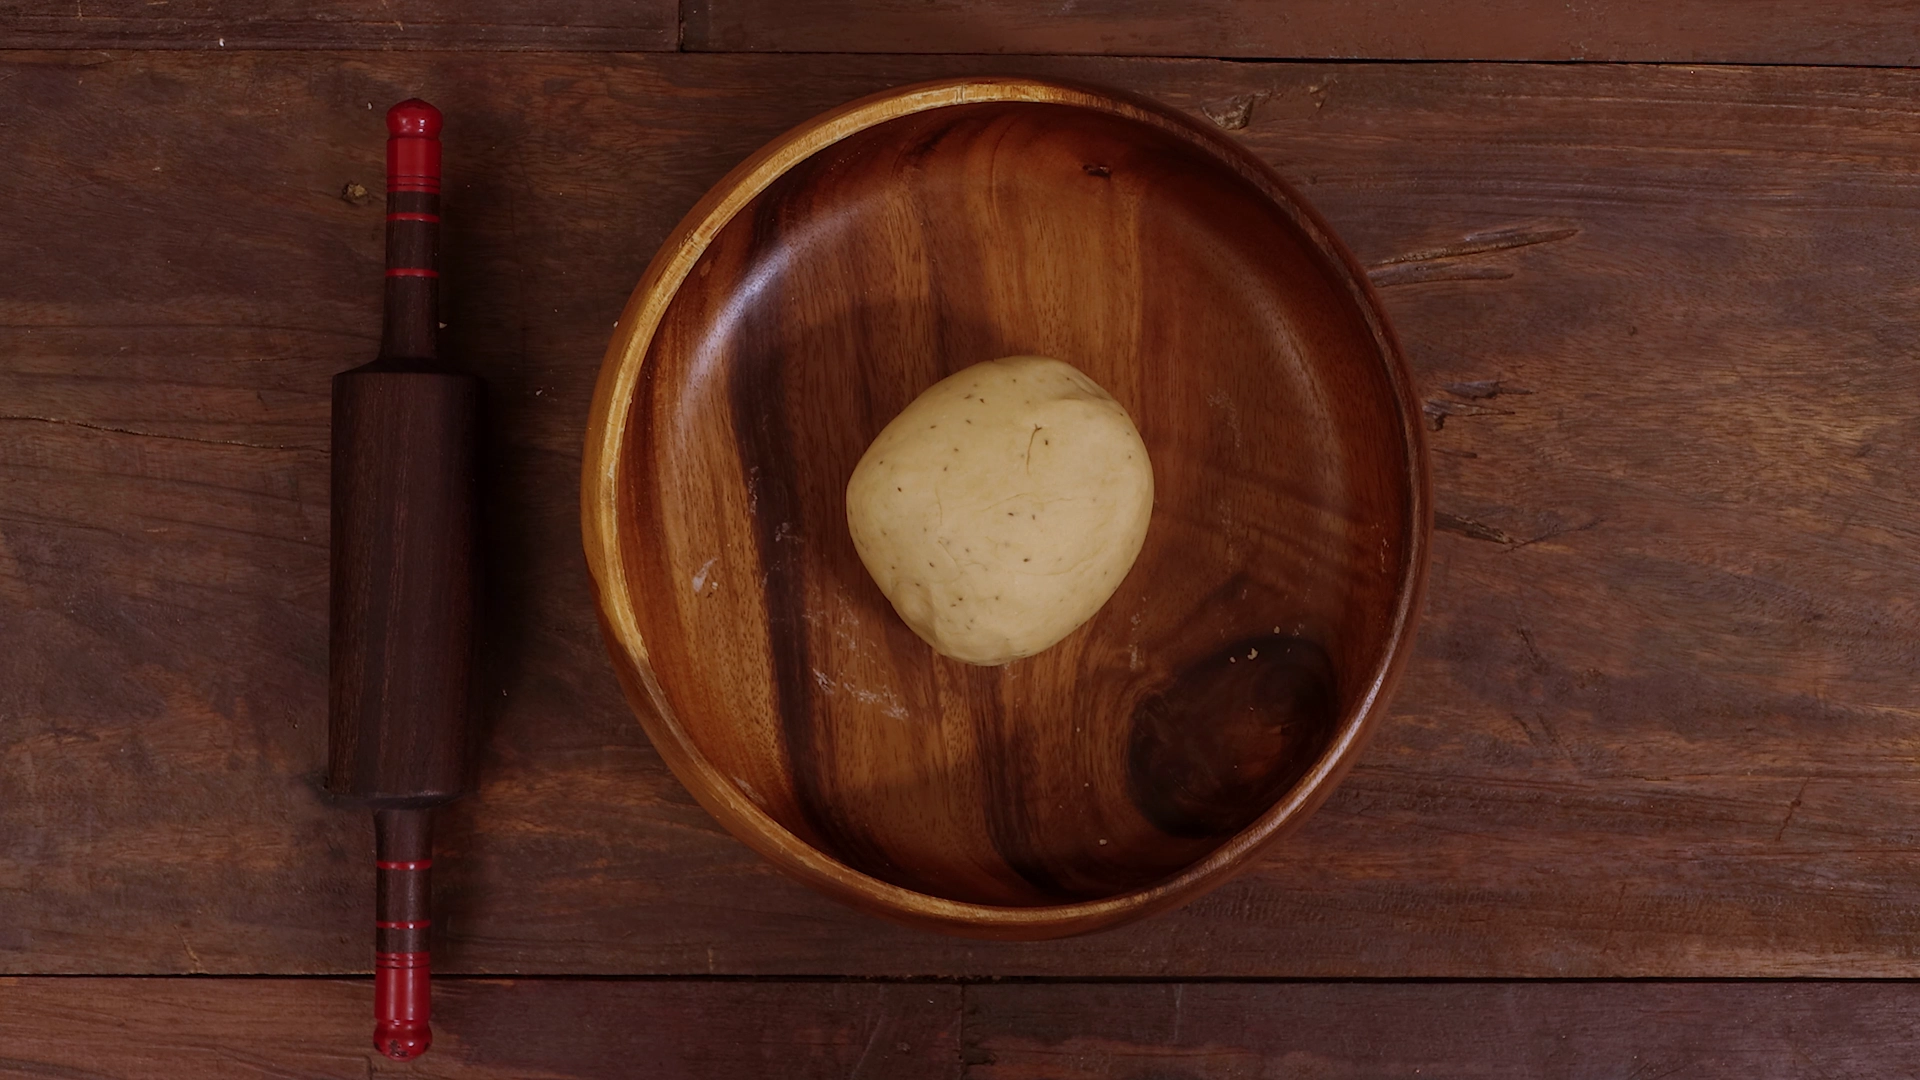
You’ll start by mixing the flour with salt and ajwain — then rub in the ghee until the flour feels like wet sand. Add hot water slowly: it’s not boiling, just hot enough to make the dough come together easily. Knead briefly until smooth; the trick isn’t extra elbow grease but the rest. Cover the dough and let it sit for 20–30 minutes — that relaxes the gluten, so rolling doesn’t spring back.
When you roll, keep the surface lightly dusted. Roll each ball thin, smear a little ghee, fold into a triangle (or the classic coil/fold method), then roll again to your desired thickness. The folding traps thin layers of ghee and flour; that’s what creates those flaky pockets as the paratha cooks. On a hot tawa, cook on medium heat — let it get pale golden, then smear a little ghee and press it gently so it puffs and develops brown spots. Flip, repeat, and you’re done.
This is technique-forward, not ingredient-forward — the dough formula is simple, but how you rest, roll, and fold determines the result.
Pro Tip 💡: If your parathas puff inconsistently, increase the heat slightly after the first side sets and press gently with a spatula while cooking — that encourages even steam pockets. Also, use hot water (not boiling) when making the dough: it softens the flour quickly and gives you a tender paratha without over-kneading.
Serve hot from the tawa with a pat of ghee on top. If you’re stacking parathas, separate them with parchment or a kitchen cloth so they don’t steam-sweat and lose flakiness. For guests, arrange in a basket lined with a thin towel to keep warm and soft.
Cool slightly, then wrap parathas in foil for lunch. For best texture at noon: reheat on a hot tawa for 30–60 seconds per side or microwave for 20–30 seconds wrapped in a damp paper towel (keeps them soft).
Party & bulk prep
Make the dough in larger quantities, divide into balls, and keep them refrigerated (up to 2 days) or frozen (up to 1 month). For events, par-cook parathas (cook 70%), then finish them on the tawa right before serving — this saves time and keeps them fresh.
This plain paratha, also called saada paratha, is the simplest yet most comforting Indian flatbread. Made with just wheat flour, ghee, salt, and hot water, it’s soft inside with light, flaky layers outside. Perfect for pairing with curries, dals, or just a cup of tea, it’s a quick recipe that anyone can make at home. The folding and rolling method gives it that irresistible texture — crispy at the edges and tender in the middle. Whether for breakfast, lunch, or dinner, this classic paratha is a must-try.
Ingredients
2cups wheat flour
1/2tsp salt
1tsp ajwain (optional)
2tbsp ghee
hot water (as needed)
Instructions
Prep Work
1
Measure ingredients
Measure wheat flour, salt, ajwain and ghee and keep them ready
2
Heat waterHeat water until hot (but not necessarily boiling) so it’s ready for mixing
3
Prepare tawaKeep a tawa or flat skillet clean and nearby (don’t heat yet)
Method
4
Combine ingredients
To a wide bowl, add wheat flour, salt, ajwain, ghee, and mix
5
Add hot waterGradually add hot water and mix the dough
6
Knead doughOnce the flour is combined, knead the dough for 5 mins
7
Rest doughCover the bowl, and let it sit for 30 mins
8
Divide doughDivide the dough into equal portions
9
Dust & rollDust the surface and roll out the parathas
10
Fold for layersOnce the dough is rolled out, fold it into triangles and roll it again
11
Heat & cookHeat the tawa and cook the paratha on both sides with a little ghee until golden.
Nutrition Facts
Servings 4
Amount Per Serving
Calories134kcal
% Daily Value *
Total Fat4.2g7%
Saturated Fat2.3g12%
Cholesterol9mg3%
Sodium145mg7%
Potassium122mg4%
Total Carbohydrate21.6g8%
Dietary Fiber3g12%
Sugars0.5g
Protein3.9g8%
Calcium 10 mg
Iron 1.8 mg
* Percent Daily Values are based on a 2,000 calorie diet. Your daily value may be higher or lower depending on your calorie needs.
Keywords:
Plain paratha, saada paratha, soft paratha, Layered Paratha,
Stay Connected with Home Cooking Show!
Love our recipes? Follow us for more delicious cooking inspiration, tips, and behindthescenes fun!
Pin this recipe to share with your friends and followers.
Hema Subramanian
Food and Lifestyle Blogger
I love to cook! And through Home Cooking Show, I hope to make cooking fun, easy, and approachable for everyone.
My way of sharing recipes is all about keeping it simple and delicious—no complicated steps, no fancy ingredients, just real home-cooked food that anyone can make. Cooking should be a joy, not a chore! Whether you’re a beginner or a seasoned cook, you’ll find something here to inspire you. If you love good food made with love, then you’re in the right place!

 Once the flour is combined, knead the dough for 5 mins
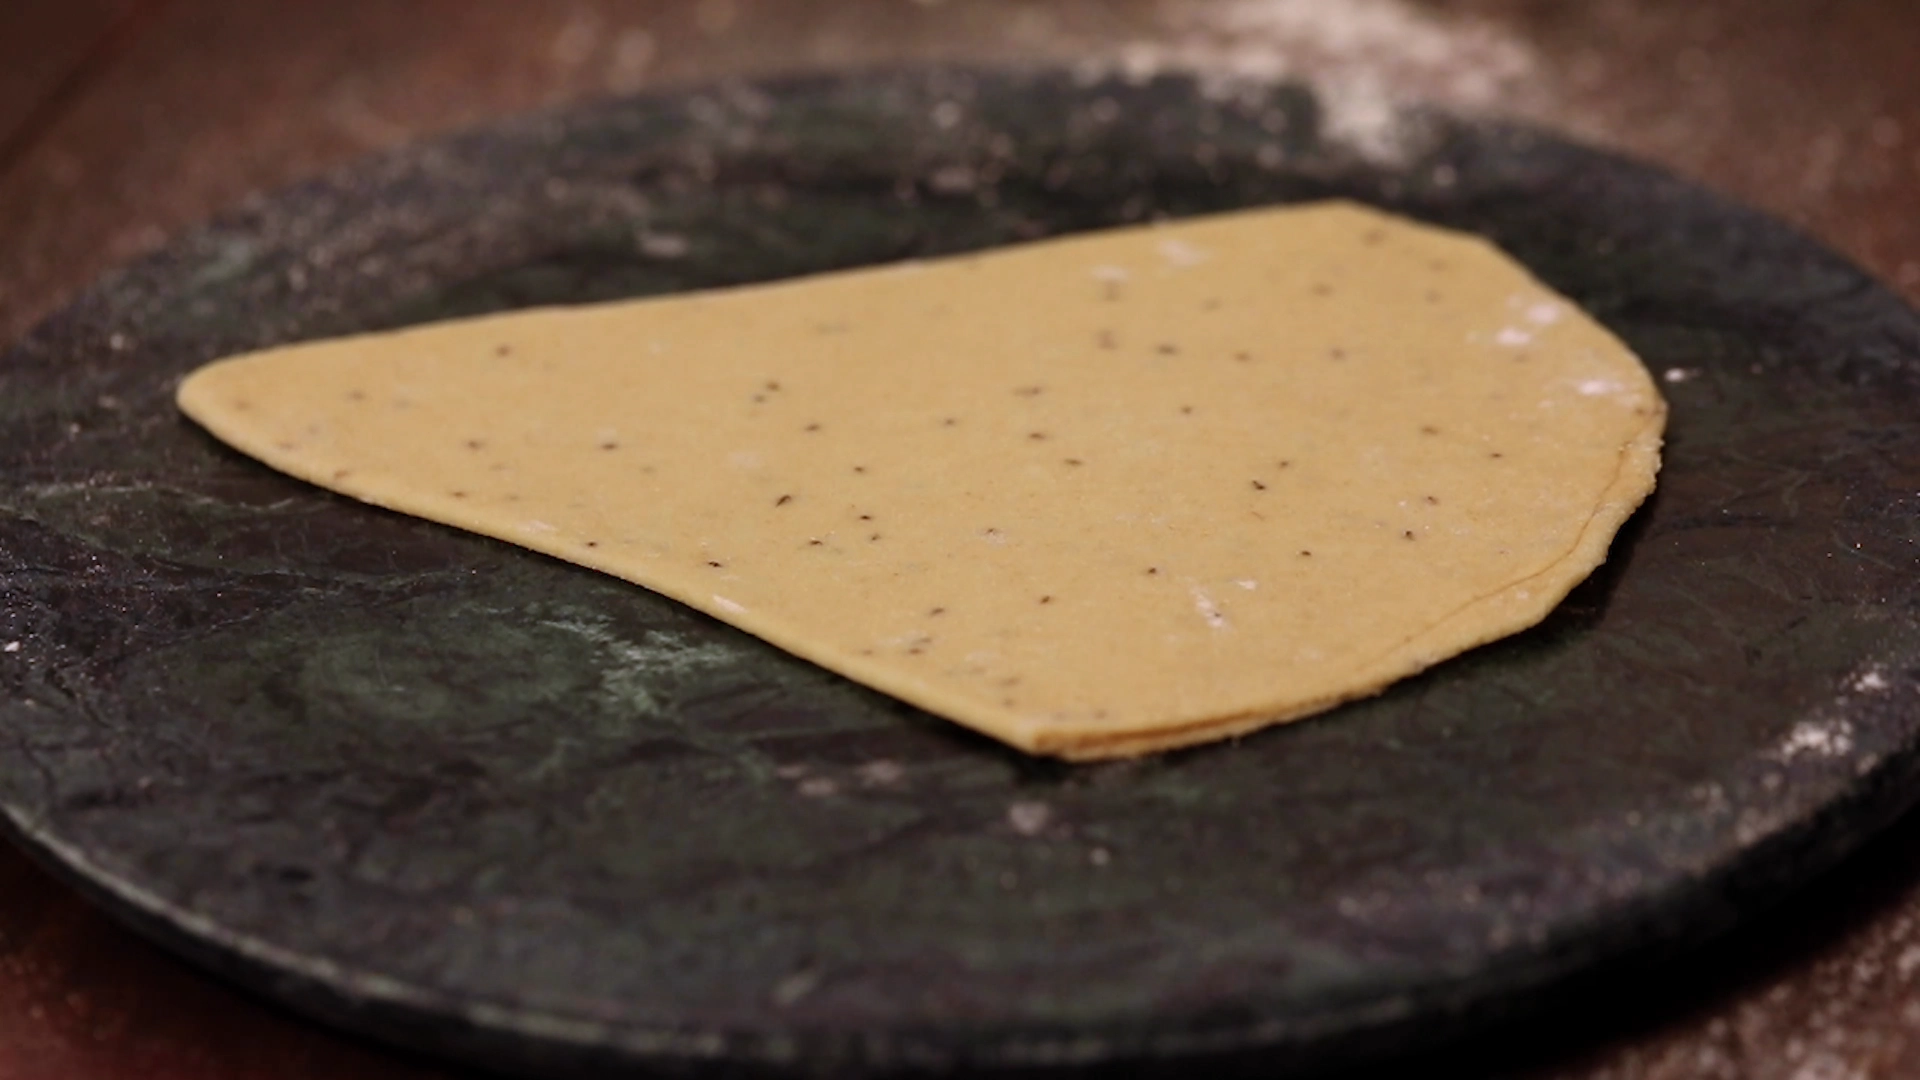 Once the dough is rolled out, fold it into triangles and roll it again
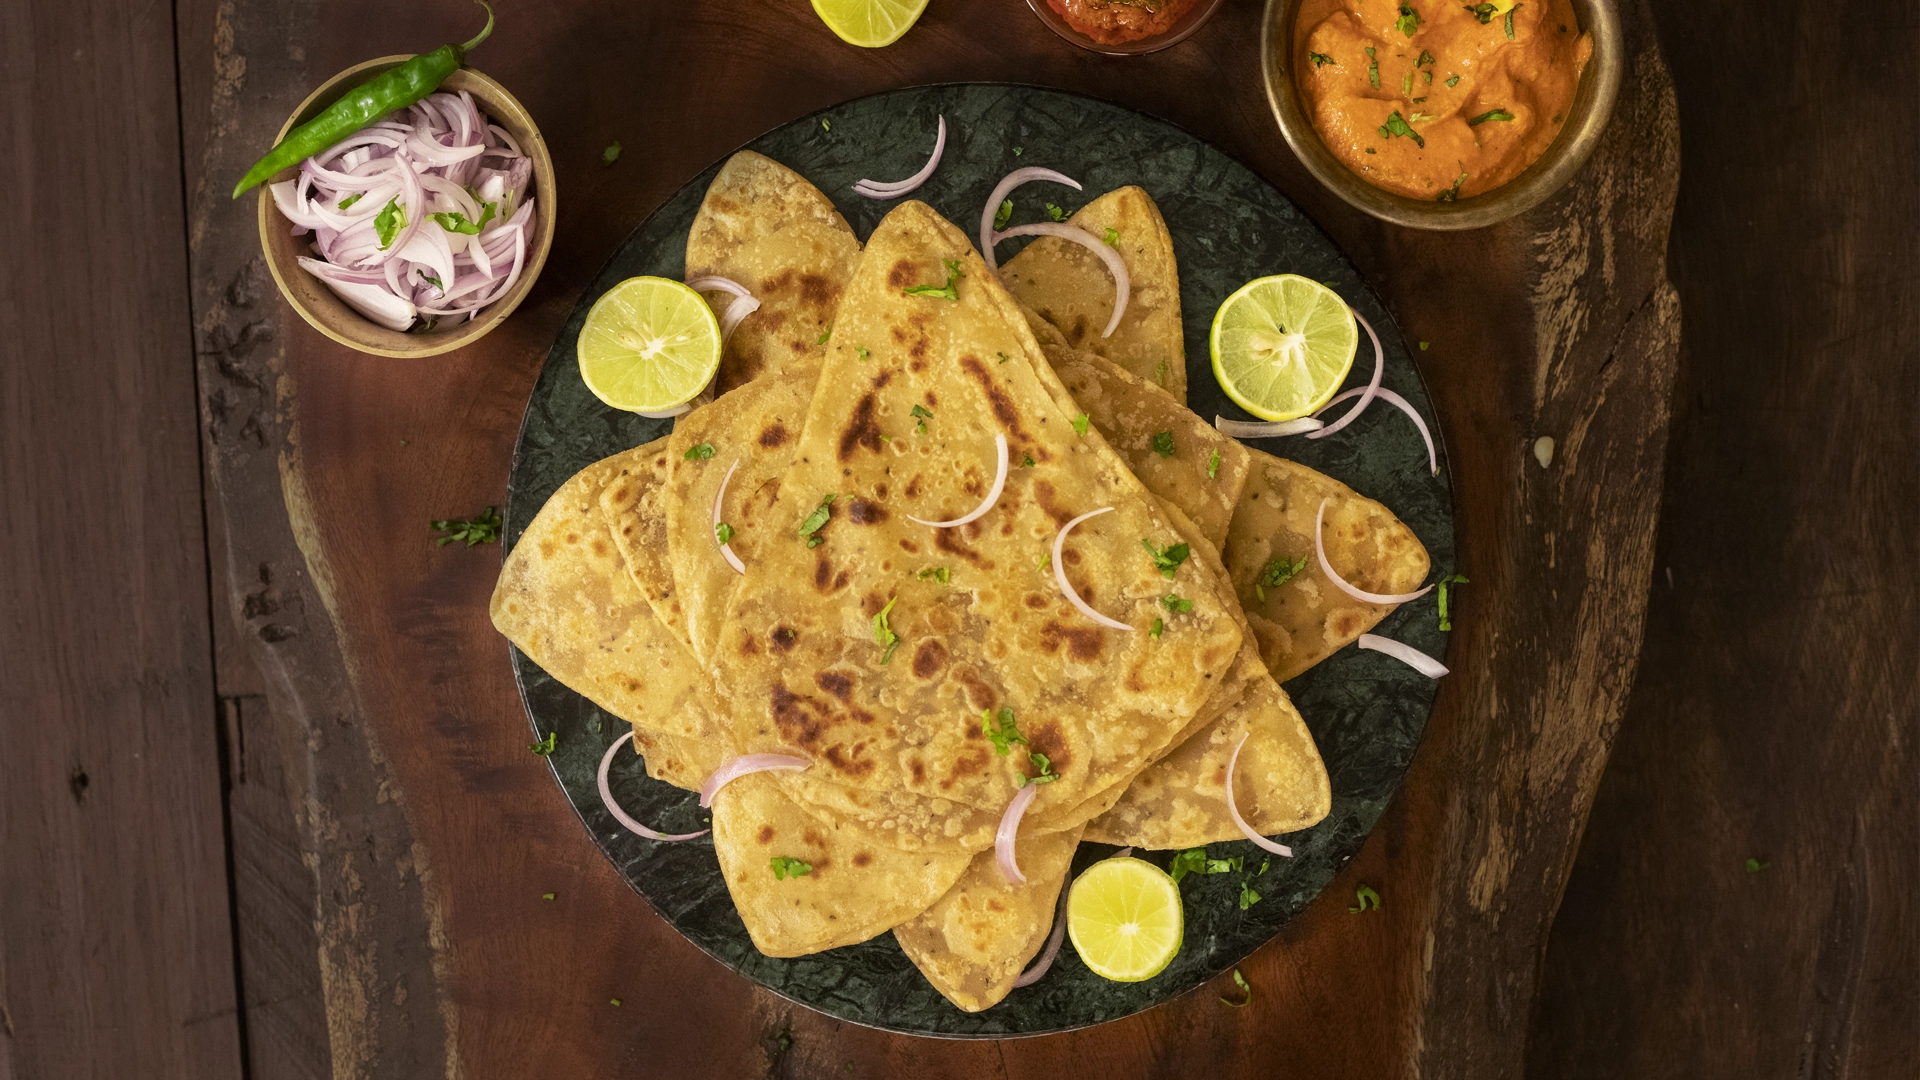 Heat the tawa and cook the paratha on both sides with a little ghee until golden.