Ever noticed how Oreos make people happy instantly?
Now imagine that same Oreo flavor baked into a soft, rich, eggless chocolate cake, layered with Oreo cream frosting and finished with a glossy chocolate ganache. That’s exactly what this Oreo cake delivers.
This isn’t one of those “looks good but tastes average” cakes. This is the kind of cake where people ask, “Did you really make this at home?”
And the best part? You don’t need eggs, fancy tools, or professional baking skills.
If you’ve got Oreos at home, you’re already halfway there.
What Makes This Oreo Cake So Good?
Let’s be honest, most homemade cakes fall into one of two categories:
- Dry and crumbly
- Dense and overly sweet
This Oreo biscuit chocolate cake avoids both.
Here’s why it works so well:
- Oreos replace cocoa powder, giving a deep chocolate flavor without bitterness
- Eggless batter stays soft and moist
- Oreo cream frosting adds that nostalgic cookies, and cream taste
- Chocolate ganache seals everything with a rich, bakery-style finish
It’s indulgent, but balanced. Sweet, but not overpowering. And yes, kids absolutely love it.
A Quick Word on Oreo Cakes and Where They Come From
Oreo cakes don’t really belong to one traditional cuisine. They’re a modern, home-baker favorite, especially popular in Indian kitchens where eggless baking is common.
Across regions, you’ll see small variations:
- Some people turn it into a no-bake Oreo cake
- Others make a pressure cooker Oreo cake
- Many frost it with whipped cream instead of buttercream
This version leans toward a classic baked celebration cake, the kind you’d proudly place on a birthday table.
Why This Recipe Is a Keeper
If you’re wondering whether this cake is worth your time, here’s the honest answer yes, especially if you want something:
- Eggless, without complicated substitutes
- Kid-friendly, both in taste and texture
- Perfect for parties, birthdays, or festive occasions
- Beginner-approved, even if you don’t bake often
It also solves a common problem: what to bake when you don’t have eggs but still want a rich chocolate cake.
Ingredient Breakdown
Before you start, it helps to know why these ingredients work together.
- Oreo biscuits – They do double duty, flavor and structure. The cocoa cookies give chocolate depth, while the cream becomes part of the frosting.
- Butter – This is what keeps the cake moist and rich. It also adds flavor that oil simply can’t match here.
- Milk– softens the biscuit crumbs and creates a smooth batter. Warm milk blends better and gives a tender crumb.
- Maida, baking powder, baking soda – These give the cake structure and lift. Nothing fancy, just reliable baking basics.
- Fresh cream and dark chocolate – Together, they form a ganache that sets beautifully and tastes like something straight out of a bakery.
Vegan Swap 🌿: You can replace butter with plant-based butter and milk with almond or oat milk. For ganache, use coconut cream and dairy-free dark chocolate.
Let’s Talk About the Process
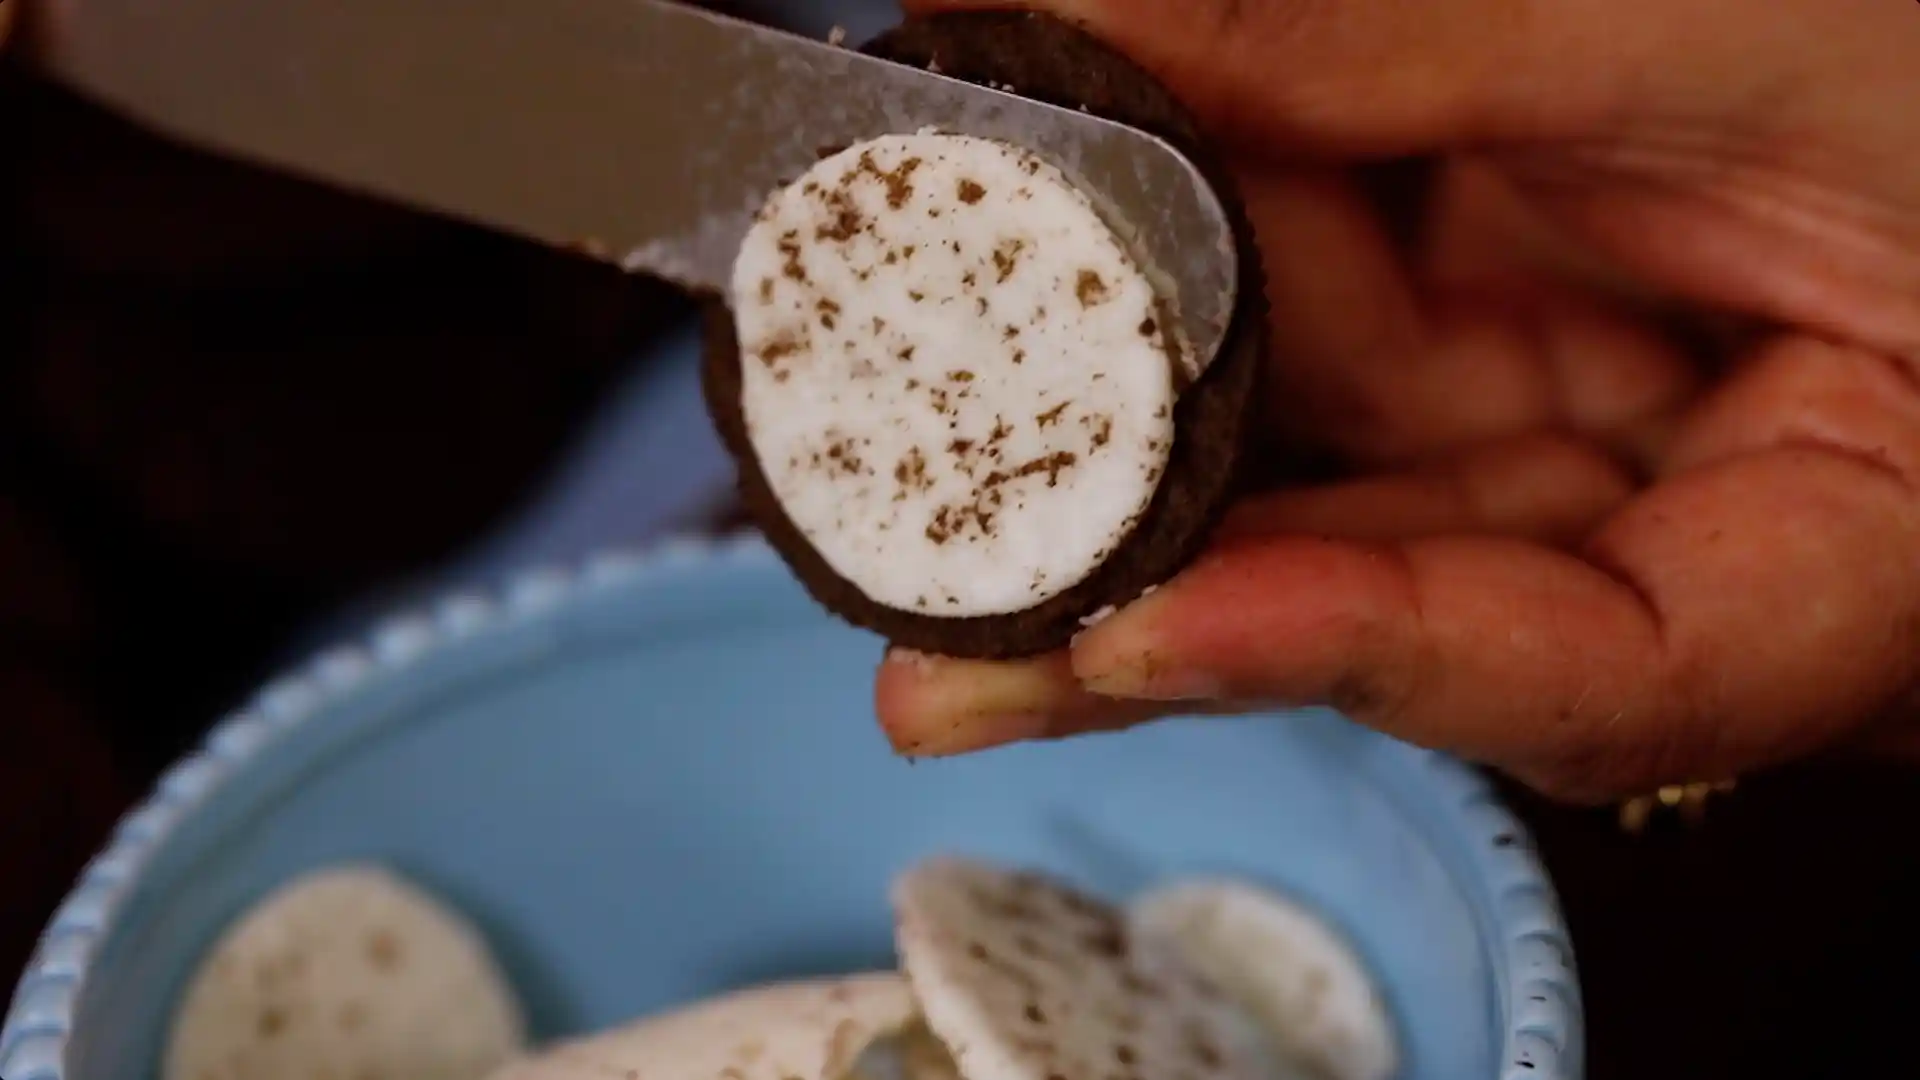
You start by separating the Oreo cream from the biscuits. Don’t rush this; the cream is gold here. Keep it aside because it becomes your frosting base later.
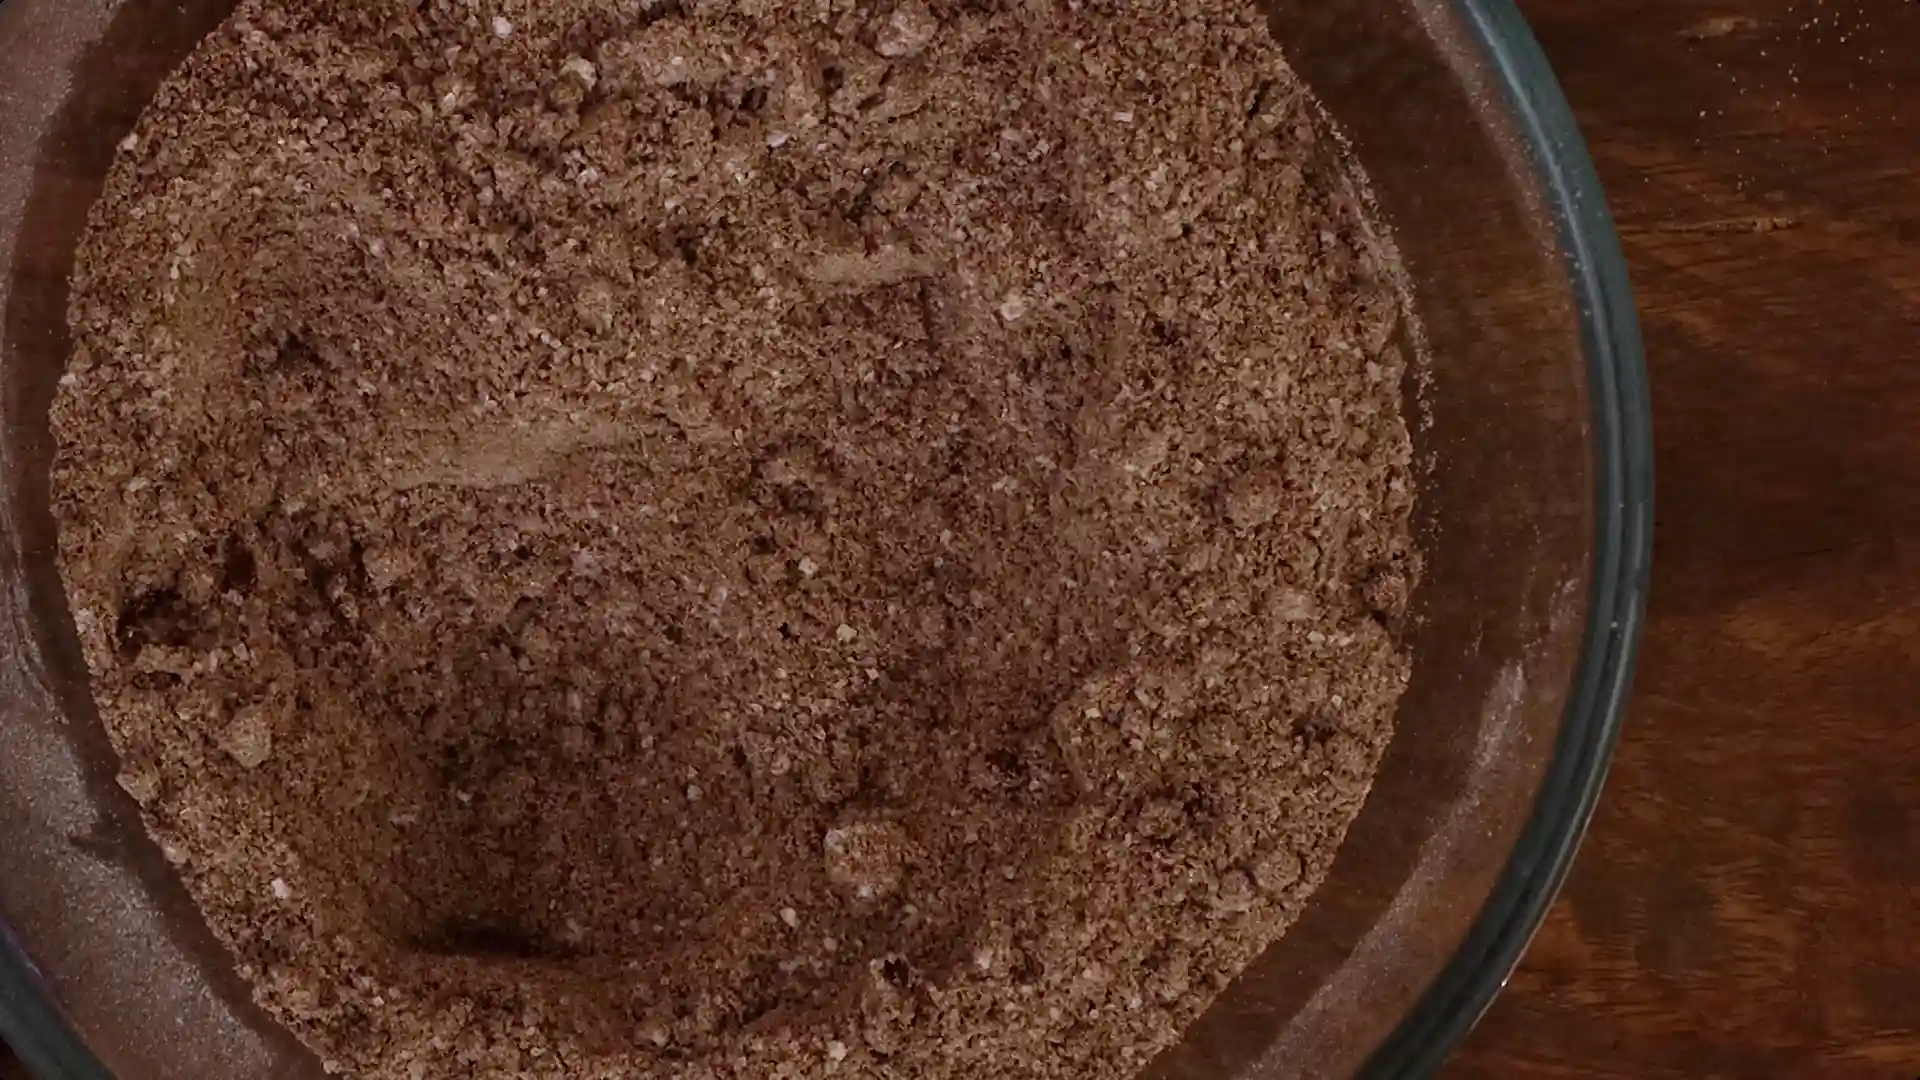
The plain biscuits go straight into the mixer and get powdered. This powder is your chocolate base, so make sure it’s fine and lump-free.
Once that’s ready, you mix it with sugar and the dry ingredients. Nothing complicated. Just make sure everything looks evenly combined before adding the melted butter and warm milk.
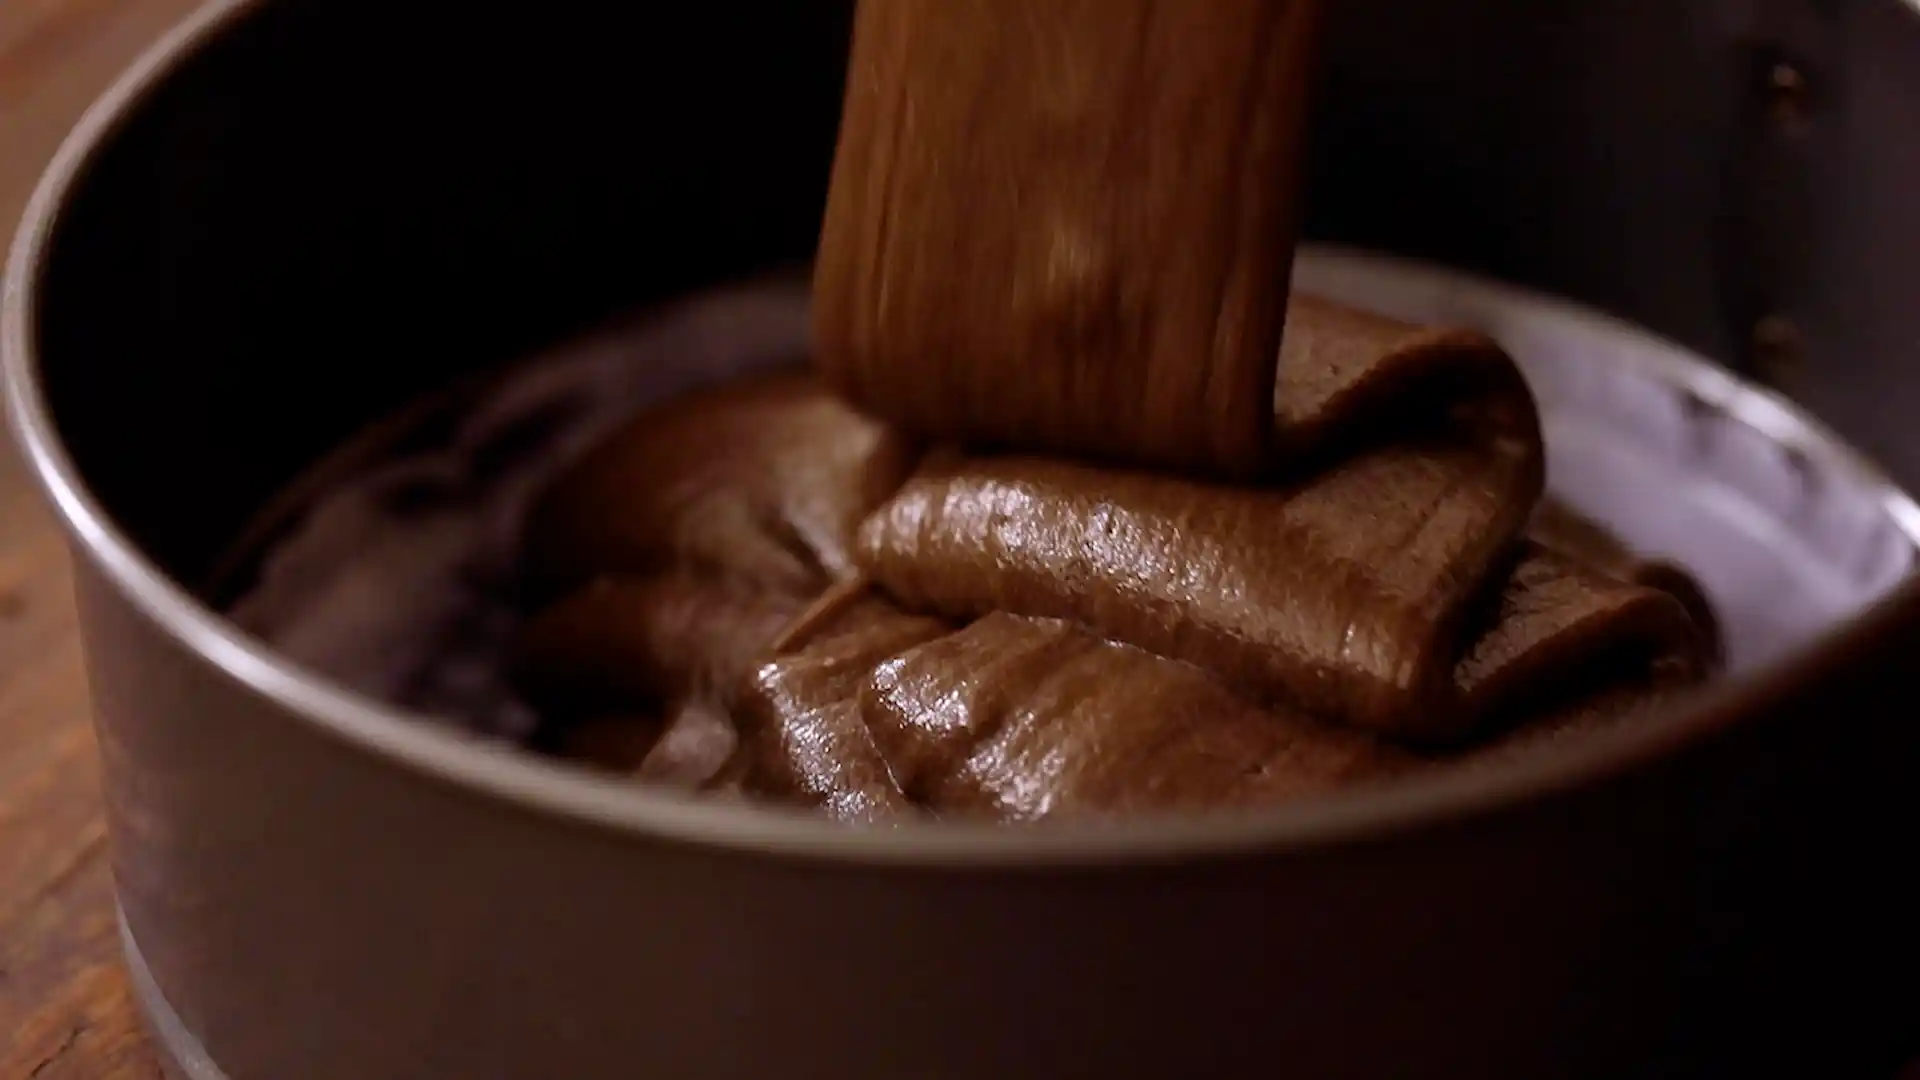
At this stage, the batter comes together beautifully. A quick blend helps smooth things out, and you’ll notice how thick yet pourable it looks — that’s exactly what you want.
Into a lined cake tin it goes, and then into the oven. While it bakes, your kitchen starts smelling like chocolate cookies, which is always a good sign.
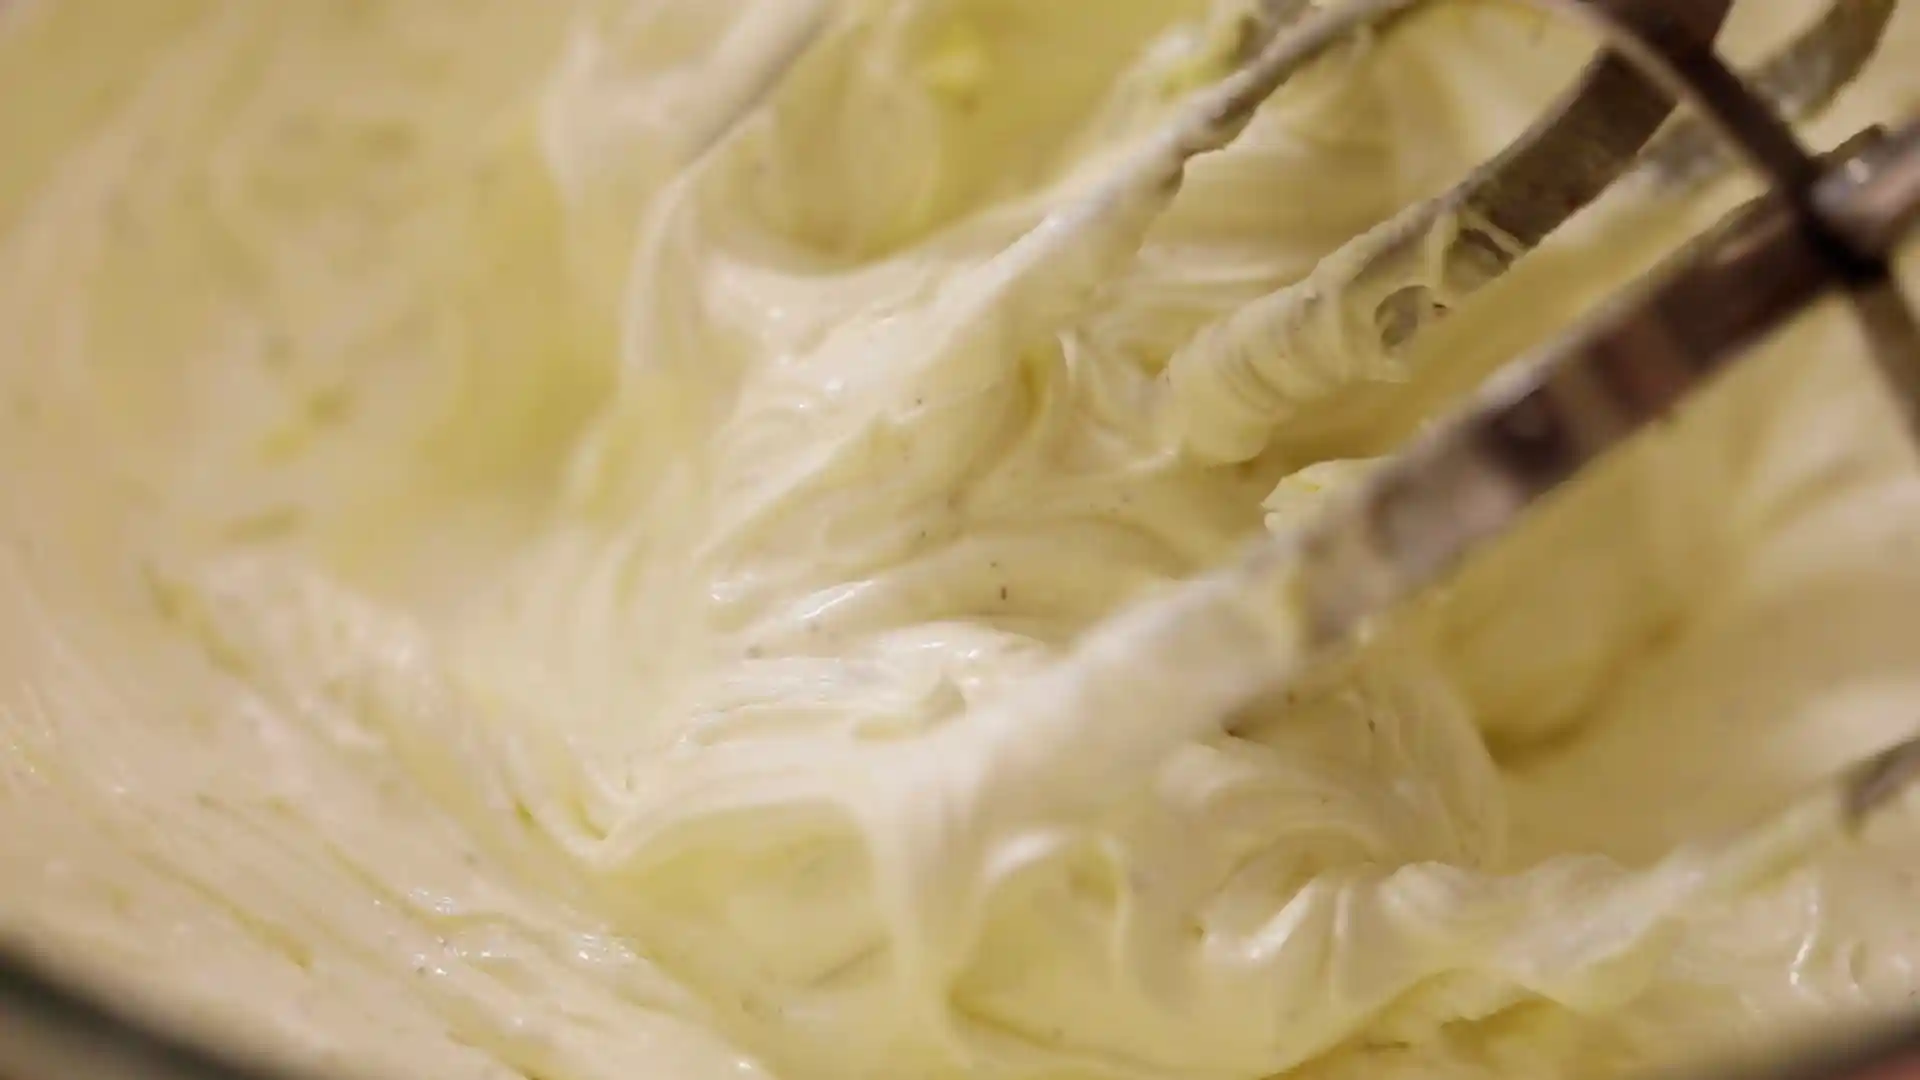
While the cake cools, you whip up the Oreo cream frosting by beating the reserved cream with butter. This frosting is smooth, lightly sweet, and packed with Oreo flavor.
Next comes the ganache, warm cream meets chopped chocolate, melts down, and turns glossy. Simple, but incredibly effective.
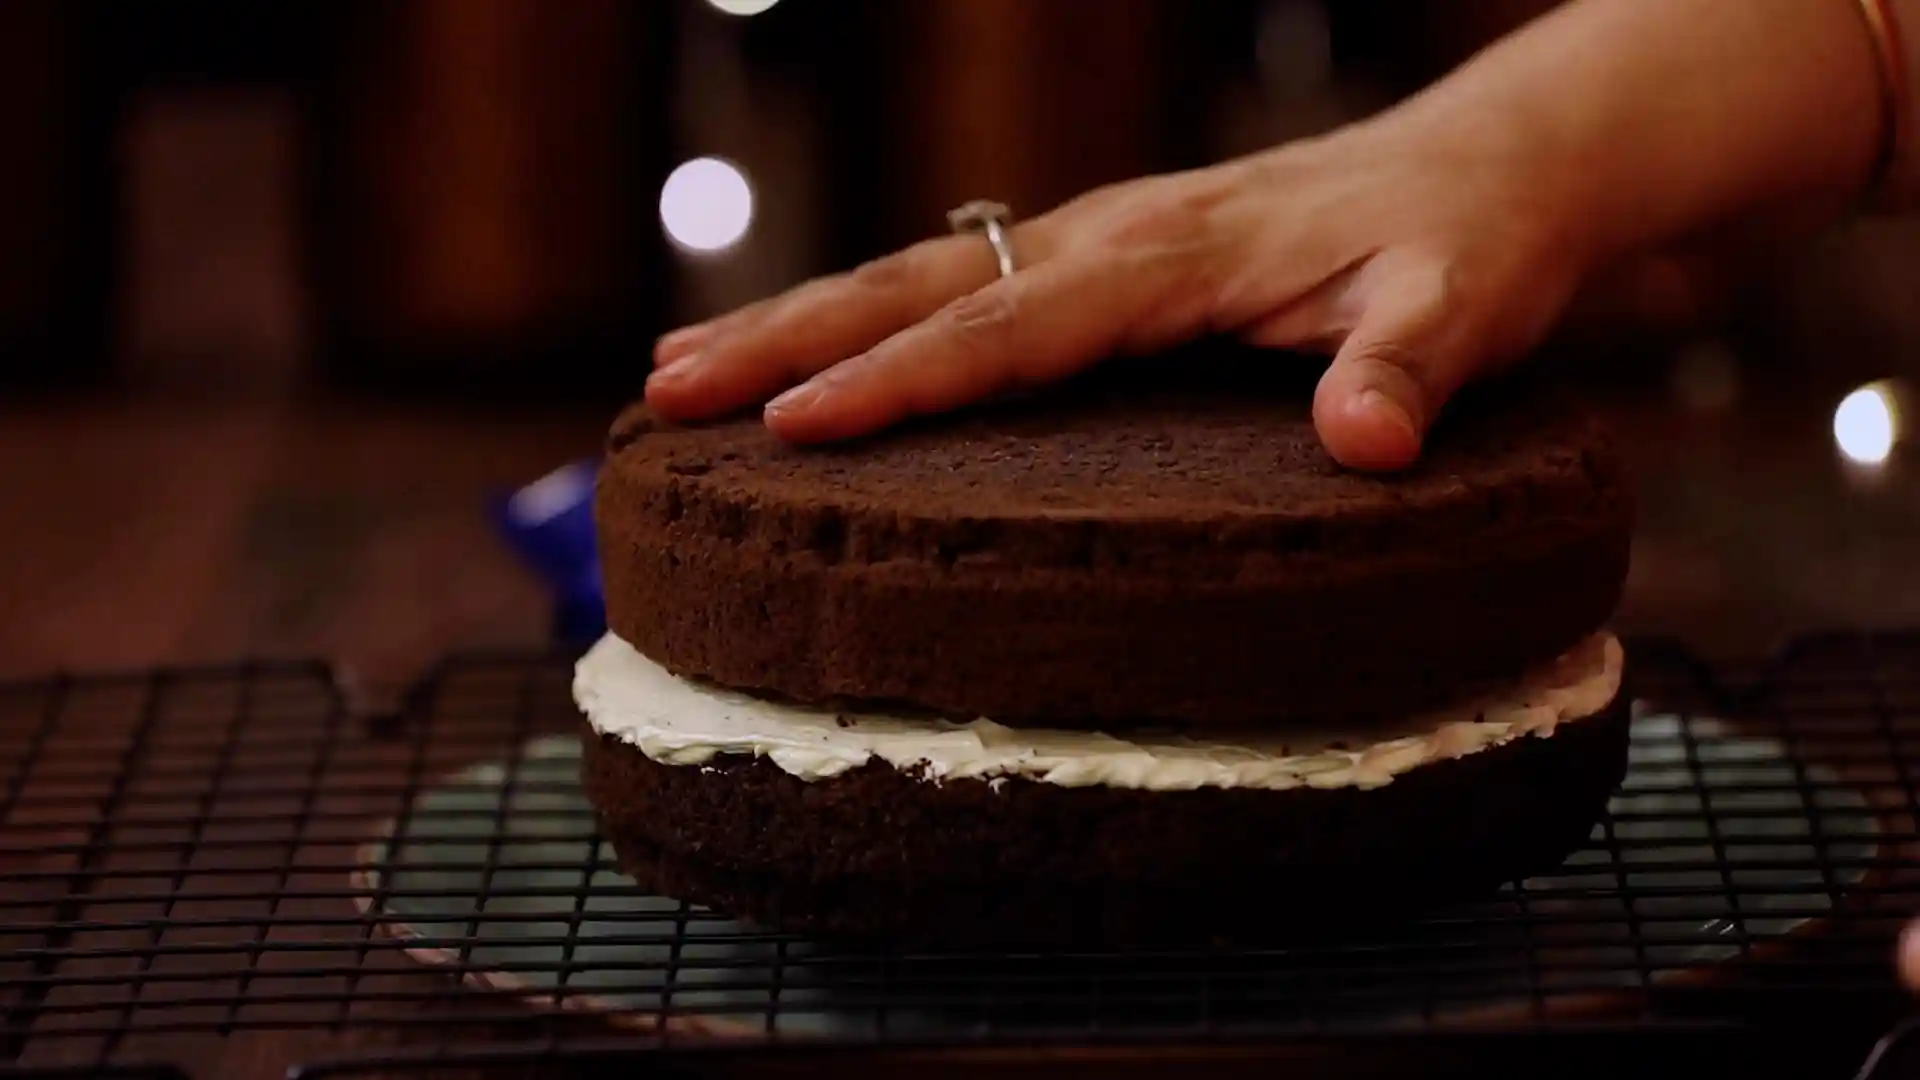
Once everything is cool, you layer the cake with frosting, pour the ganache over the top, and decorate with Oreos. At this point, it already looks celebration-ready.
Pro Tip 💡: For a taller or celebration-sized cake, bake the same cake again. Once both cakes are completely cooled, level the top surfaces, apply oreo cream frosting on one cake, and place the second cake on top for a perfectly layered finish.
Diet Notes and Allergen Info
This cake is:
- Eggless
- Nut-free
It does contain:
- Dairy
- Gluten
What Goes Along With Oreo Cake?
This cake is rich, so pair it with:
- A simple cup of coffee
- Plain milk for kids
- Vanilla ice cream for parties
You don’t need anything fancy; let the cake shine.
How to Serve This Cake
- Slice with a warm knife for clean edges
- Serve chilled for firmer layers or at room temperature for a softer texture
- Add crushed Oreos to the plate for a café-style look
Packing, Parties, and Bulk Prep Tips
If you’re making this for a party:
- Bake the cake a day ahead
- Frost and ganache it on the day of serving
- Keep decorations simple if transporting
For bulk prep, this cake doubles well. Just bake in separate tins rather than one large pan.
How to Store Oreo Cake
Store the cake in an airtight container:
- In the fridge for up to 3 days
- Bring to room temperature before serving for best texture
How to Reheat
This cake doesn’t really need reheating, but if you prefer it slightly warm:
- Microwave a slice for a few seconds
- Avoid overheating, or the frosting will melt
Common Pitfalls
- Cake turns dense: Batter was overmixed
- Frosting melts: Cake wasn’t fully cooled
- Ganache looks grainy: Cream was overheated
Take it slow, and you’ll be fine.
Other Related Recipes You Might Like:-
- Eggless Chocolate Cake in Pressure Cooker – moist, rich chocolate cake perfect for beginners.
- Chocolate Truffles – bite-sized chocolate treats made with minimal ingredients.
- Eggless Brownie – dense, fudgy brownie for chocolate lovers.
- No-Bake Chocolate Bread Pudding – easy chocolate dessert without oven or baking.
- Eggless Mug Cake – quick single-serve cake made in minutes.
- Mini Christmas Cake – festive mini cake perfect for celebrations.
- Eggless Plum Cake – rich, spiced cake loaded with dry fruits.
- Fruit Cake – classic bakery-style cake with fruits and nuts.
Oreo Cake
Description
This Oreo Cake is a dream dessert for cookies-and-cream lovers. Soft, moist chocolate sponge layers are generously infused with crushed Oreo cookies, then stacked and frosted with a smooth, creamy Oreo-packed frosting. Every bite delivers the perfect balance of rich cocoa flavor and the iconic crunch and creaminess of Oreos.
Whether you’re baking for a birthday, celebration, or just to satisfy a sweet craving, this cake is guaranteed to impress. It’s easy enough for home bakers yet indulgent enough to feel bakery-worthy. Serve it chilled for clean slices and maximum flavor, and watch it disappear within minutes.
Ingredients
For oreo cream frosting
For chocolate ganache
Instructions
Prep Work
-
Separate oreo cream
Remove the cream filling from the Oreo biscuits and keep aside
-
Powder biscuits
Grind plain Oreo biscuits into a fine powder
-
Sieve dry ingredients
Sieve maida, baking powder and baking soda together
-
Preheat oven
Preheat the oven to the required temperature
-
Line cake tin
Line the cake tin with butter paper
-
Chop chocolate
Chop dark chocolate for ganache
Method
-
Mix Oreo powder
Add sugar to the Oreo biscuit powder and mix well
-
Add dry ingredients
Add sieved flour mixture and mix evenly
-
Add liquids
Add melted butter and milk and mix
-
Blend batter
Blend the batter until smooth and lump free
-
Pour batter
Pour batter into the prepared cake tin
-
Bake cake
Bake until the cake is fully cooked
-
Cool cake
Allow the cake to cool completely
-
Prepare frosting
Beat butter with oreo cream until smooth and creamy
-
Prepare ganache
Heat cream and chocolate together until smooth
-
Single cake layering and decoration
Cut the baked cake horizontally into two equal halves. apply frosting on one half and place the other half on top. trim the top surface to make it smooth. spread the remaining frosting evenly on the sides. pour chocolate ganache on top and decorate with oreo biscuits
-
Double cake layering for bigger cake
prepare the same cake again for a bigger cake. once both cakes are completely cooled, trim the top surface of one cake to make it smooth. apply frosting on top of this cake and place the second cake over it. spread the remaining frosting evenly on the sides -
Pour ganache
Pour ganache over the top of the cake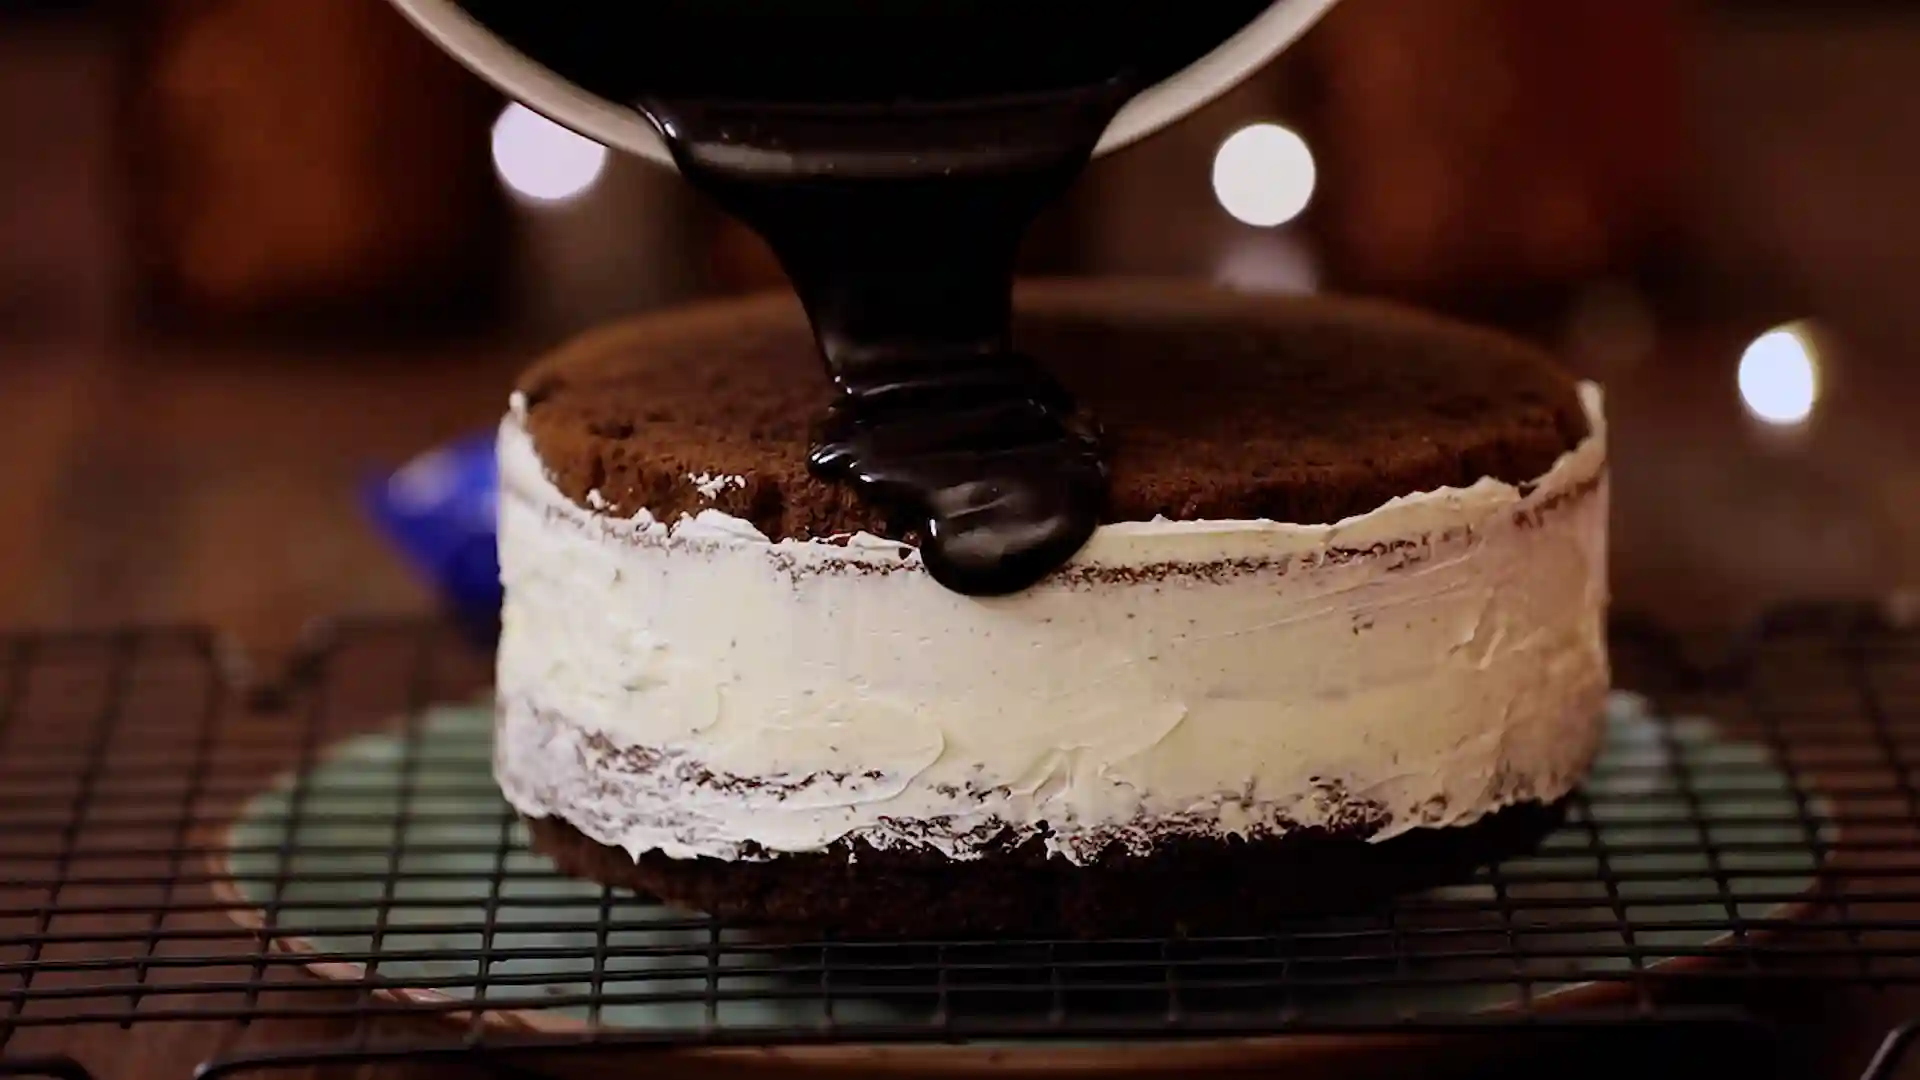
-
Decorate cake
Decorate with Oreo biscuits and cream frosting.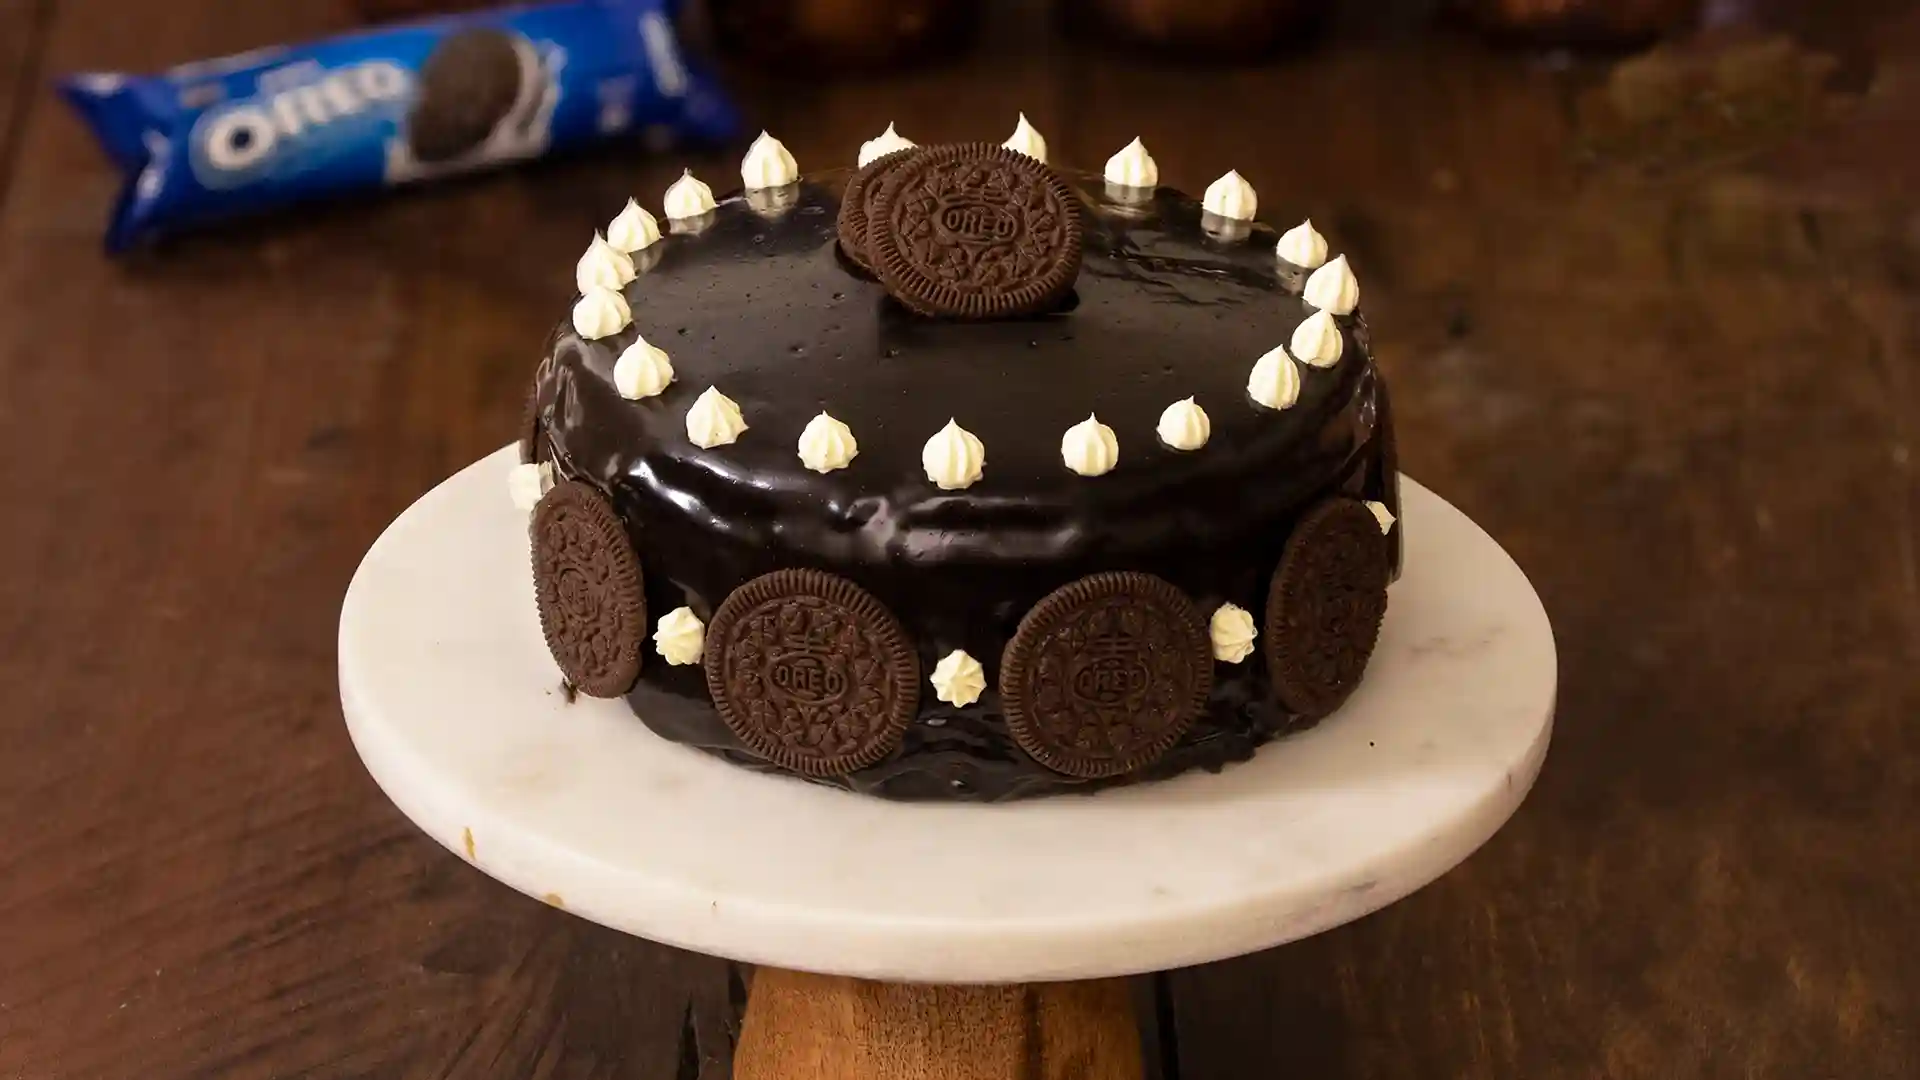
Equipment
 3")


Affiliate Disclosure: This post contains Amazon affiliate links, i.e., when you buy any product using the links below, we get commissions. but it doesn’t cost you anything extra. If you do purchase any product using the given links, we thank you in advance!
Nutrition Facts
Servings 4
- Amount Per Serving
- Calories 420kcal
- % Daily Value *
- Total Fat 26g40%
- Saturated Fat 15g75%
- Cholesterol 65mg22%
- Sodium 270mg12%
- Potassium 210mg6%
- Total Carbohydrate 42g15%
- Dietary Fiber 2g8%
- Sugars 26g
- Protein 5g10%
- Calcium 90 mg
- Iron 2 mg
- Magnesium 28 mg
* Percent Daily Values are based on a 2,000 calorie diet. Your daily value may be higher or lower depending on your calorie needs.