Imagine a thick, fluffy pancake studded with colorful vegetables, aromatic spices, and fresh herbs—that’s rava uttapam in all its glory. Unlike traditional uttapam that requires fermented rice and lentil batter (and hours of waiting), this version uses semolina and flattened rice to give you the same satisfying experience in a fraction of the time. The texture is soft and pillowy with a slightly crispy bottom, and every bite is packed with the crunch of shallots, the warmth of ginger, the heat of green chilies, and the sweetness of grated carrots.
Rava uttapam is the ultimate solution for those mornings when you want something substantial and flavorful but don’t have fermented batter on hand. It’s colorful, nutritious, and incredibly versatile—you can load it with whatever vegetables you have. Serve it for breakfast, brunch, or even as a light dinner with your favorite chutney, and watch it disappear from the plate.
The Story Behind This Instant Classic
Uttapam is a beloved South Indian breakfast staple, traditionally made with fermented rice and urad dal batter—the same base used for dosas and idlis. But busy modern life called for shortcuts, and rava uttapam was born. By using semolina (rava) and flattened rice (poha), home cooks created an instant version that captures the essence of traditional uttapam without the overnight fermentation.
The addition of flattened rice is genius—it adds softness and helps bind the batter while giving it a texture that’s remarkably close to the fermented original. The toppings aren’t just decorative; they’re a flavor explosion that gets pressed into the batter as it cooks, creating pockets of spiced vegetables throughout. It’s practical, delicious, and proves that sometimes the quickest route can be just as satisfying as the traditional one.
Breaking Down Your Flavor Builders
Sooji Rava (Semolina) – The base that gives uttapam its structure and slightly grainy, satisfying texture. It’s quick-cooking and doesn’t need fermentation.
Flattened Rice (Poha) – Soaked and ground into the batter, it adds softness, helps with binding, and gives the uttapam a texture closer to traditional fermented versions.
Curd – Adds tanginess that mimics fermented batter and helps activate the ingredients, giving you a slight sourness that’s characteristic of good uttapam.
Salt – For seasoning the batter and toppings appropriately.
Water – To achieve the perfect batter consistency—thick enough to hold toppings but spreadable.
Oil – For tempering the toppings and cooking the uttapam to golden perfection.
Chana Dal – Adds nutty crunch and texture to the topping mixture.
Mustard Seeds – Classic South Indian tempering that brings sharp, pungent flavor.
Cumin Seeds – Earthy warmth that complements the vegetables beautifully.
Shallots – Sweeter and more delicate than regular onions, they caramelize beautifully and add wonderful flavor without overpowering.
Green Chilli – Fresh heat that wakes up your palate without being overwhelming.
Ginger – Adds warmth, slight spiciness, and aromatic depth.
Curry Leaves – The aromatic signature of South Indian cooking—absolutely essential.
Asafoetida (Hing) – A tiny pinch adds savory depth and aids digestion.
Carrot – Grated carrots add sweetness, color, crunch, and nutrition.
Coriander Leaves – Fresh, bright, herbaceous notes that lighten and brighten the dish.
Ghee – Used for cooking, it adds richness and that irresistible aroma. You can use oil if preferred.
How This All Comes Together
Start by washing your flattened rice thoroughly, then soak it in water for just a few minutes—it softens quickly, so you don’t need long. While that’s soaking, get your prep work done. Finely chop your shallots into small pieces so they distribute well and cook quickly. Do the same with your green chilies and ginger—the finer they are, the better they’ll integrate into the topping. Grate your carrots and have your curry leaves and coriander ready to go.
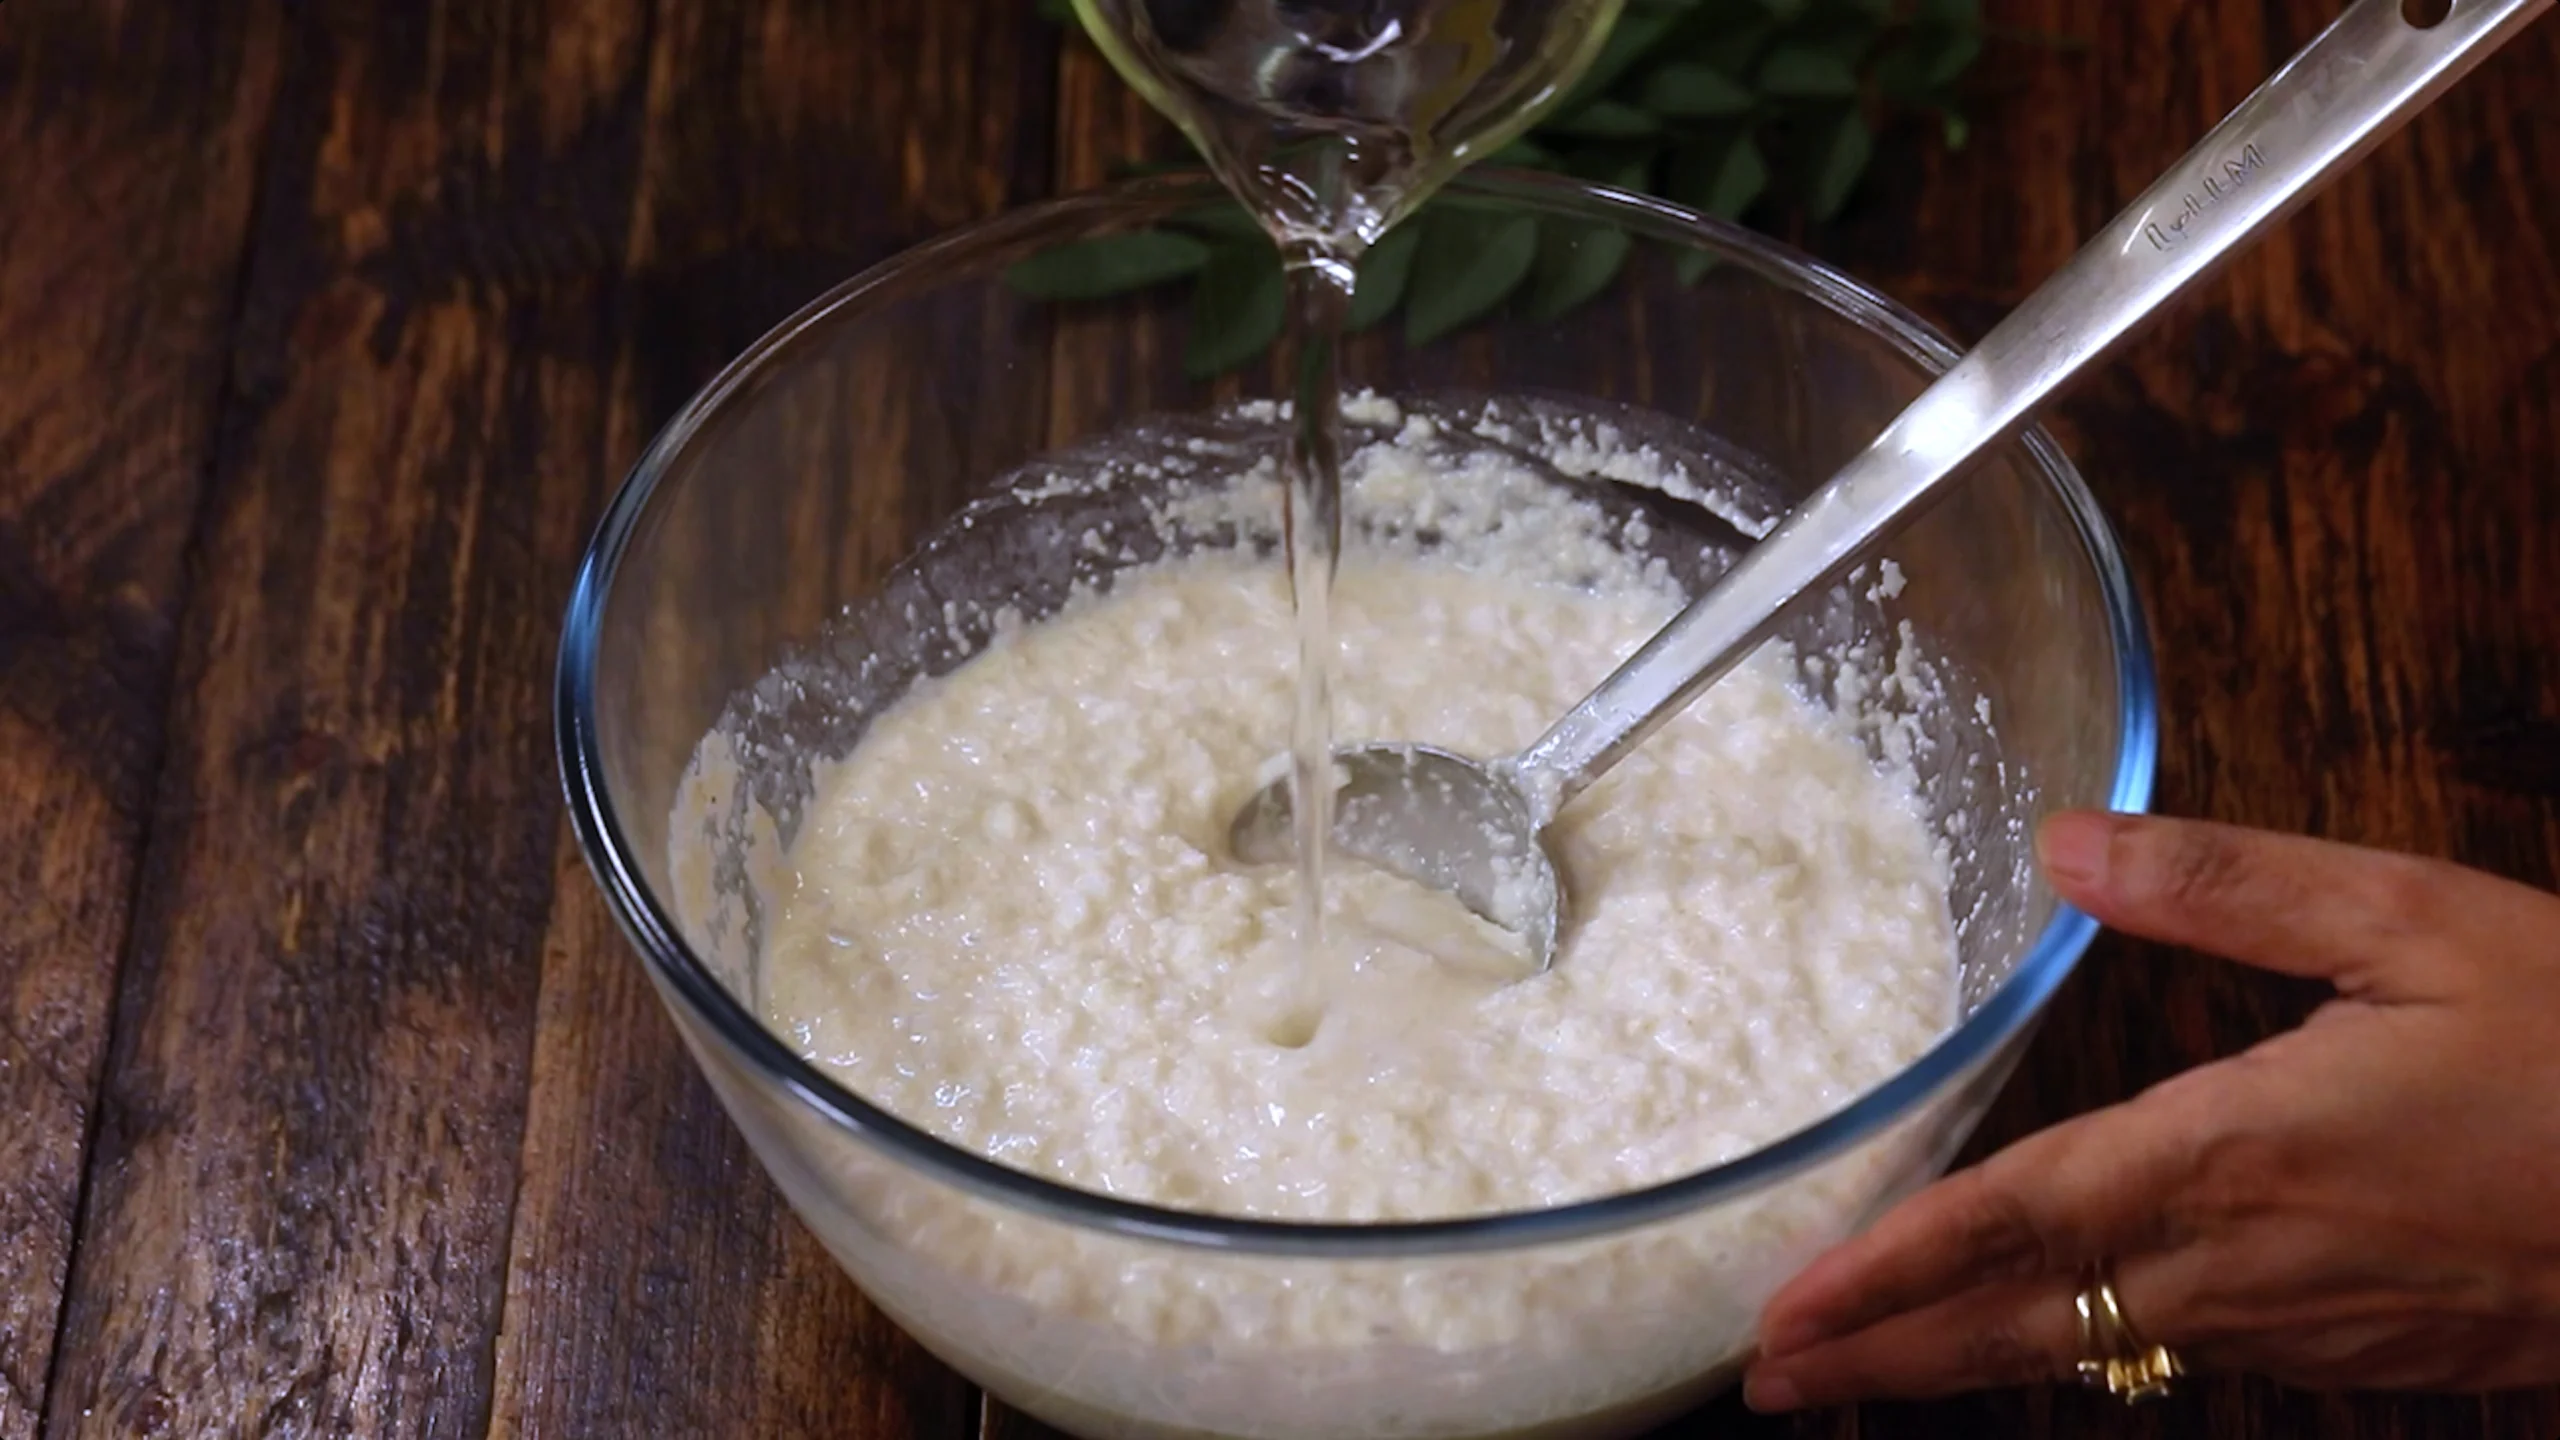
Now let’s make the batter. In a large bowl, combine your rava and the soaked flattened rice (squeeze out excess water first). Add your curd and salt, then mix everything together. Gradually add water, little by little, mixing as you go until you achieve a smooth batter. The consistency should be thicker than dosa batter but still pourable—think of thick pancake batter. This batter needs to rest for about 30 minutes, which allows the rava to absorb the liquid and soften, giving you a better texture.
💡 Pro Tip: Don’t skip the resting time for the batter. Those 30 minutes allow the semolina to hydrate properly, resulting in softer, fluffier uttapams. Use this time to prepare your toppings.
While your batter is resting, make the topping mixture. Heat oil in a pan and add your chana dal first—let it turn golden and fragrant. Then add your mustard seeds and cumin seeds. Once they start crackling and sputtering, add your finely chopped shallots, green chilies, and ginger. Sauté everything until the shallots turn soft and slightly golden—this is when they develop sweetness.
Add your curry leaves (they’ll sizzle beautifully), salt, a pinch of asafoetida, and the grated carrots. Mix everything together well and let it cook for just a minute or two. The carrots should soften slightly but still retain some crunch. Turn off the heat and set this topping mixture aside. This is what’s going to make your uttapam colorful, flavorful, and absolutely delicious.
After your batter has rested, give it a good stir. If it’s thickened too much, add a splash of water to bring it back to the right consistency—it should be thick but still easily spreadable. Heat your tawa or griddle on medium heat. Unlike dosas that need high heat, uttapams cook better on medium heat because they’re thicker and need time to cook through.
Pour a ladleful of batter onto the center of the tawa and spread it gently in a circular motion, keeping it slightly thick—about half an inch thick. Don’t try to make it thin; uttapam is meant to be substantial and fluffy. Once you’ve spread the batter, immediately add a generous amount of your prepared topping mixture on top, spreading it evenly across the surface. Sprinkle fresh coriander leaves over everything, then drizzle ghee or oil around the edges and on top.
💡 Pro Tip: Press the toppings gently into the batter with the back of your spatula. This helps them stick and ensures they cook into the uttapam rather than just sitting on top.
Cover the tawa with a lid and let it cook for about a minute or until you see the edges starting to look cooked and the bottom has turned golden. The covering is important—it traps steam and helps the thick batter cook through evenly. Once the bottom is golden and the top looks cooked, carefully flip the uttapam. Cook the other side for another minute until it develops a nice golden color. The vegetables will caramelize slightly, adding even more flavor.
Remove your uttapam from the tawa and serve it hot. The bottom should be golden and slightly crispy, the inside should be soft and fluffy, and those vegetables should be beautifully cooked and fragrant.
🌿 Vegan Swap: Replace curd with plant-based yogurt (coconut or soy yogurt work beautifully) and use oil instead of ghee for cooking. Everything else is already vegan!
What to Serve Alongside
Rava uttapam’s perfect companion is coconut chutney—creamy, cool, and slightly sweet to balance the savory, spiced uttapam. Tomato chutney is another excellent choice, as is peanut chutney. Many people love it with sambar, which makes it a complete, hearty meal. A hot cup of filter coffee or masala chai alongside makes this breakfast absolutely perfect.
How to Serve It Right
Serve uttapams hot and fresh, straight off the tawa. They’re at their absolute best when they’re just cooked—that’s when the exterior is slightly crispy, the interior is fluffy, and the vegetables are at their most aromatic. If you’re making multiple uttapams, keep the cooked ones warm in a low oven (around 100°C) loosely covered with foil. Don’t stack them directly on top of each other or they’ll steam and lose their texture.
Cut each uttapam into quarters or serve whole, depending on size. Arrange them on a plate with your choice of chutney on the side. Some people like to drizzle a little extra ghee on top just before serving for added richness.
💡 Pro Tip: If your uttapam is sticking to the tawa, your pan probably needs more oil or ghee, or it’s not hot enough. Make sure your tawa is properly heated and well-greased before pouring the batter.
Packing for Lunch or Bulk Preparation
Rava uttapam is excellent for meal prep and travels reasonably well. The batter can be made ahead and refrigerated for up to 24 hours—just give it a good stir and adjust the consistency with water before using. The topping mixture can also be prepared ahead and stored in the refrigerator for a day or two.
If you’re packing uttapams for lunch, let them cool completely before packing to prevent sogginess. Wrap them individually in foil or parchment paper and pack your chutney separately. They’ll stay fresh for several hours and can be eaten at room temperature or reheated briefly in a microwave.
For bulk preparation or parties, you can cook all the uttapams ahead of time and keep them warm in an oven, or cook them as guests arrive if you have someone to man the tawa. The batter holds well, so you can make batch after batch without any issues. Just remember to stir the batter occasionally as the rava tends to settle at the bottom.
You can also customize the toppings based on what you have—add finely chopped tomatoes, bell peppers, grated beetroot, or even some paneer. The beauty of uttapam is its versatility. Kids especially love the colorful vegetable toppings, making this a great way to get them to eat their vegetables without complaint!
Other Related Recipes you might like
- Instant Rava Paniyaram — soft, spiced rava dumplings made from a similar batter — great alternative breakfast bite.
- Set Dosa — fluffy, soft dosas that pair beautifully with the same chutneys and sambar.
- Ghee Karam Dosa — ghee-rich, aromatic dosa — a richer dosa option to serve alongside uttapam.
- Tomato Dosa — tangy tomato-infused dosa for a bright, flavorful variation.
- Idli Sambar — classic lentil and vegetable sambar — the perfect soupy accompaniment for uttapam.
- Peanut Chutney — creamy, nutty chutney that complements the savory rava flavors.
- Chammanthi (Coconut Side Dish) — fresh coconut chutney — a cooling, traditional dip for uttapam.
Instant Rava Uttapam
Description
Instant Rava Uttapam is a soft, fluffy, and wholesome South Indian breakfast made with rava, curd, and veggies. This no-fermentation recipe is quick, easy, and perfect for busy mornings or tiffin boxes. With crispy edges, a fluffy center, and colorful toppings, it’s a delicious dish that pairs beautifully with coconut or tomato chutney. A must-try for anyone who loves comforting, homemade breakfasts!
Ingredients
To Make Batter
To Make Toppings
Instructions
-
Soak Flattened Rice
Wash and soak flattened rice for a few minutes. -
Chop Ingredients
Finely chop shallots, green chilies, and ginger. -
Grate Carrots
Grate carrots and keep them ready.
-
Prepare Herbs
Prepare curry leaves and coriander leaves.
Methods
-
Prepare the Batter
In a large bowl, take rava and soaked flattened rice. Add curd and salt. Mix well. Add water little by little until you get a smooth batter. Let it rest for 30 minutes.
-
Prepare the Toppings
Heat oil in a pan. Add chana dal, mustard seeds, and cumin seeds. Once they splutter, add chopped shallots, green chilies, and ginger. Sauté well. Add curry leaves, salt, asafoetida, and grated carrots. Mix everything and set aside.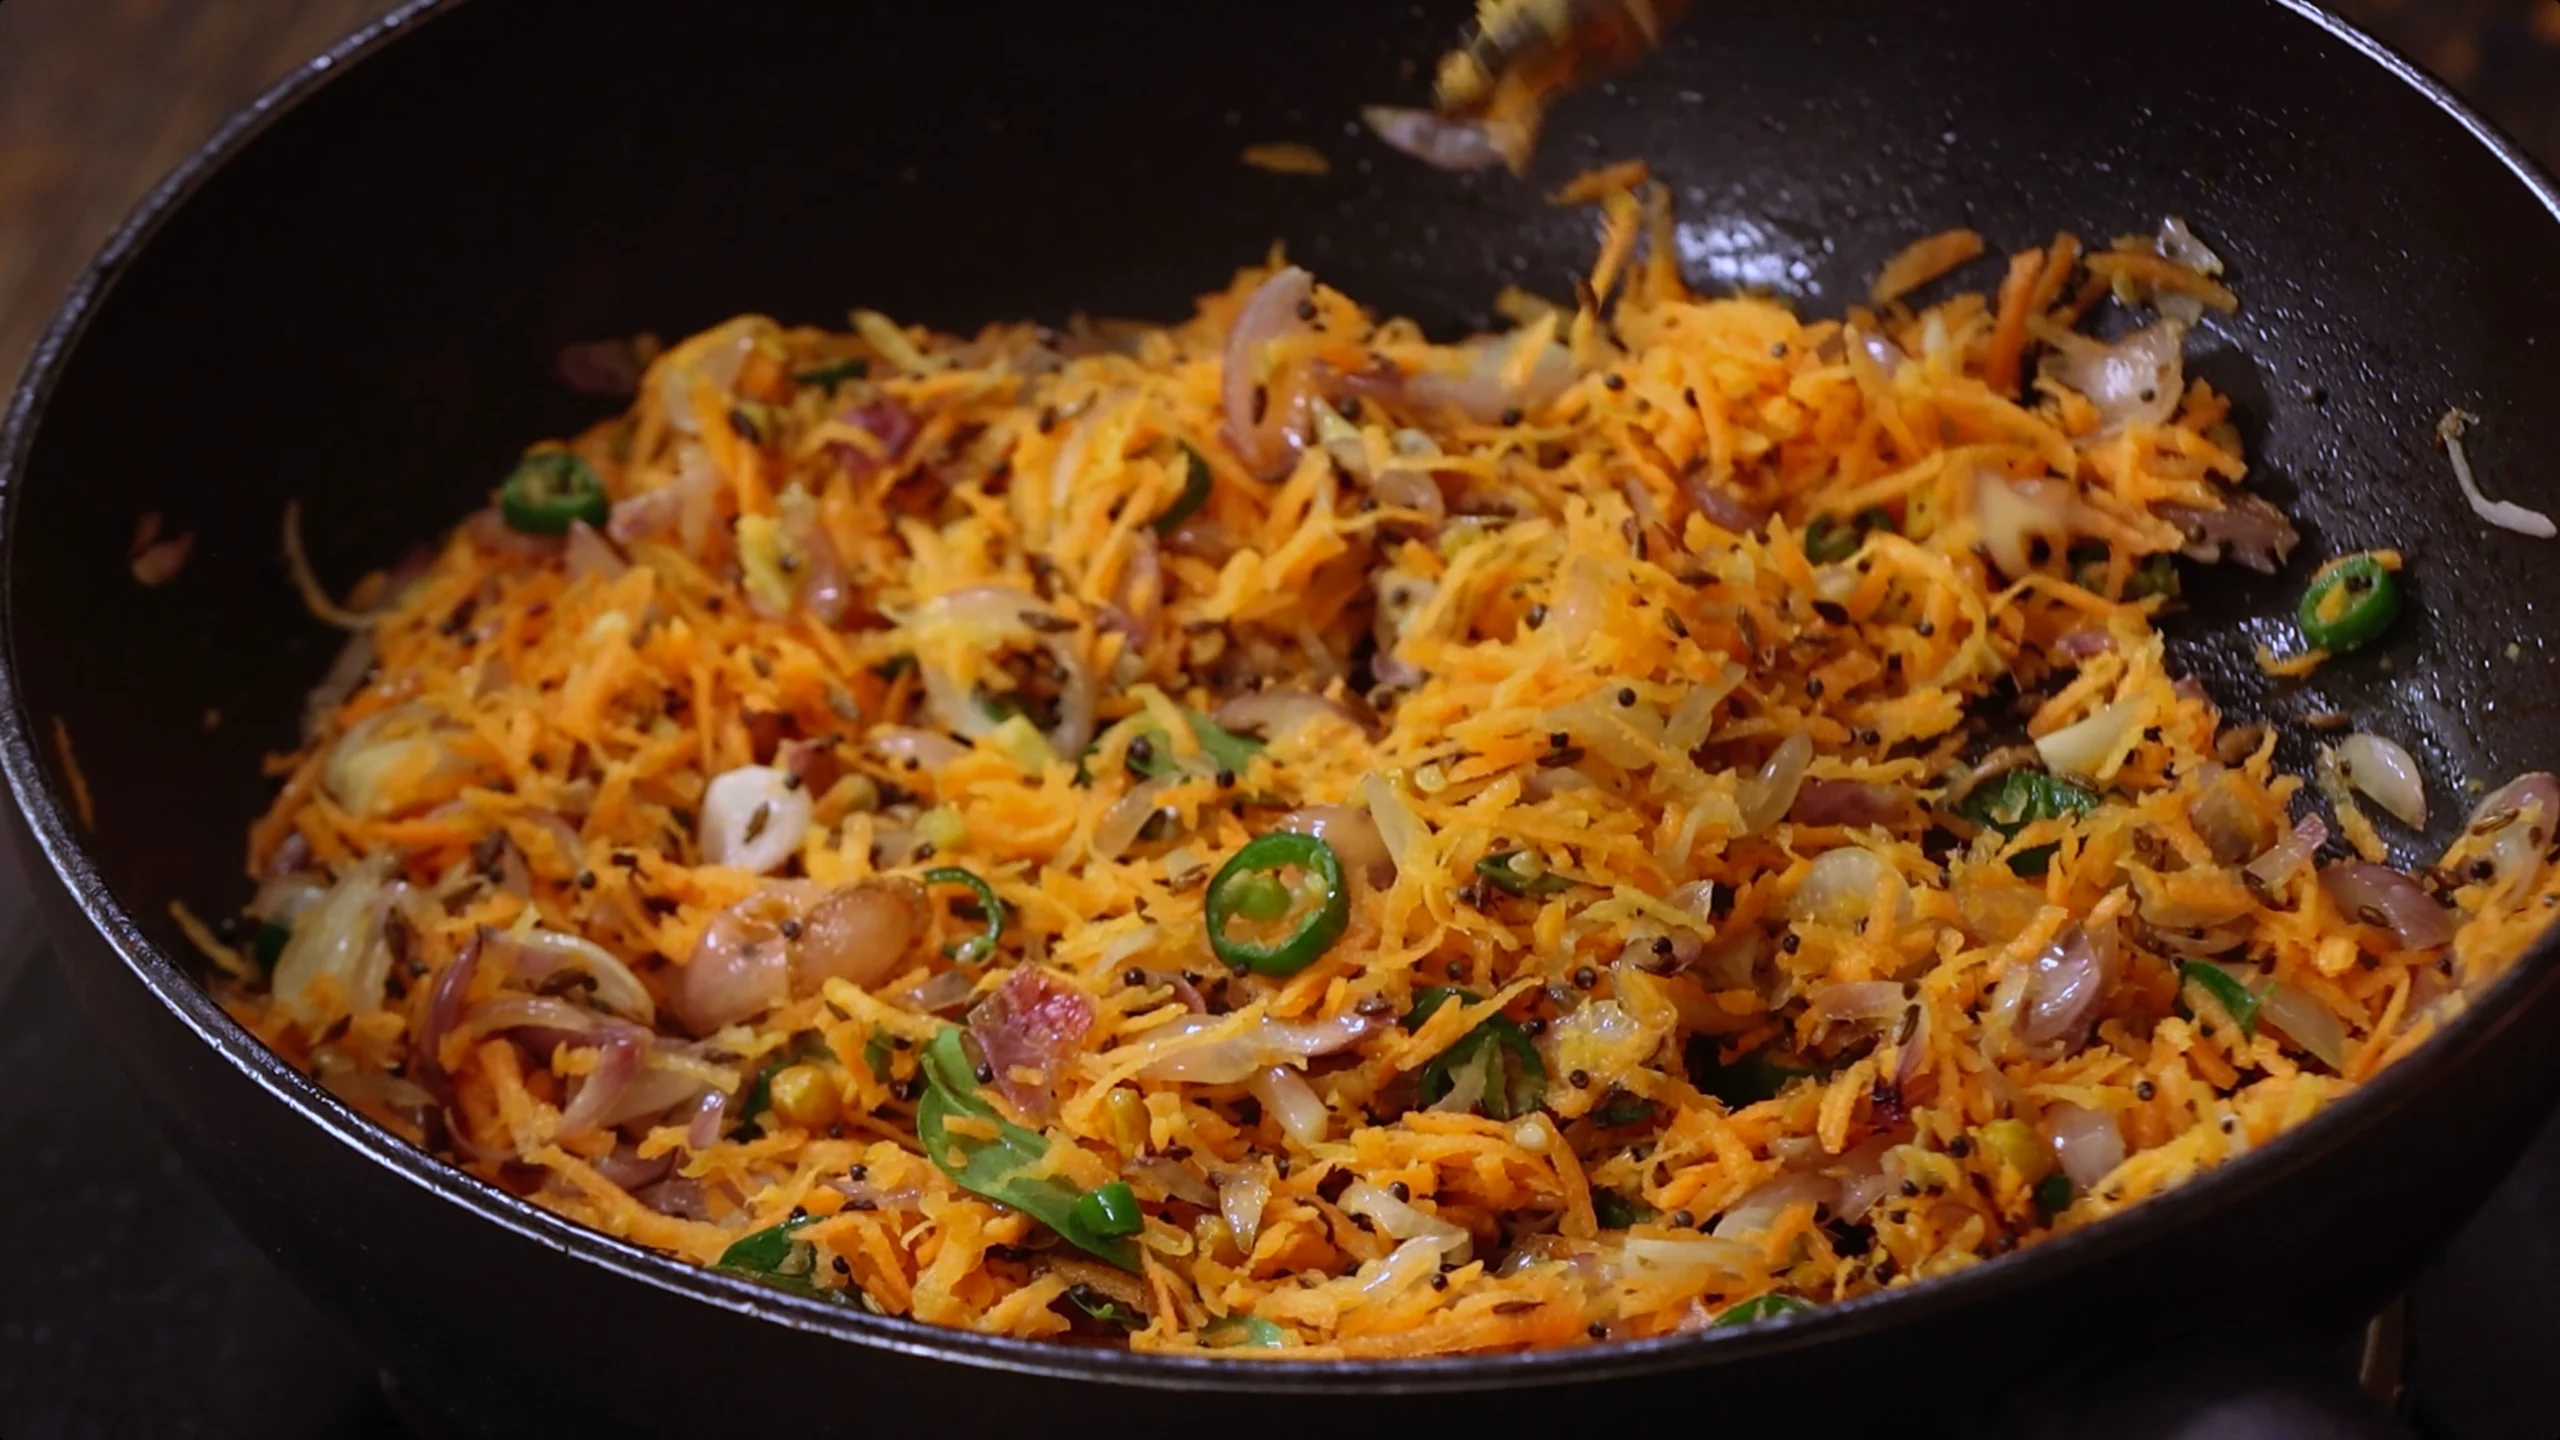
-
Make the Uttapam
Heat a tawa and pour a ladleful of batter. Spread it gently, keeping it slightly thick. Add prepared toppings, sprinkle coriander leaves, and drizzle ghee or oil. Cover and cook for a minute, then flip the uttapam carefully and cook for another minute.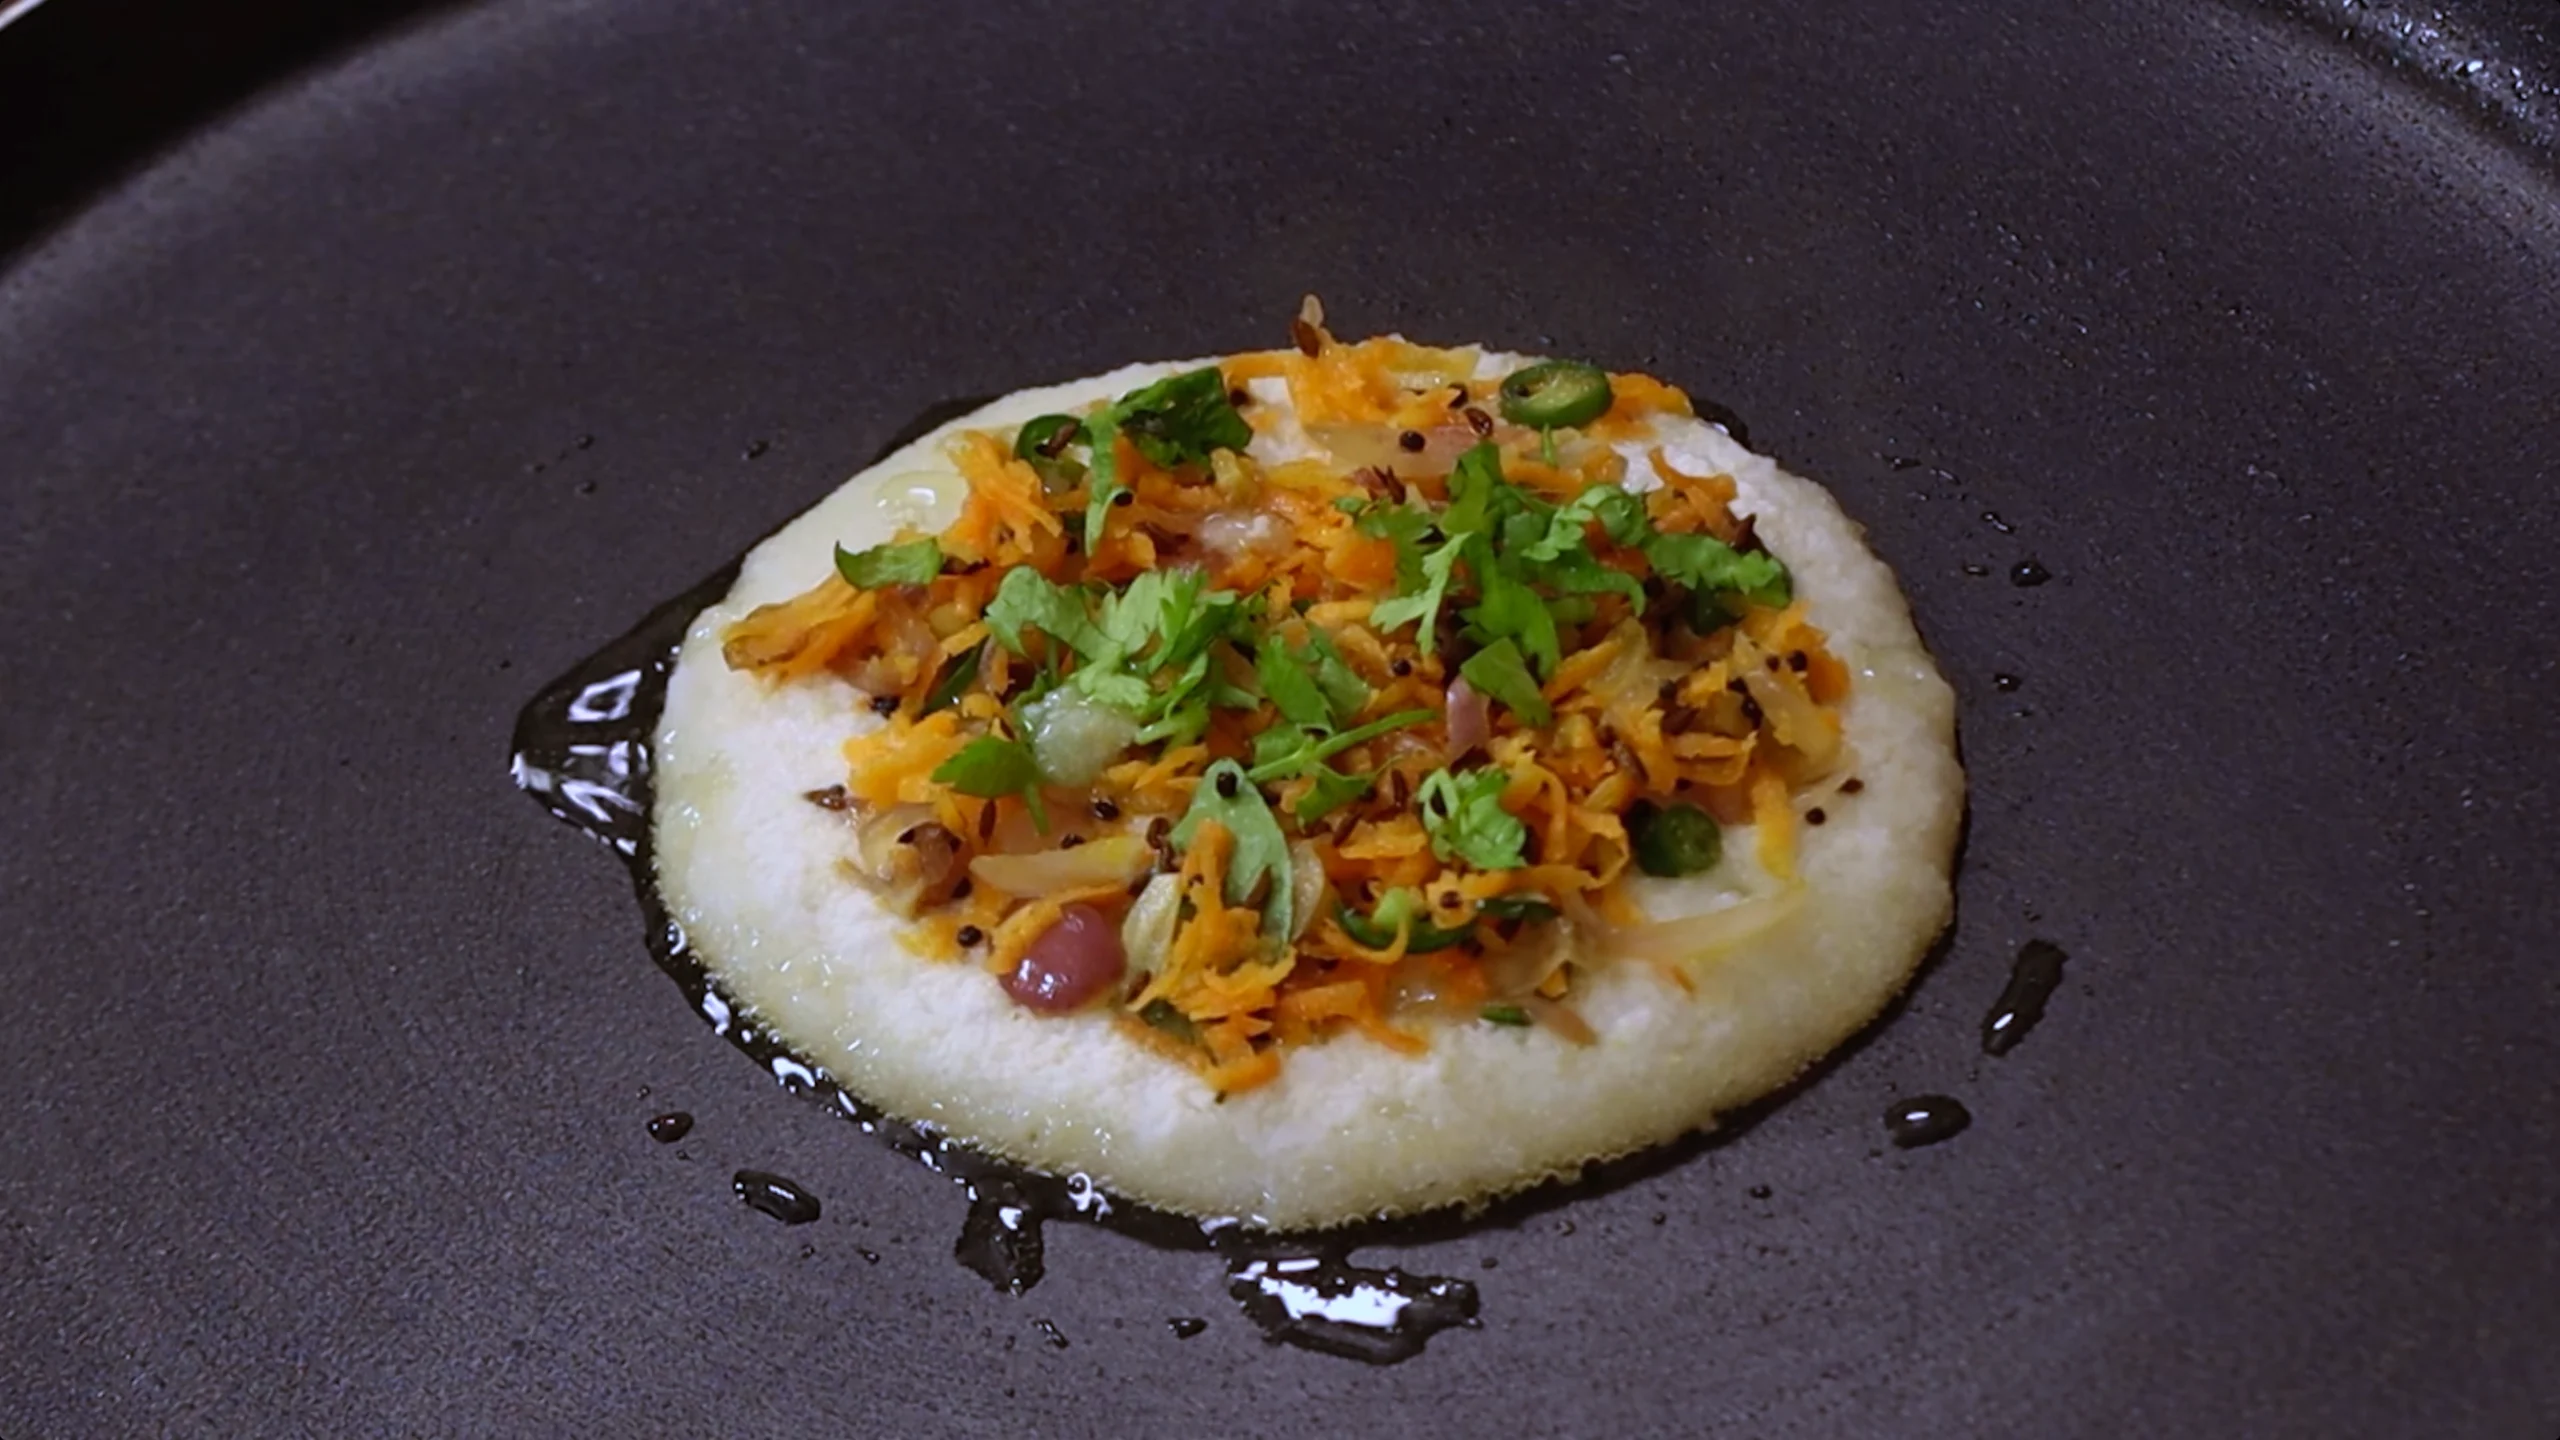
-
Serve & Enjoy
Your hot, fluffy uttapam is ready! Serve with coconut or tomato chutney and enjoy a delicious breakfast.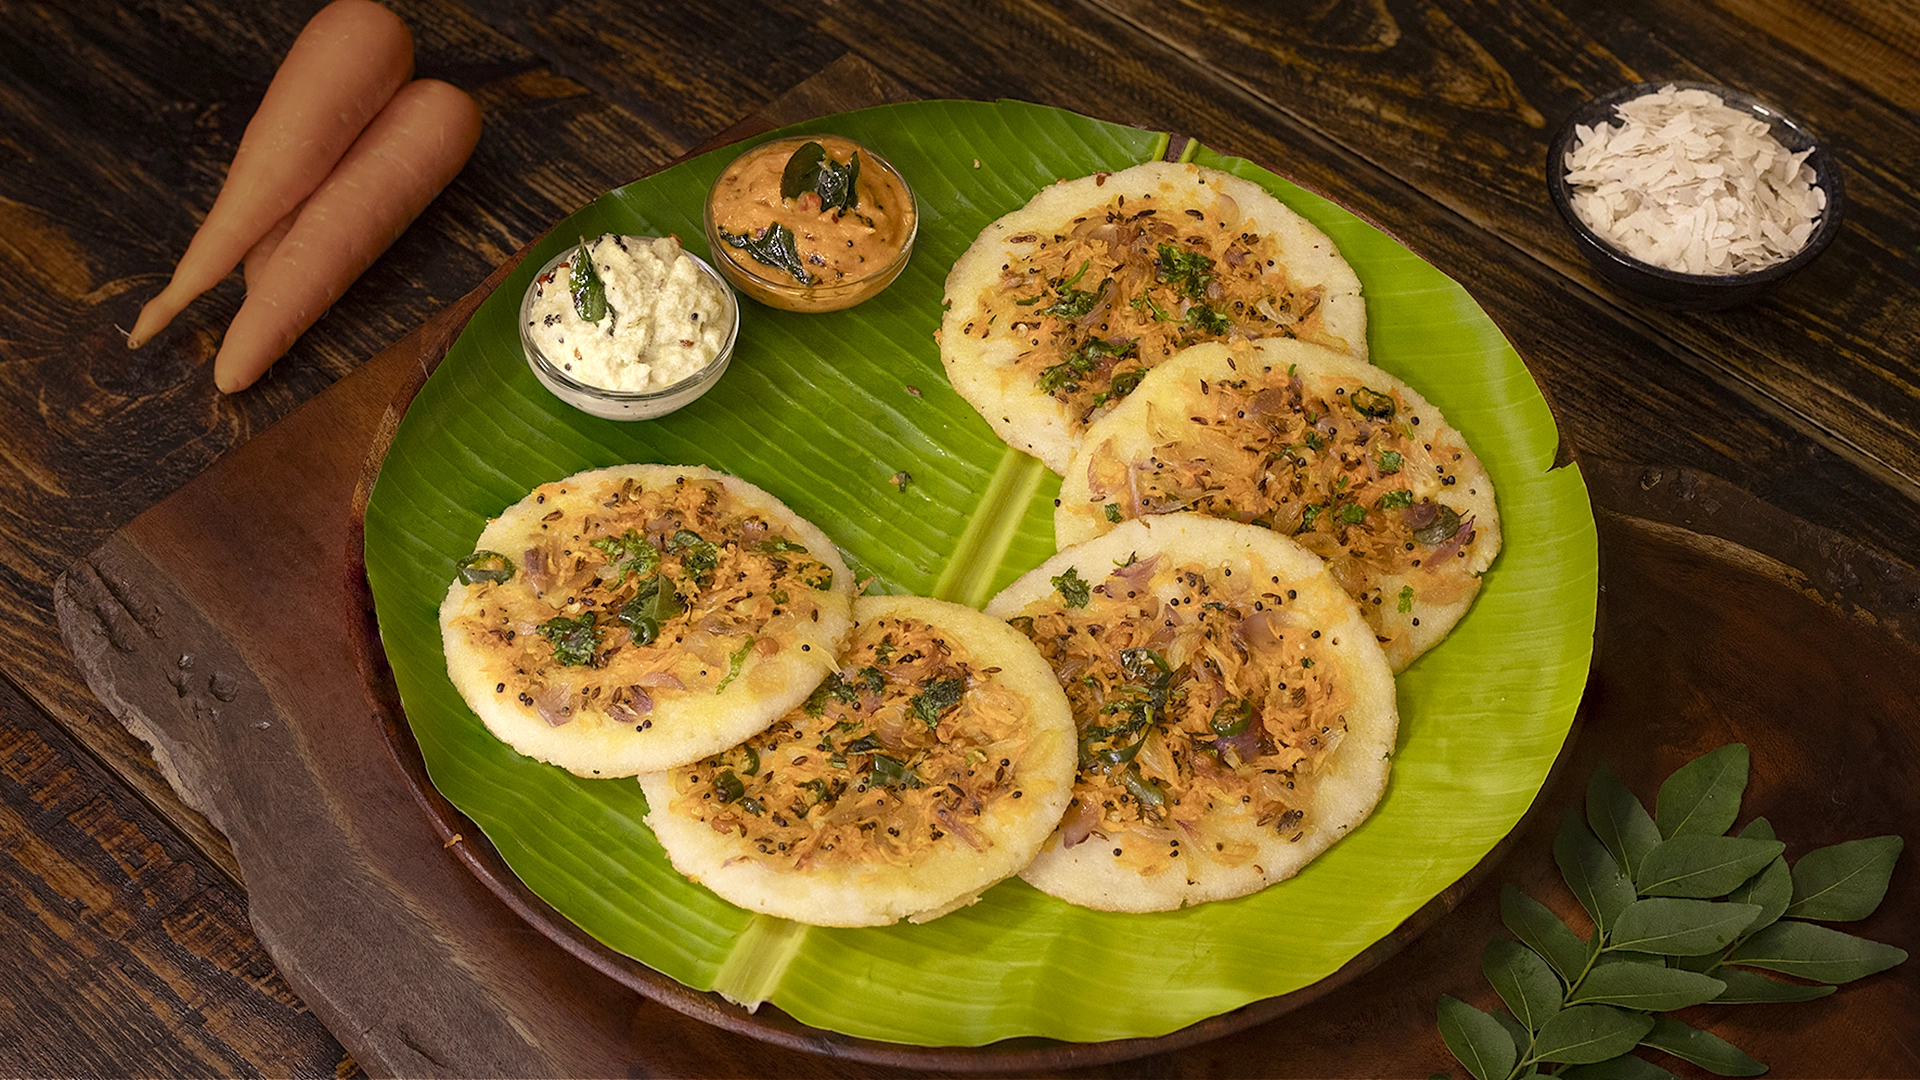
Equipment
 3")


Affiliate Disclosure: This post contains Amazon affiliate links, i.e., when you buy any product using the links below, we get commissions. but it doesn’t cost you anything extra. If you do purchase any product using the given links, we thank you in advance!
Nutrition Facts
Servings 3
- Amount Per Serving
- Calories 210kcal
- % Daily Value *
- Total Fat 5g8%
- Total Carbohydrate 35g12%
- Dietary Fiber 3g12%
- Protein 6g12%
* Percent Daily Values are based on a 2,000 calorie diet. Your daily value may be higher or lower depending on your calorie needs.