There's a reason masala vada holds such a special place in South Indian snack culture. These aren't your delicate, dainty fritters—these are robust, deeply flavored, gloriously crispy-on-the-outside, tender-on-the-inside beauties that pack a serious punch. The moment you bite through that golden, craggy exterior, you're met with a soft, aromatic interior studded with bits of onion, ginger, and fresh herbs. The fennel and cumin add warmth, the green chilies bring heat, and those curry leaves? They're the aromatic soul that makes everything sing.
Masala vada is the ultimate tea-time companion, the snack you make when friends drop by unexpectedly, the thing you crave on rainy evenings. They're equally at home at a festive gathering or wrapped in newspaper from a street vendor's cart. Serve them hot with coconut chutney and a steaming cup of chai, and you've got pure comfort in your hands.
The Story Behind These Golden Fritters
Masala vada, also known as paruppu vadai in Tamil Nadu or ambode in Karnataka, is deeply rooted in South Indian culinary tradition. Unlike the medu vada with its distinctive hole in the center, masala vada is all about texture and flavor—coarsely ground lentils mixed with aromatics and spices, shaped into thick patties, and fried until crispy. The technique of soaking lentils and grinding them without water is centuries old, creating a batter that holds together beautifully while frying and develops that characteristic crunchy exterior.
What makes these vadas special is their versatility. They're perfect as a standalone snack, but they also transform beautifully into vada pav when stuffed in bread, or become the star of dahi vada when soaked in spiced yogurt. But honestly, fresh out of the fryer with just a simple chutney? That's when they're at their absolute best.
Breaking Down Your Flavor Builders
Green Gram (Whole Moong Dal) – The foundation of your vada, providing earthy flavor, protein, and that perfect texture when ground coarsely. Soaking is essential for the right consistency.
Rock Salt – Adds a subtle mineral complexity that regular salt doesn't quite achieve. It also helps in getting the right texture during grinding.
Onion – Finely chopped for sweetness, crunch, and moisture. It caramelizes slightly during frying, adding depth.
Green Chilies – Fresh heat that's bright and sharp, not just burning. Adjust based on your spice tolerance.
Ginger – Adds warmth and a slight pungency that cuts through the richness of the fried vada.
Curry Leaves – These are non-negotiable. They add that distinctive South Indian aroma and flavor that makes these vadas authentic.
Fennel Seeds – Sweet, licorice-like notes that add complexity and help with digestion.
Cumin Seeds – Earthy, warm, and slightly bitter in the best way. They're a classic pairing with lentils.
Coriander Leaves – Fresh, bright, and herbaceous. They lighten up the rich, fried exterior.
Salt – For seasoning the batter properly so every bite is flavorful.
Oil – For deep frying to that perfect golden crisp.
How This All Comes Together
The first and most important step happens hours before you even think about frying—soaking your green gram for at least 10 hours or overnight. This isn't optional. The soaking allows the lentils to absorb water, soften, and expand, which is what gives you the right texture when you grind them. Skip this, and you'll struggle to get the batter consistency right.
While your green gram is soaking away, you can prep your aromatics. Finely chop your onion—you want small pieces that distribute evenly throughout the vada. Do the same with your green chilies and ginger. The finer you chop these, the better they'll integrate into the batter. Roughly chop your coriander leaves and keep those curry leaves whole—they'll release their fragrance beautifully when mixed in.
Once your green gram has soaked long enough, drain it completely. Here's where the technique gets interesting—you're going to grind this in two batches, and it's crucial that you don't add any water. Take half of the soaked green gram and transfer it to your mixer jar. Add your rock salt and grind in pulse mode. Keep stopping to scrape down the sides, and pulse again until you get a coarse texture. It should look rough and grainy, not smooth like a paste.
💡 Pro Tip: The key to perfect masala vada is grinding without water. This keeps the batter thick and prevents it from absorbing too much oil during frying. Be patient with the pulse mode—it's worth it.
For the second batch, add the remaining soaked green gram along with your chopped onion, green chilies, ginger, whole curry leaves, fennel seeds, and cumin seeds. Grind this coarsely as well, again without adding any water. This batch will have more texture from all the aromatics and spices.
Transfer both batches to a large bowl and mix them together thoroughly. Fold in your chopped coriander leaves, and this is when you should taste and adjust the salt. The batter should be thick enough to hold its shape when you form it into patties—if it's too loose, your vadas will fall apart in the oil; if it's too thick, they'll be dense and won't cook through properly.
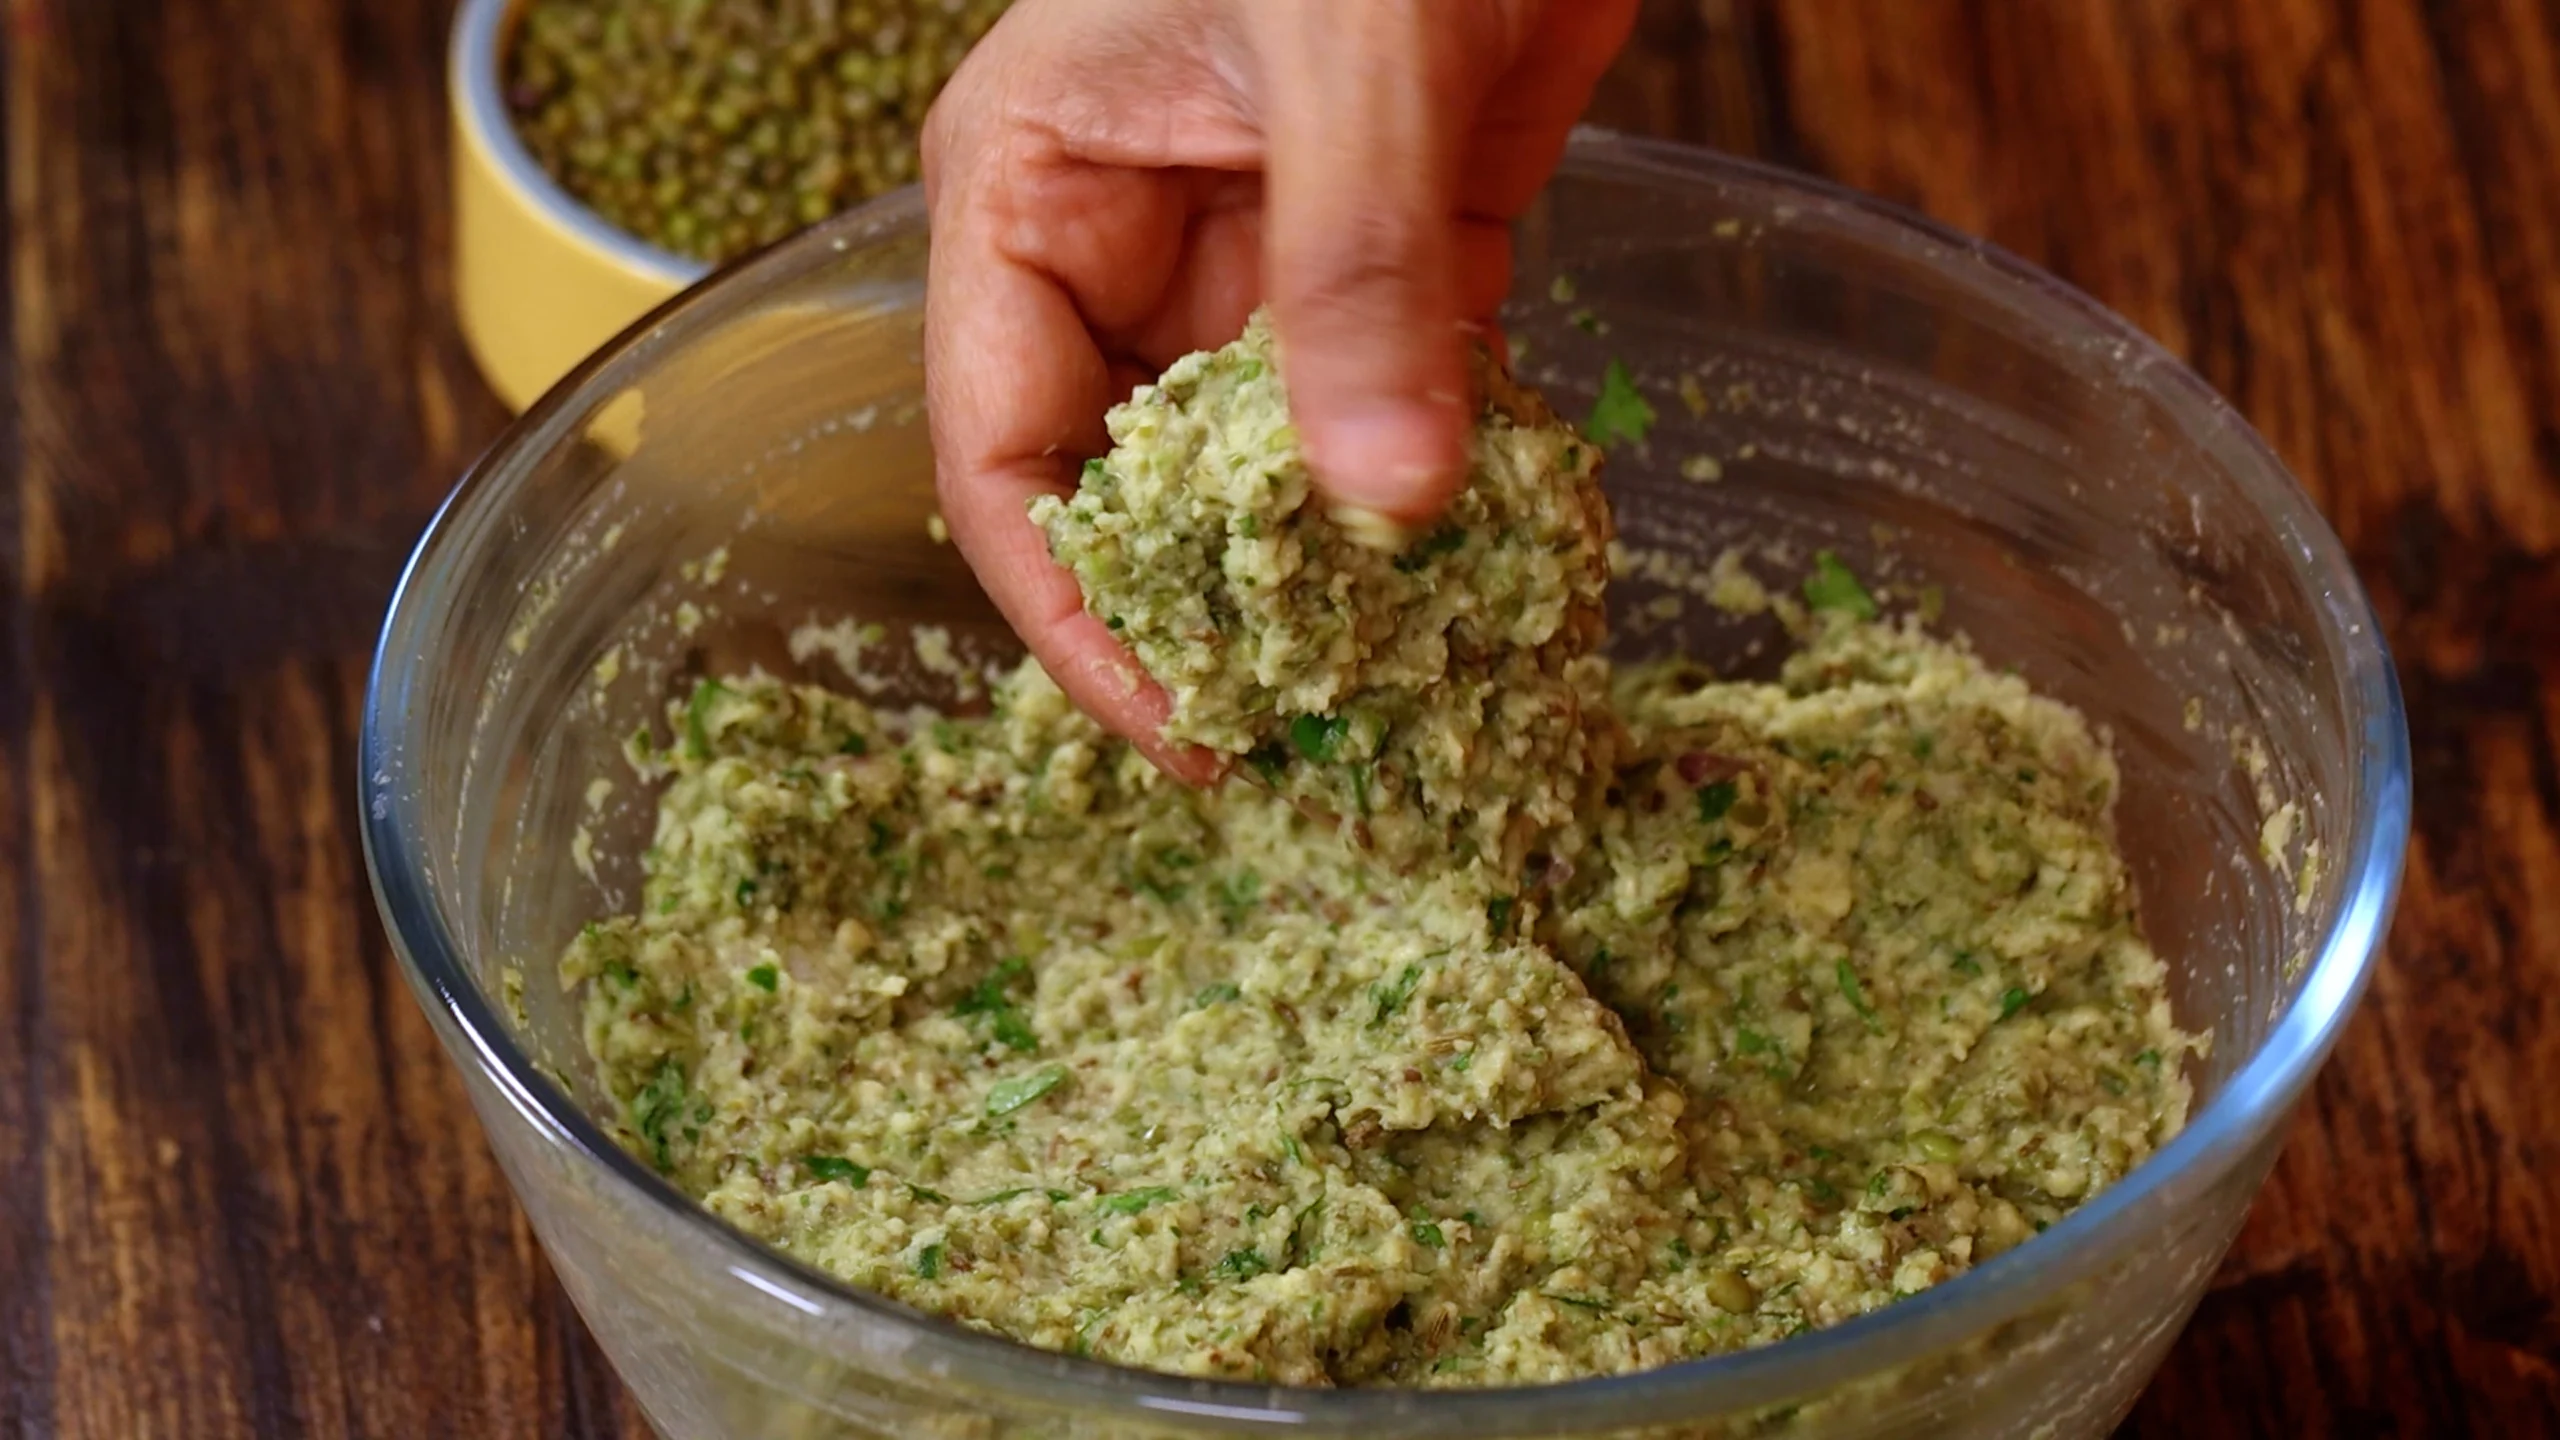
Now comes the shaping. Take a small portion of the batter—about the size of a lime—and shape it into a vada using your hands. Some people prefer using a banana leaf or even plastic wrap to flatten it, which prevents the batter from sticking to your palms. Flatten it slightly into a thick patty, maybe about half an inch thick. Don't make them too thin or they'll just be all crunch with no soft interior.
Heat your oil in a kadai on medium flame. The temperature is critical here—too hot and your vadas will brown on the outside while remaining raw inside; too cool and they'll absorb excessive oil and turn greasy. Test the oil by dropping a tiny bit of batter into it. If it rises to the surface immediately but doesn't brown instantly, you're good to go.
💡 Pro Tip: Maintain a steady medium heat throughout frying. Medium heat gives you that perfect golden color and ensures the inside cooks through completely while the outside gets wonderfully crispy.
Carefully slide your shaped vadas into the hot oil. Don't overcrowd the kadai—give each vada space to fry evenly. They'll sizzle enthusiastically when they hit the oil. Fry them until they're golden brown and crispy all over, turning them gently once or twice to ensure even cooking. This should take about 4-5 minutes per batch.
Once they're beautifully golden and crisp, use a slotted spoon to lift them out and place them on paper towels to drain any excess oil. That paper towel step is important—it keeps your vadas from being greasy.
https://www.youtube.com/watch?v=uxc86Fzq7QU
What to Serve Alongside
Masala vada's best friend is coconut chutney—that cool, creamy chutney against the hot, crispy vada is magic. You could also serve it with mint chutney, tomato chutney, or even a simple onion-tomato raita. A hot cup of masala chai or filter coffee on the side makes this the perfect evening snack. Some people love eating these with ketchup too, though purists might disagree!
How to Serve It Right
Always serve masala vadas hot and fresh. They're at their absolute best straight from the fryer when that exterior is at its crispiest. If you're serving them at a gathering, keep them warm in a low oven (around 120°C) rather than covering them, which would make them soggy. Arrange them on a plate lined with a paper napkin, with your chutneys in small bowls on the side.
💡 Pro Tip: If your vadas have cooled down and lost some crispiness, you can revive them by reheating in an air fryer or oven at 180°C for 5-7 minutes. Don't use a microwave—it'll make them soft and chewy.
Packing for Parties or Bulk Preparation
Masala vada is excellent for bulk preparation because the batter holds well and you can fry in large batches. You can even prepare the batter a few hours ahead and keep it refrigerated—just bring it back to room temperature before frying. For parties, fry them about 30 minutes before serving and keep them warm in the oven.
If you're packing these for travel or a picnic, let them cool completely first, then pack in a container lined with paper towels. They'll stay reasonably crispy for a few hours. You can also freeze the shaped, unfried vadas on a tray, then transfer them to freezer bags. When you want to eat them, fry directly from frozen—just give them an extra minute or two in the oil.
For big gatherings, this recipe scales up beautifully. Just soak more green gram and maintain the proportions of spices and aromatics. You can grind larger batches and set up an assembly line for shaping and frying to make the process more efficient.
Green Gram Vada are golden, crisp fritters made from soaked and coarsely ground green gram (moong dal) batter, spiced with fresh ginger, green chilies, and aromatic curry leaves. The dal’s natural sweetness is complemented by savory notes of asafoetida and crushed black pepper, while finely chopped onions, cilantro, and a handful of grated coconut lend texture and brightness. Shaped into flat discs and shallow‑fried until they puff and develop a lacy, crunchy edge, each vada reveals a tender, flavorful interior. Serve piping‑hot Green Gram Vada with tangy tamarind‑date chutney or cooling coconut chutney for a protein‑rich snack that’s perfect for tea‑time or a light appetizer.
Ingredients
1.5cups green gram
1 rock salt
1 onion (finely chopped)
3 green chilies (adjust to taste)
1small piece ginger (finely chopped)
1handfull of curry leaves
1tsp fennel seeds
1tsp cumin seeds
1handful of coriander leaves (chopped)
1tsp salt (as per the needed)
1cup oil (for deep frying)
Instructions
Prep Work
1
Soak green gram
Soak green gram in water for at least 10 hours or overnight. This allows it to expand and soften.
2
Chop ingredientsFinely chop onion, green chilies, ginger, and coriander leaves. Keep curry leaves whole.
Method
3
Grind green gram
Transfer half of the soaked green gram to a mixer jar. Add rock salt and grind in pulse mode without adding water. Scrape down the sides to get a coarse batter.
4
Grind remaining gram with spicesAdd the remaining soaked green gram along with onion, green chilies, ginger, curry leaves, fennel seeds, and cumin seeds. Grind coarsely without water.
5
Combine and mixMix both batches of batter together in a bowl. Stir in chopped coriander leaves and adjust salt if needed.
6
Shape vadaTake small portions of the batter, shape into vada using your hands or a banana leaf. Flatten slightly.
7
Heat oilHeat oil in a kadai on medium flame until hot enough for deep frying.
8
Deep fry vadaCarefully drop vada into the hot oil and fry until golden brown and crisp. Fry in batches without overcrowding.
9
Drain excess oilRemove the fried vada and place them on a paper towel to drain excess oil.
10
ServeServe hot and crispy with chutney or enjoy as is!
Nutrition Facts
Servings 4
Amount Per Serving
Calories180kcal
% Daily Value *
Total Fat9g14%
Saturated Fat1.2g6%
Sodium320mg14%
Potassium280mg8%
Total Carbohydrate20g7%
Dietary Fiber4g16%
Sugars2g
Protein7g15%
Vitamin A 210 IU
Vitamin C 4 mg
Calcium 45 mg
Iron 2 mg
Magnesium 40 mg
Zinc 1 mg
* Percent Daily Values are based on a 2,000 calorie diet. Your daily value may be higher or lower depending on your calorie needs.
Keywords:
Green Gram Vada, crisp fritters, fritters, vada
Stay Connected with Home Cooking Show!
Love our recipes? Follow us for more delicious cooking inspiration, tips, and behindthescenes fun!
Pin this recipe to share with your friends and followers.
Hema Subramanian
Food and Lifestyle Blogger
I love to cook! And through Home Cooking Show, I hope to make cooking fun, easy, and approachable for everyone.
My way of sharing recipes is all about keeping it simple and delicious—no complicated steps, no fancy ingredients, just real home-cooked food that anyone can make. Cooking should be a joy, not a chore! Whether you’re a beginner or a seasoned cook, you’ll find something here to inspire you. If you love good food made with love, then you’re in the right place!

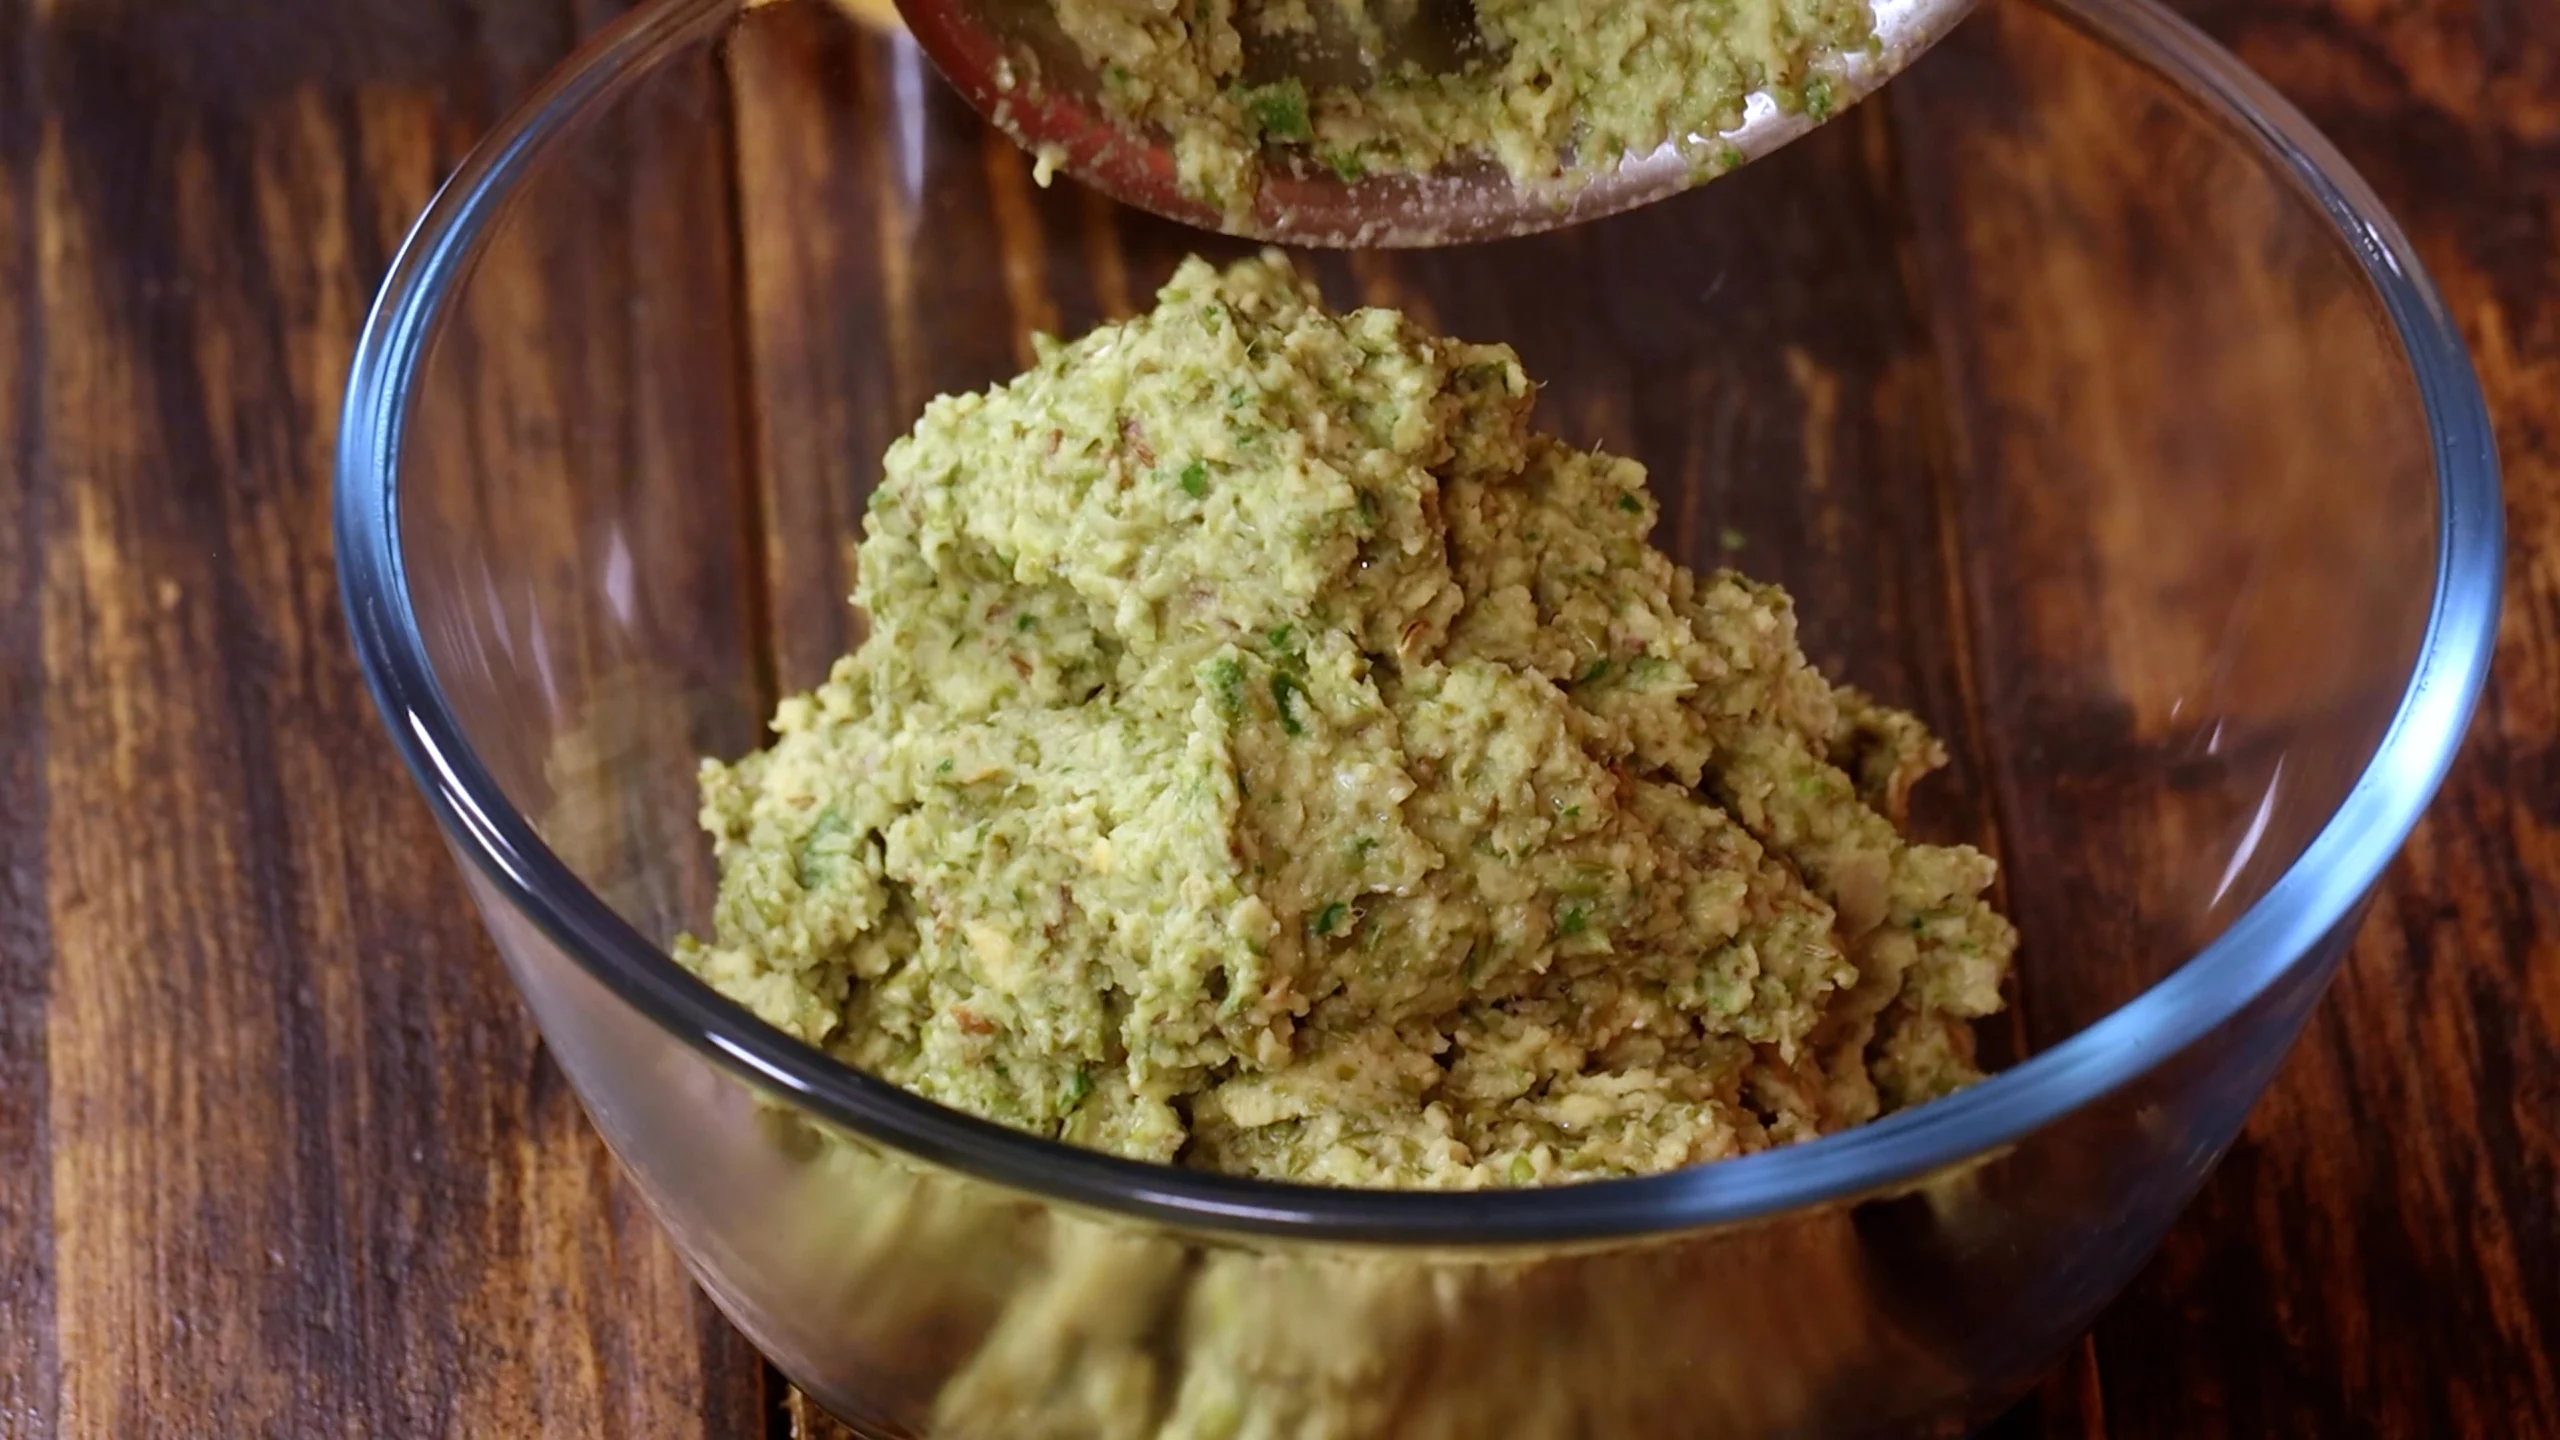
 Mix both batches of batter together in a bowl. Stir in chopped coriander leaves and adjust salt if needed.
 Take small portions of the batter, shape into vada using your hands or a banana leaf. Flatten slightly.
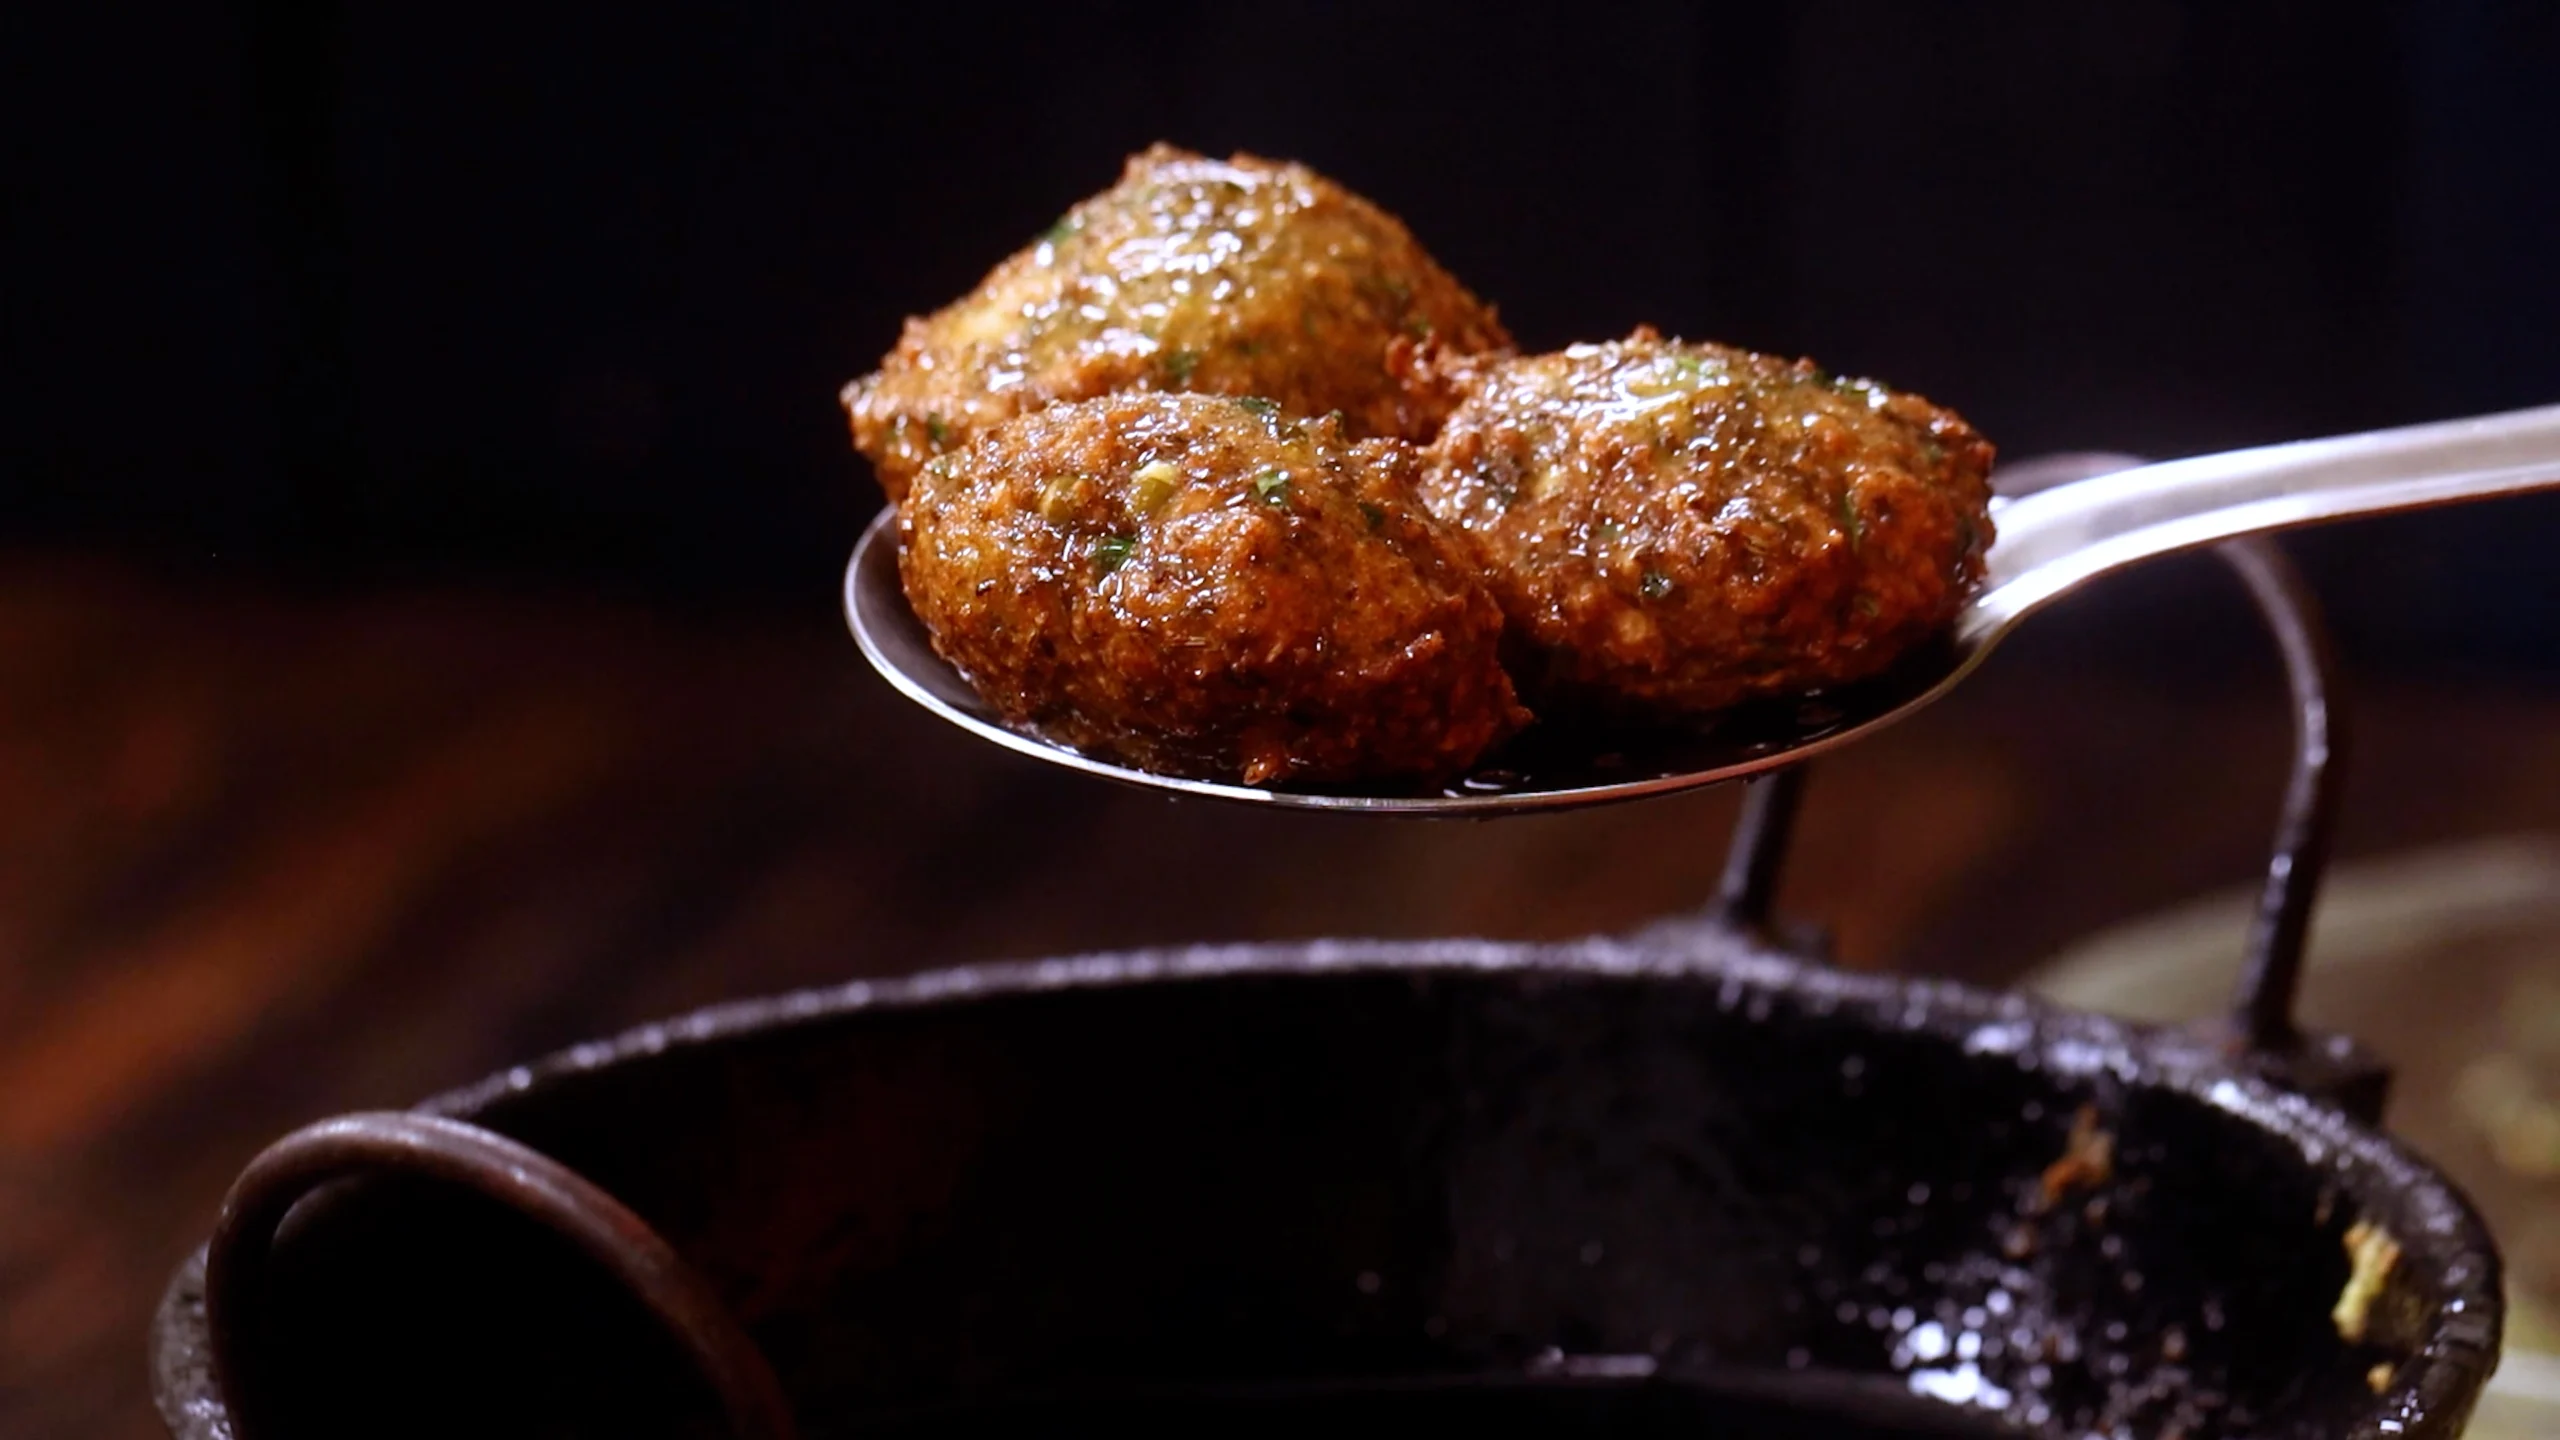 Carefully drop vada into the hot oil and fry until golden brown and crisp. Fry in batches without overcrowding.
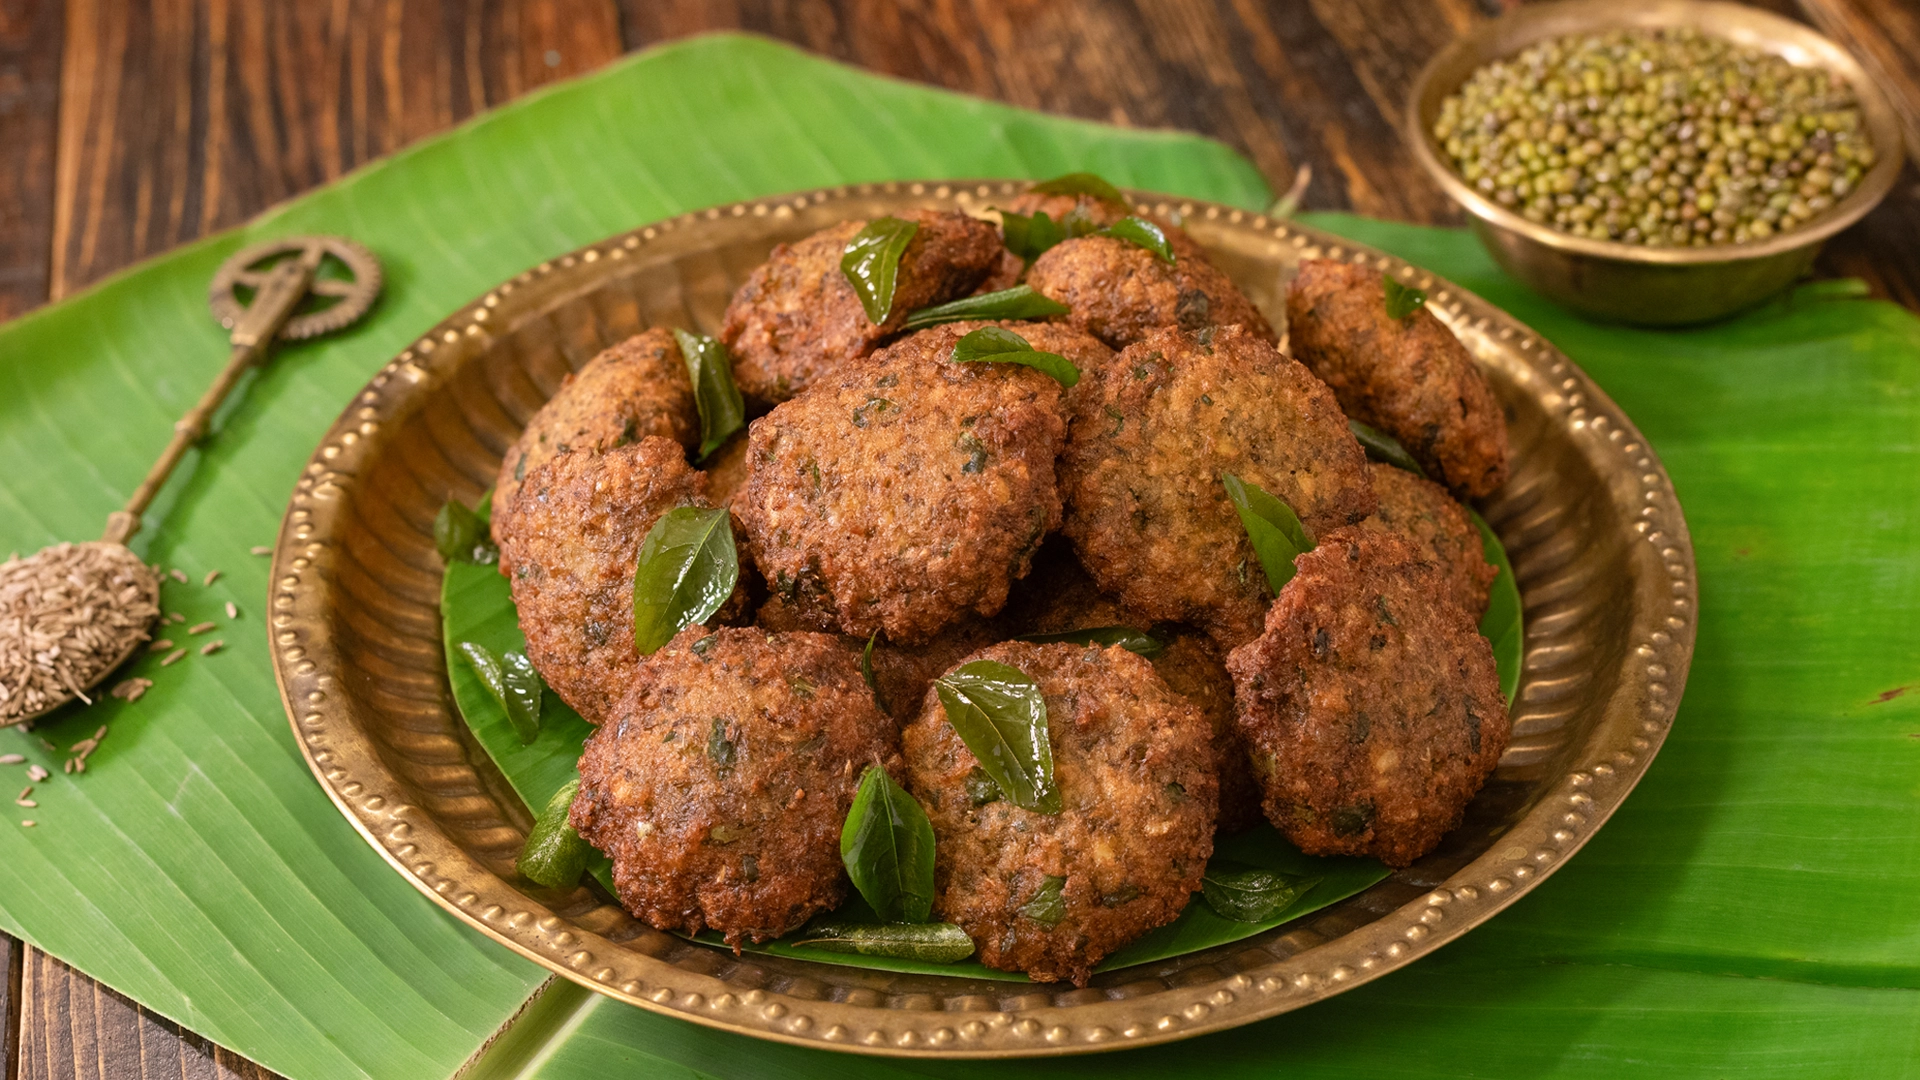 Serve hot and crispy with chutney or enjoy as is!