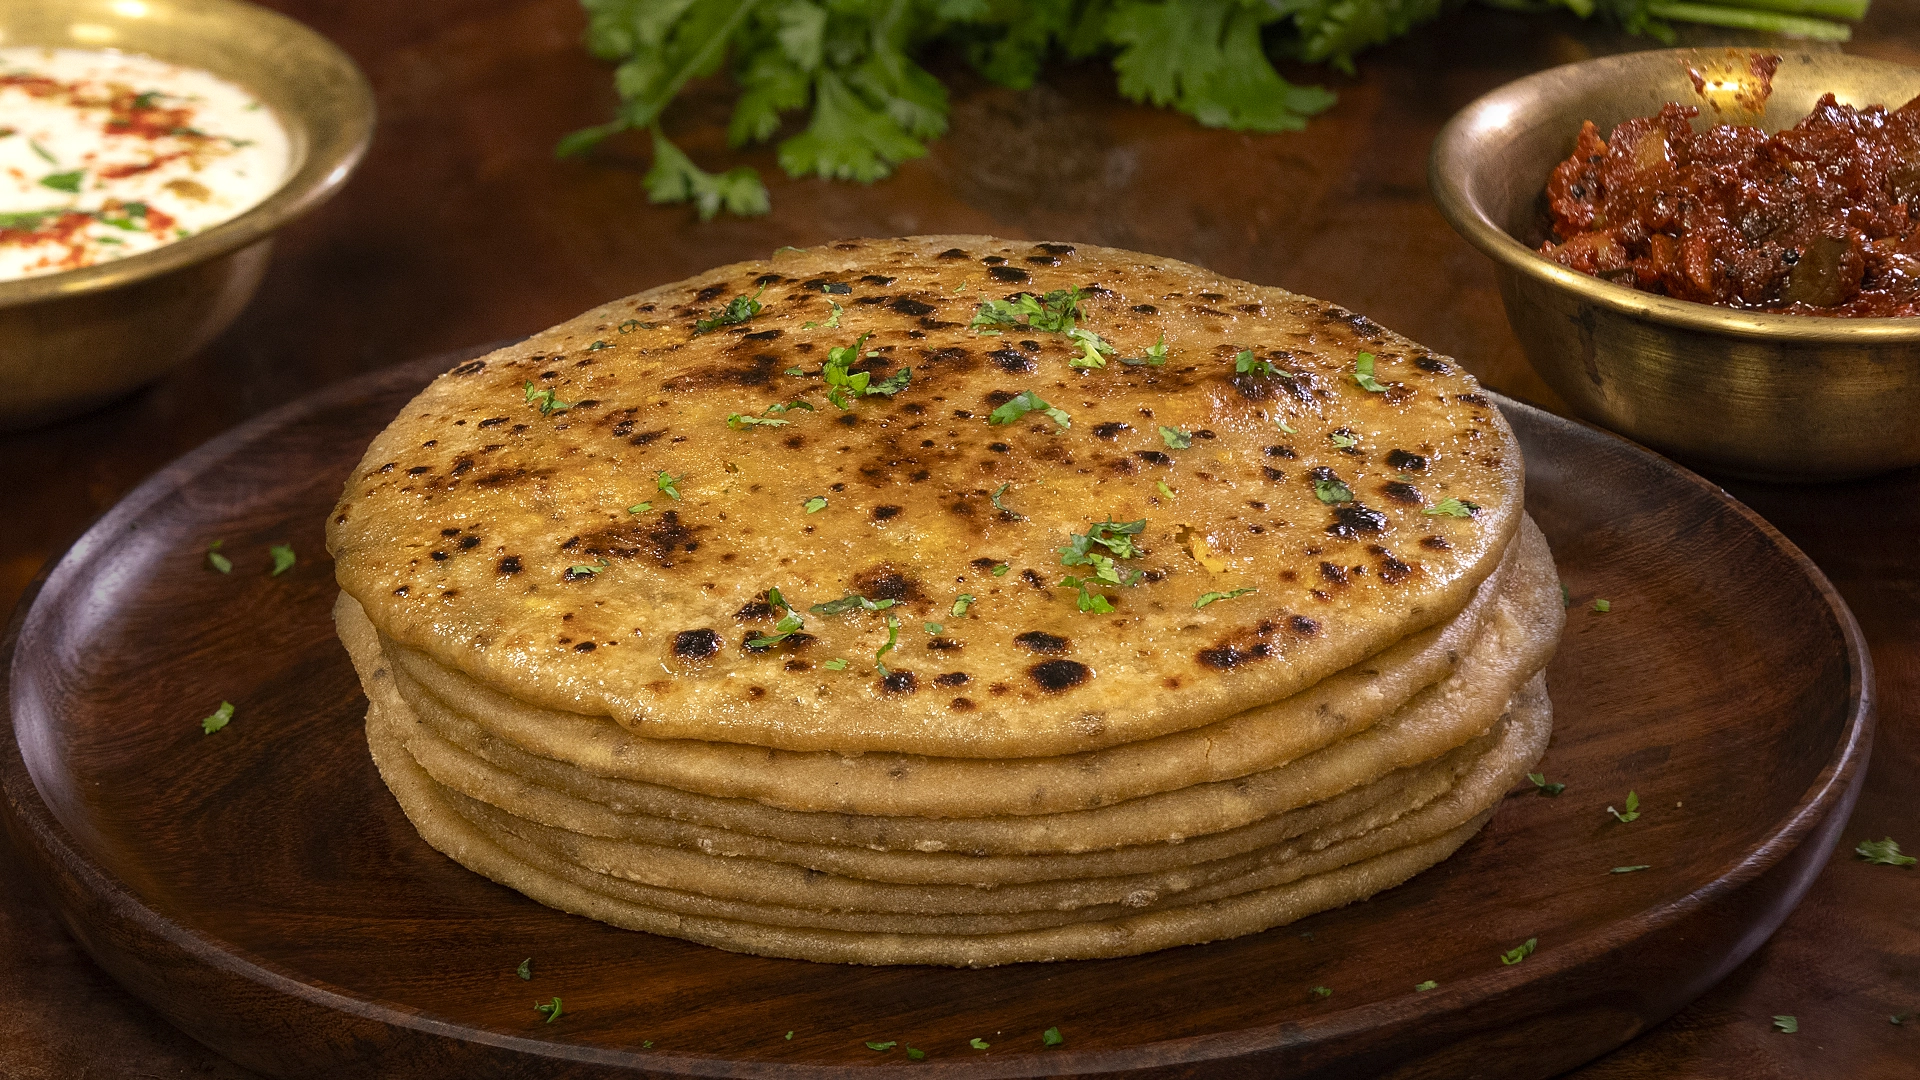
Picture a golden-brown flatbread, crispy on the outside and layered within, hiding a treasure of spiced cauliflower that’s been cooked down until it’s tender and flavorful. When you tear into a gobi paratha, steam escapes carrying the aroma of cumin, garam masala, and ajwain, while flecks of fresh coriander and the kick of green chili make each bite interesting. The dough is soft yet sturdy enough to hold all that filling without tearing, and that ghee sizzling on the tawa creates those gorgeous brown spots and adds richness to every mouthful. The texture is what makes it special—the slight crunch from the crispy exterior giving way to soft, pillowy dough and that spiced, slightly moist cauliflower filling. This is winter breakfast food, highway dhaba food, lazy Sunday brunch food, and comfort food all rolled into one. Perfect on its own or with just a dollop of yogurt and some pickle.
Gobi paratha hails from Punjab, where stuffed parathas are an art form and a way of life. In traditional Punjabi homes, the morning doesn’t truly begin without parathas on the table—sometimes stuffed with potatoes, sometimes radish, often cauliflower. The genius of stuffed parathas lies in their portability and completeness—they’re essentially a full meal wrapped in bread, which made them perfect for farmers heading out to the fields or travelers on long journeys. Cauliflower became a popular filling because it’s a winter vegetable that grows abundantly in North India, and when grated and spiced properly, it doesn’t release too much moisture, making it ideal for stuffing. I remember winter mornings at my aunt’s place in Amritsar, watching her roll out paratha after paratha with practiced ease, each one puffing up perfectly on the tawa. She’d say the secret was in the love and the amount of ghee you weren’t afraid to use.
The Ingredients That Make Gobi Paratha
For the dough, you’ll need wheat flour (atta)—the foundation that holds everything together and gives you that wholesome, nutty flavor. Salt seasons the dough from within. Ajwain (carom seeds) adds a distinctive, slightly bitter, thyme-like flavor and aids digestion—crucial when you’re eating something as filling as a stuffed paratha. Water brings everything together into a workable dough.
For the filling, fresh cauliflower is the star—when grated, it cooks quickly and absorbs all those wonderful spices. Onion adds sweetness and moisture. Garlic brings pungent depth. Fresh ginger adds warmth and that essential zing. Green chili provides the heat—adjust to your tolerance. Fresh coriander leaves add brightness and that herbal, citrusy note. Salt seasons the filling. Turmeric powder gives color and earthy undertones. Chili powder layers in more heat and color. Cumin powder brings that warm, earthy, slightly citrusy flavor that’s essential to North Indian cooking. Garam masala is the finishing spice blend that ties everything together with its complex, aromatic warmth. Oil helps cook the filling and prevents it from being too dry.
How To Make Gobi Paratha
Let’s start with the prep work because organized prep makes the actual cooking smooth and enjoyable. Take your cauliflower and grate it finely using the medium holes on a box grater. You want small, rice-like pieces, not chunks—this ensures even cooking and makes the filling easier to seal inside the paratha. Finely chop your onion, garlic, ginger, green chili, and coriander leaves. Keep everything ready in separate bowls.
Now for the dough. In a large bowl, combine your wheat flour, salt, and ajwain. Mix these dry ingredients well so the ajwain is evenly distributed—you want that flavor in every bite. Add water gradually, a little at a time, and bring the mixture together with your hands. Once it forms a shaggy mass, start kneading. Knead for a good 5-7 minutes until you have a soft, smooth, pliable dough. It should be softer than chapati dough but not sticky—think play-dough consistency. Form it into a ball, smear a little oil on the surface to prevent drying, cover with a damp cloth or lid, and let it rest for 30 minutes. This resting time allows the gluten to relax and the flour to fully hydrate, making the dough much easier to roll out later.
💡 Pro Tip: The dough should be soft. If it’s too firm, your parathas will be tough and hard to roll without breaking. If it feels stiff after resting, knead in a few drops of water to soften it.
While the dough rests, let’s prepare the filling. In a large bowl, combine your grated cauliflower, chopped onion, garlic, ginger, green chili, and coriander leaves. Add salt, turmeric powder, chili powder, cumin powder, and garam masala. Mix everything together really well with your hands, making sure every bit of cauliflower is coated with spices.
Heat a wide pan over medium flame and add oil. Once the oil is hot, add your entire spiced cauliflower mixture. Sauté it, stirring frequently, for about 5-7 minutes. You’re not looking to fully cook the cauliflower here—just take the raw edge off and let the spices bloom. The mixture should soften slightly, the raw smell should disappear, and you should see the oil separating slightly from the mixture. Don’t cook it until it’s mushy; it needs to retain some texture. Once done, remove from heat and let it cool completely before using. This is important—hot filling will make the dough difficult to work with and can tear it.
💡 Pro Tip: Squeeze out any excess moisture from the cooked filling before using it. Too much moisture will make your parathas soggy and difficult to seal. Just press the cooled filling against a strainer or squeeze it gently with your hands.
Now for the assembly. Divide your rested dough into equal portions—about the size of a large lime or small lemon. Roll each portion between your palms to create smooth balls with no cracks. Take one ball, dust it lightly with flour, and roll it out into a small circle about 4-5 inches in diameter. Don’t make it too thin at this stage.
Place about 2-3 tablespoons of the cooled cauliflower filling in the center of this circle. Don’t overfill—greed will lead to torn parathas. Pull the edges of the dough up and over the filling, gathering them in the center like a little pouch. Pinch and seal the edges together firmly, twisting slightly to secure. You should have a stuffed ball with the filling completely enclosed inside.
Dust this stuffed ball lightly with flour and gently flatten it with your palm. Now comes the gentle rolling. Using a rolling pin, very gently roll this stuffed ball into a flat circle about 7-8 inches in diameter. Roll carefully and with even pressure—if you press too hard in one spot, the filling will break through. If the dough does tear and filling peeks out, just pinch it closed, dust with flour, and continue. It takes practice to get perfectly sealed parathas, so don’t worry if your first few aren’t perfect.
💡 Pro Tip: Roll from the center outward, rotating the paratha as you go to maintain an even thickness and circular shape. If you feel resistance, let it rest for a minute—the gluten needs time to relax.
Heat a tawa or flat griddle over medium-high flame. Once it’s hot, place your rolled paratha on it. Let it cook for about 30 seconds until you see the surface starting to change color and small bubbles forming. Flip it over. Now drizzle about half a teaspoon of ghee around the edges and on top of the paratha. After another 30-40 seconds, flip it again. Drizzle ghee on this side too. Use a flat spatula to press gently on the paratha, especially around the edges—this helps it cook evenly and encourages those beautiful golden-brown spots to form.
Keep flipping and pressing until both sides have gorgeous golden-brown spots and the paratha is cooked through—this takes about 3-4 minutes total. You should see steam escaping and smell that irresistible combination of roasted wheat, spiced cauliflower, and ghee. The paratha should feel firm but still have a slight give when pressed.
What Goes Along With Gobi Paratha
Gobi paratha is incredibly self-sufficient—it’s almost a complete meal on its own. The classic accompaniments are plain yogurt or raita (yogurt mixed with cucumber and spices), which cools down the spice and adds a creamy contrast.
A side of mango pickle or lime pickle adds tangy, spicy punch. Some people love it with a slab of butter on top. A glass of lassi (sweet or salted) or a hot cup of chai makes it breakfast perfection. For a more elaborate meal, serve it with dal or chickpea curry.
You will love it with these gravies
- Cauliflower Pickle
- Ginger Pickle (Allam Pachadi)
- Baby Corn Masala
- Meal Maker Curry (Soya Chunks Curry)
- Kadala Curry
- Paneer Butter Masala
- Afghani Paneer
How to Serve Gobi Paratha
Serve gobi parathas hot off the tawa—that’s when they’re at their absolute best. Place them on a plate, slather with a little extra ghee or butter if you’re feeling indulgent, and serve with yogurt and pickle on the side. They’re meant to be eaten with your hands, torn into pieces, and used to scoop up yogurt or pickle. Stack them in a covered container if making multiple parathas to keep them warm and soft.
How to Store Gobi Paratha
Store cooked parathas in an airtight container at room temperature for up to 24 hours, or refrigerate for 2-3 days. The dough can be refrigerated for up to 2 days, and the cooked filling lasts 3-4 days in the fridge—just assemble and cook when needed. You can also freeze assembled but uncooked parathas with parchment paper between each one, then cook them directly from frozen (they’ll just take a bit longer).
How to Reheat Gobi Paratha
Reheat parathas on a hot tawa for 30 seconds on each side, adding a tiny bit of ghee to refresh them. You can also microwave them for 20-30 seconds, though they won’t be as crispy. A toaster oven works wonderfully—just heat at 180°C (350°F) for 3-4 minutes and they’ll crisp up beautifully.
Common Substitutions
No cauliflower? This same technique works with grated radish (mooli paratha), mashed spiced potatoes (aloo paratha), or even paneer. Can’t find ajwain? Use dried thyme or just skip it—it adds flavor but isn’t absolutely essential. Want to make it healthier? Use half wheat flour and half multigrain flour. No ghee? Use butter or even oil, though you’ll miss that distinctive ghee flavor. If you’re avoiding onions and garlic, simply leave them out and increase the ginger and spices slightly.
🌿 Vegan Swap: Replace ghee with coconut oil or vegan butter. Everything else is already plant-based, so this is an easy modification that works beautifully.
Packing for a Party / Bulk Preparation
Gobi parathas are perfect for meal prep and feeding a crowd. Make the dough and filling the night before and refrigerate separately. In the morning, assemble and cook fresh—it goes quickly once you’re in the rhythm. You can also assemble all the parathas, stack them with parchment paper between each one, and refrigerate or freeze. Cook them as needed throughout the week. For parties, keep cooked parathas warm in a roti basket lined with a clean kitchen towel, or use a slow cooker on low covered with foil. The filling can be doubled or tripled easily, and once you master the technique, you can roll and cook multiple parathas simultaneously on a large tawa. These also travel beautifully—wrap them in foil and they stay warm for hours, making them perfect for road trips, picnics, or packed lunches.
Other Related Recipes you might like
- Brinjal Lobia Curry — spiced brinjal and beans curry that pairs well with stuffed parathas.
- Masoor Dal Curry — tangy, mildly spiced red-lentil gravy — a comforting side for parathas.
- Instant Rava Paniyaram — soft, savory rava dumplings — great as a breakfast/snack companion.
- Mixed Vegetable Paratha — hearty paratha stuffed with spiced mixed vegetables for a veggie-packed meal.
- Methi Paratha — flavorful fenugreek-infused flatbread — a healthy, aromatic pairing.
- Chammanthi (Coconut Side Dish) — fresh coconut chutney — cooling and classic with Indian breads.
- Eggless Mug Cake — quick sweet treat to finish the meal on a dessert note.
Gobi Paratha
Description
Gobi Paratha is a classic Indian stuffed flatbread filled with a flavorful cauliflower mixture. Soft, wholesome, and perfectly spiced, this paratha makes a comforting choice for any meal of the day. Whether you enjoy it with curd, butter, or pickle, each bite is warm, hearty, and satisfying. This recipe is simple, easy to follow, and perfect for beginners as well as seasoned home cooks.
Ingredients
For the dough
For the filling
Instructions
Prep Work
-
Grate the cauliflower
Grate the cauliflower finely and keep it aside.
-
Chop the vegetables
Finely chop onion, garlic, ginger, green chilli, and coriander leaves. -
Mix the dough
In a bowl, mix wheat flour, salt, and ajwain. Add water gradually and knead into a soft dough. Cover and let it rest for 30 mins.
-
Prepare the filling
In a bowl, mix grated cauliflower, chopped onion, garlic, ginger, green chilli, and coriander leaves with salt, turmeric, chilli powder, cumin powder, and garam masala.
Method
-
Heat the pan
Heat a wide pan and add oil
-
Cook the filling
Add the prepared cauliflower mixture and sauté until the raw smell disappears. Remove from heat and set aside.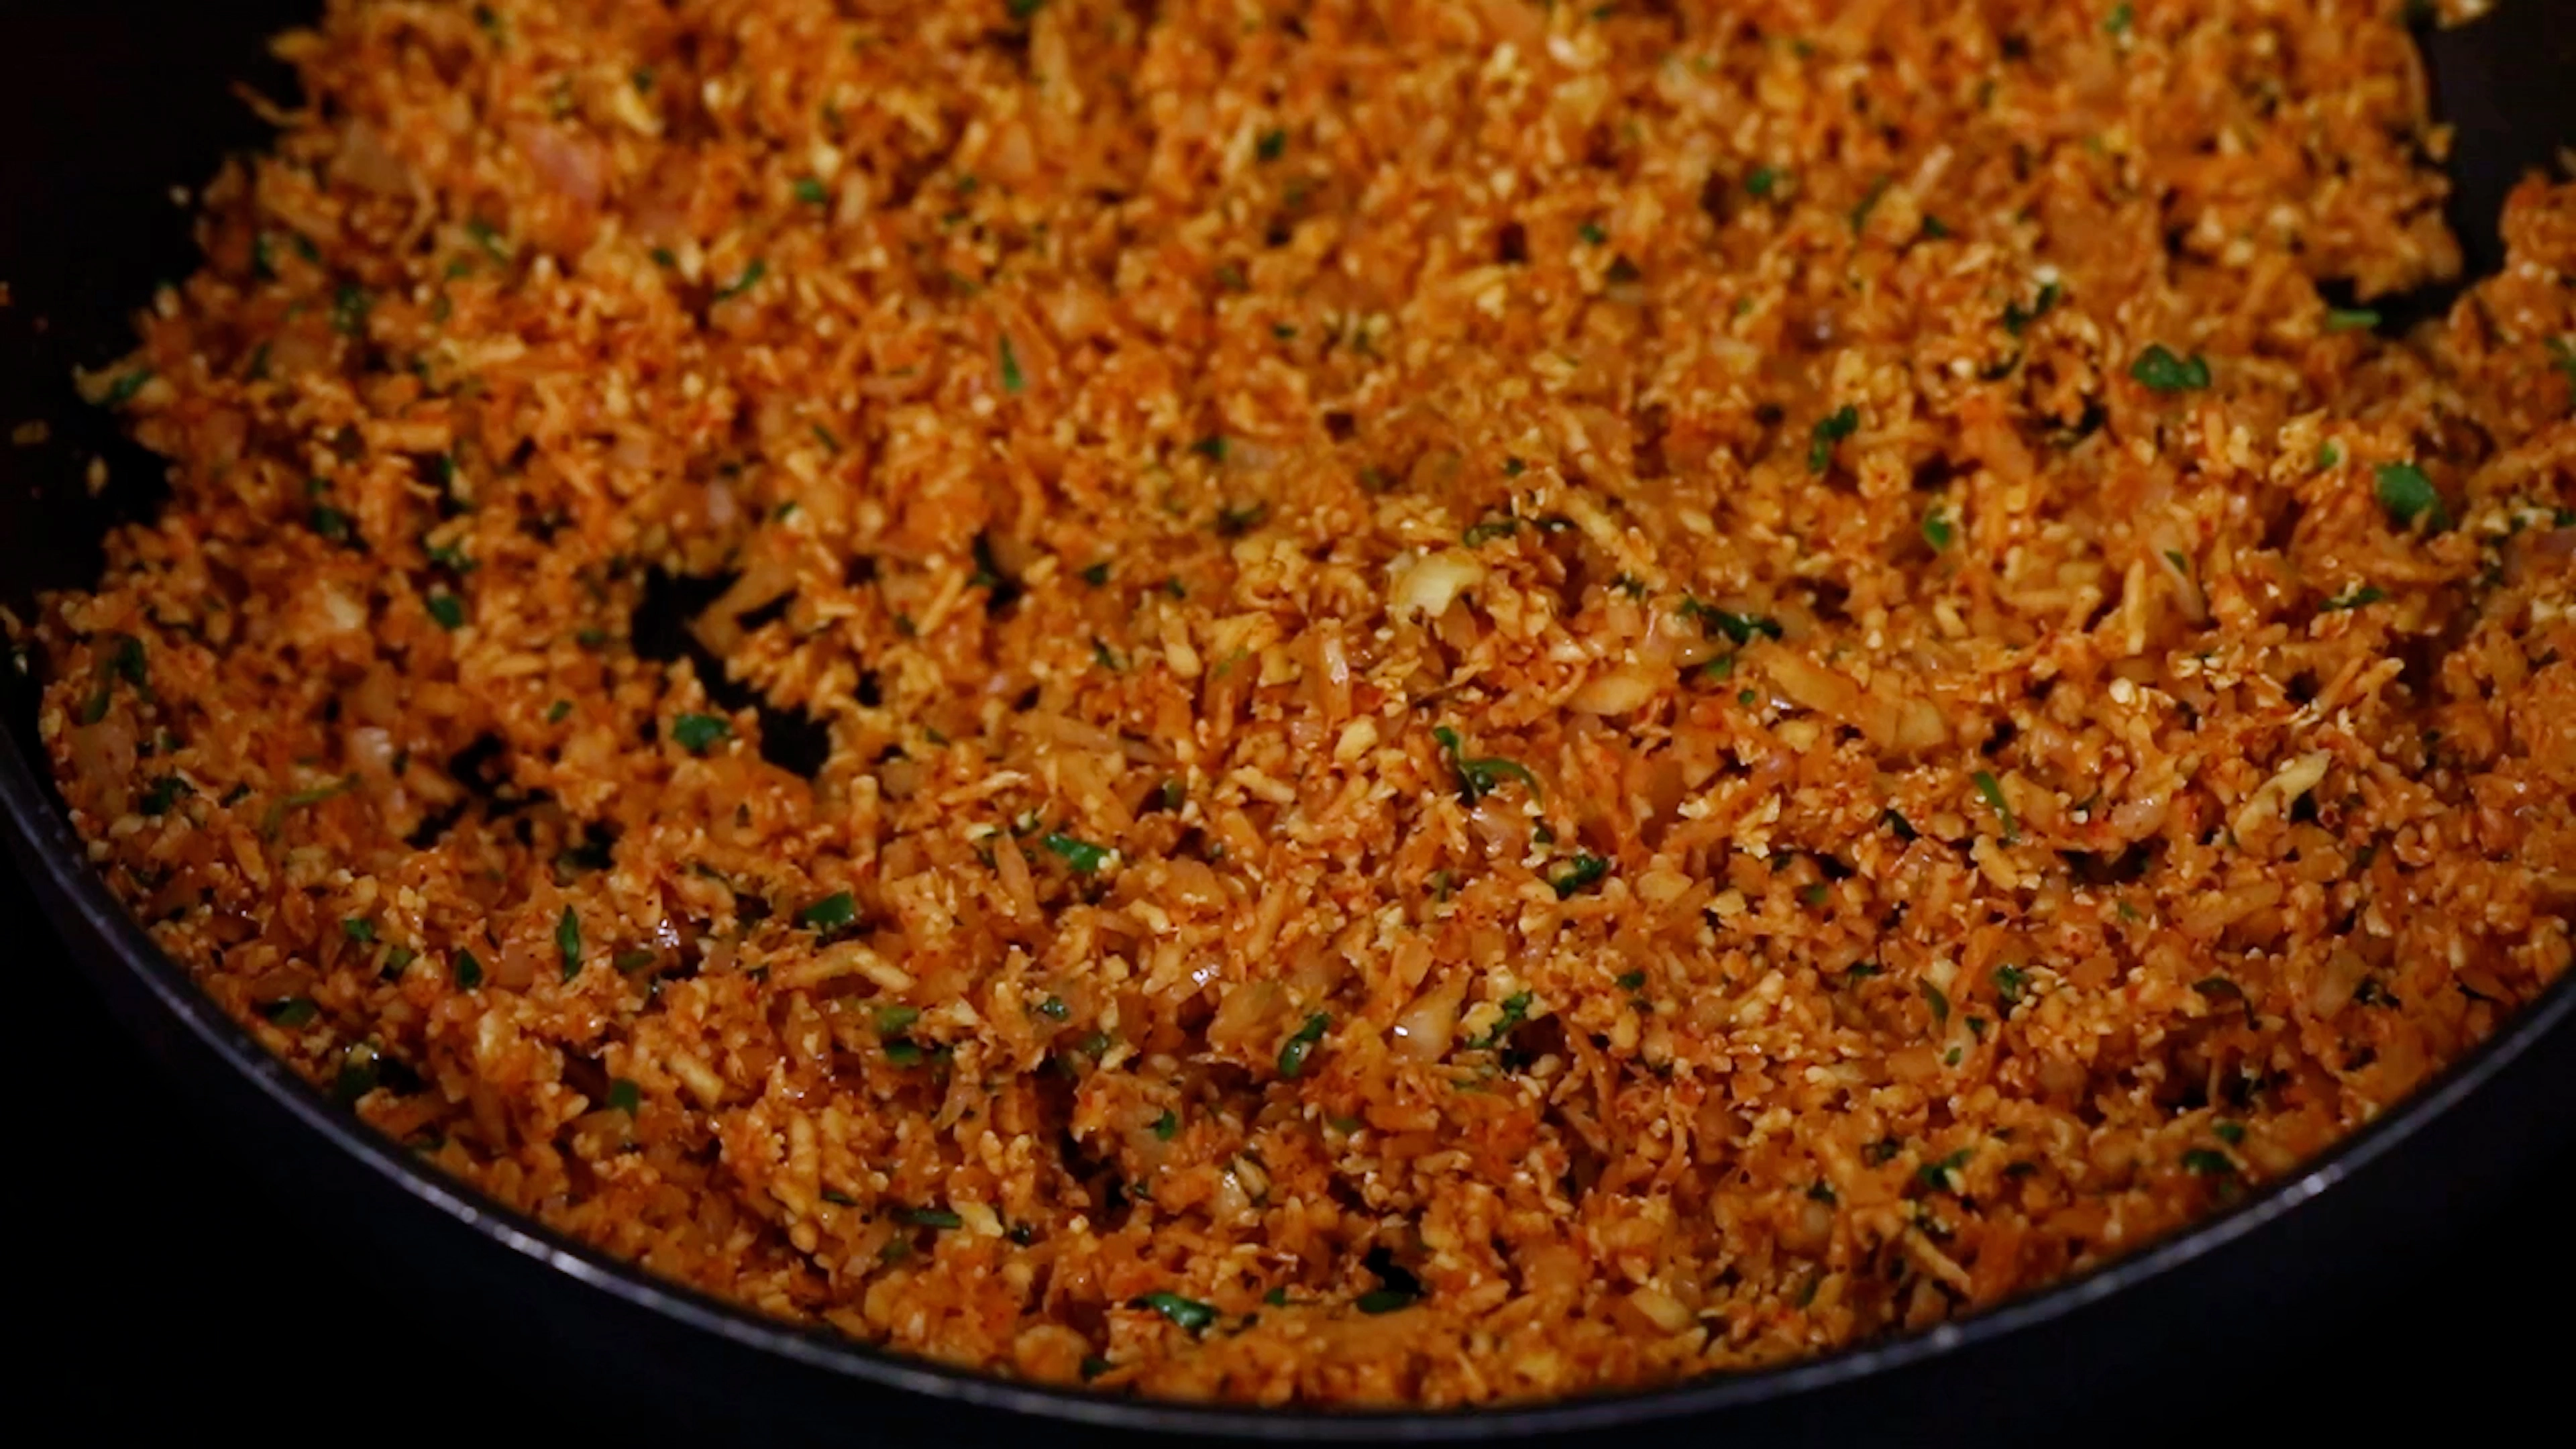
-
Divide the dough
Divide the dough into equal portions and roll them into small balls.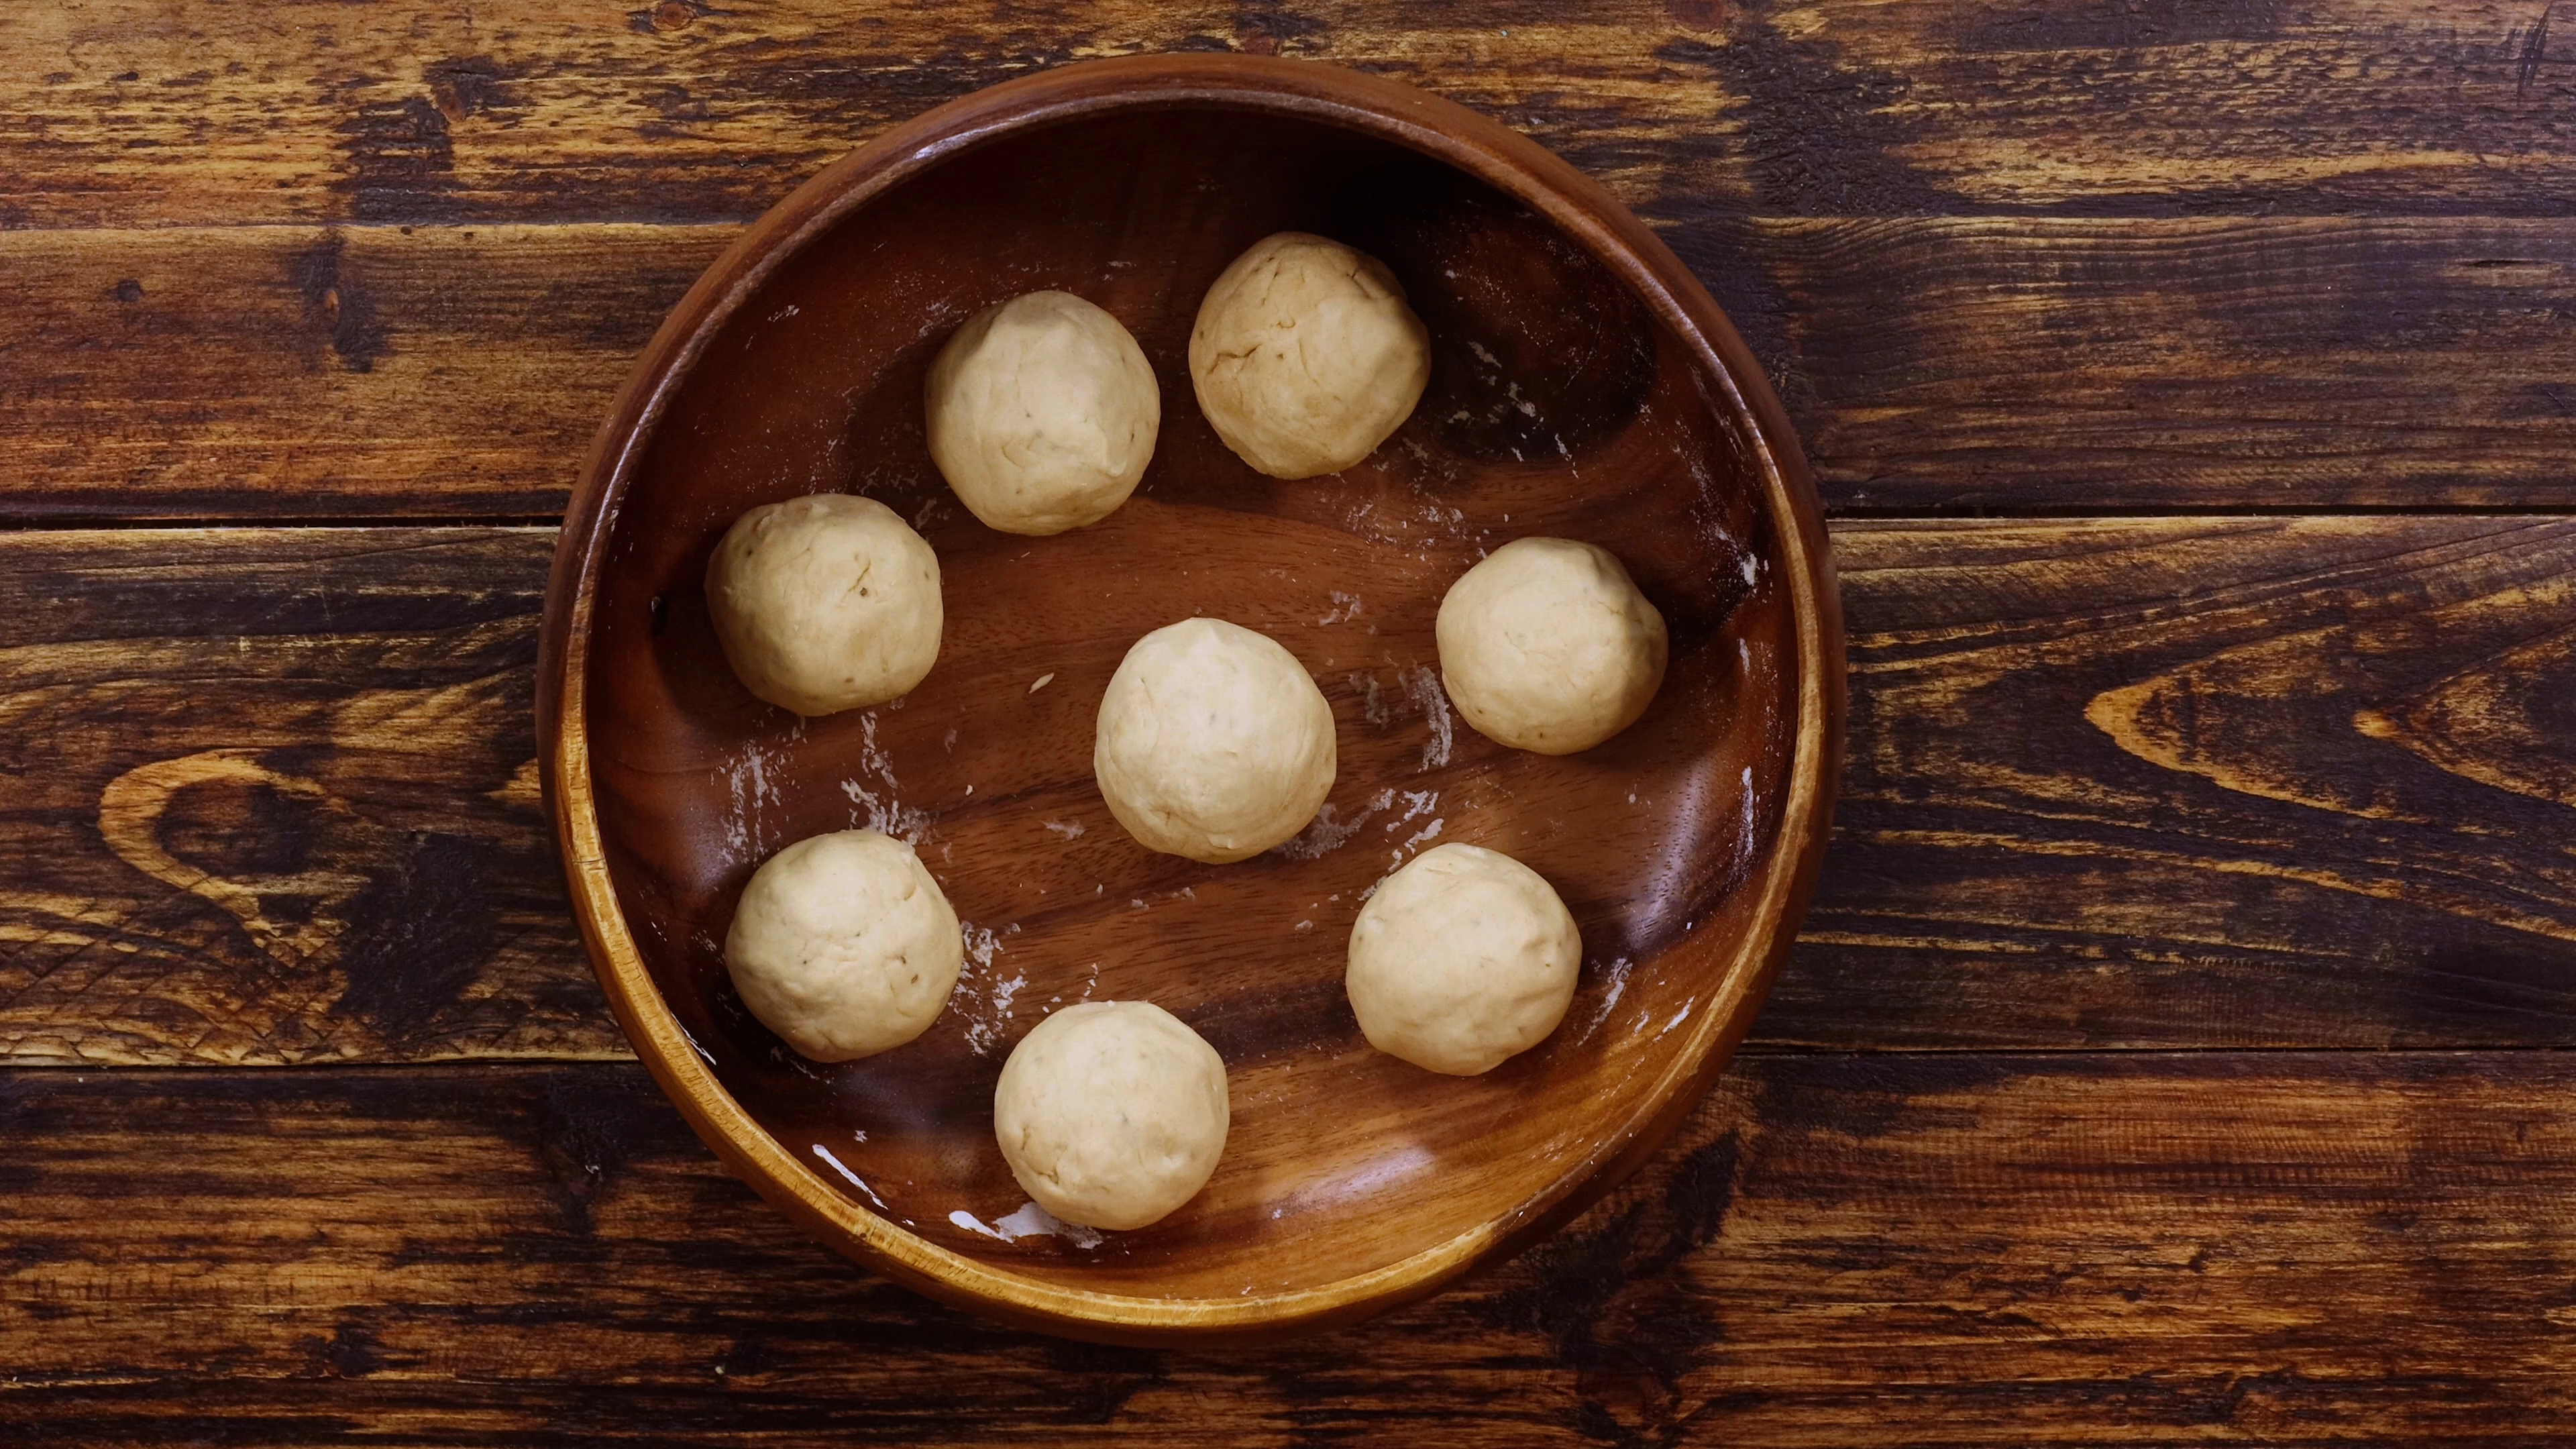
-
Roll the paratha
Roll each dough ball into a small circle, dusting with flour if needed. -
Add the filling
Place a portion of the cauliflower filling in the center of the rolled dough.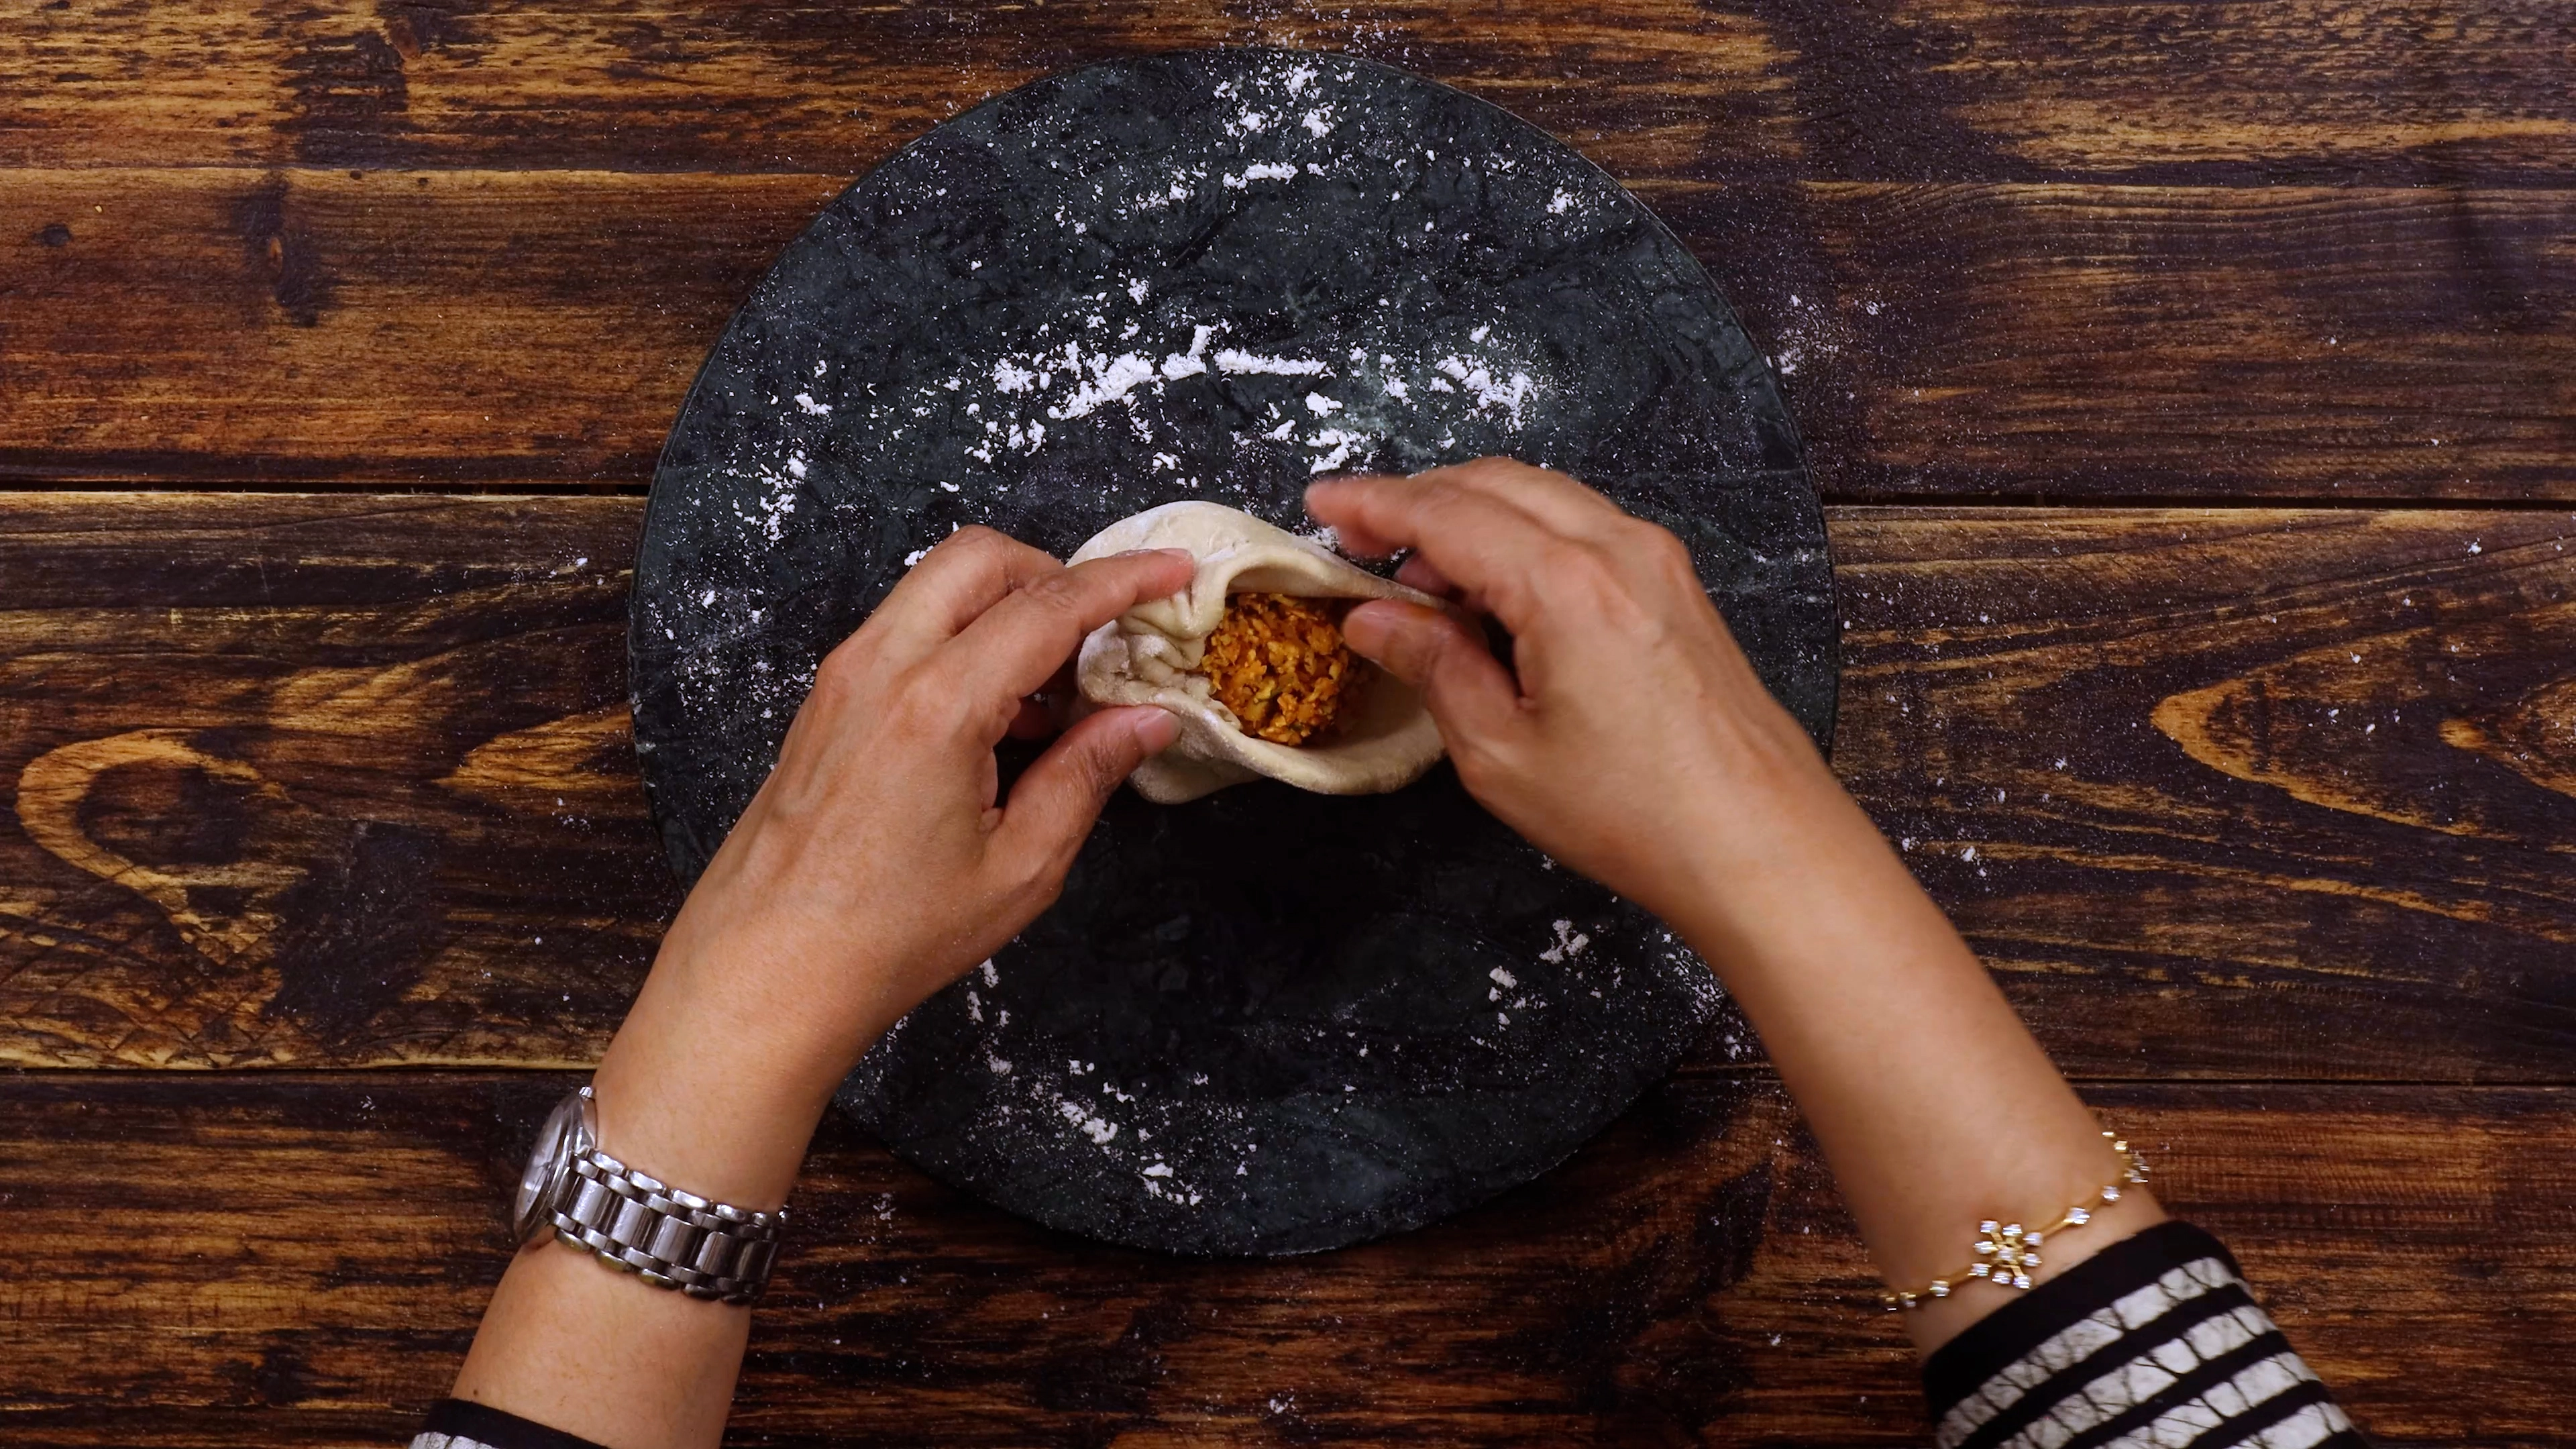
-
Seal the paratha
Pull the edges of the dough to the center and seal the filling inside. -
Roll again
Gently roll out the stuffed dough to make an even paratha.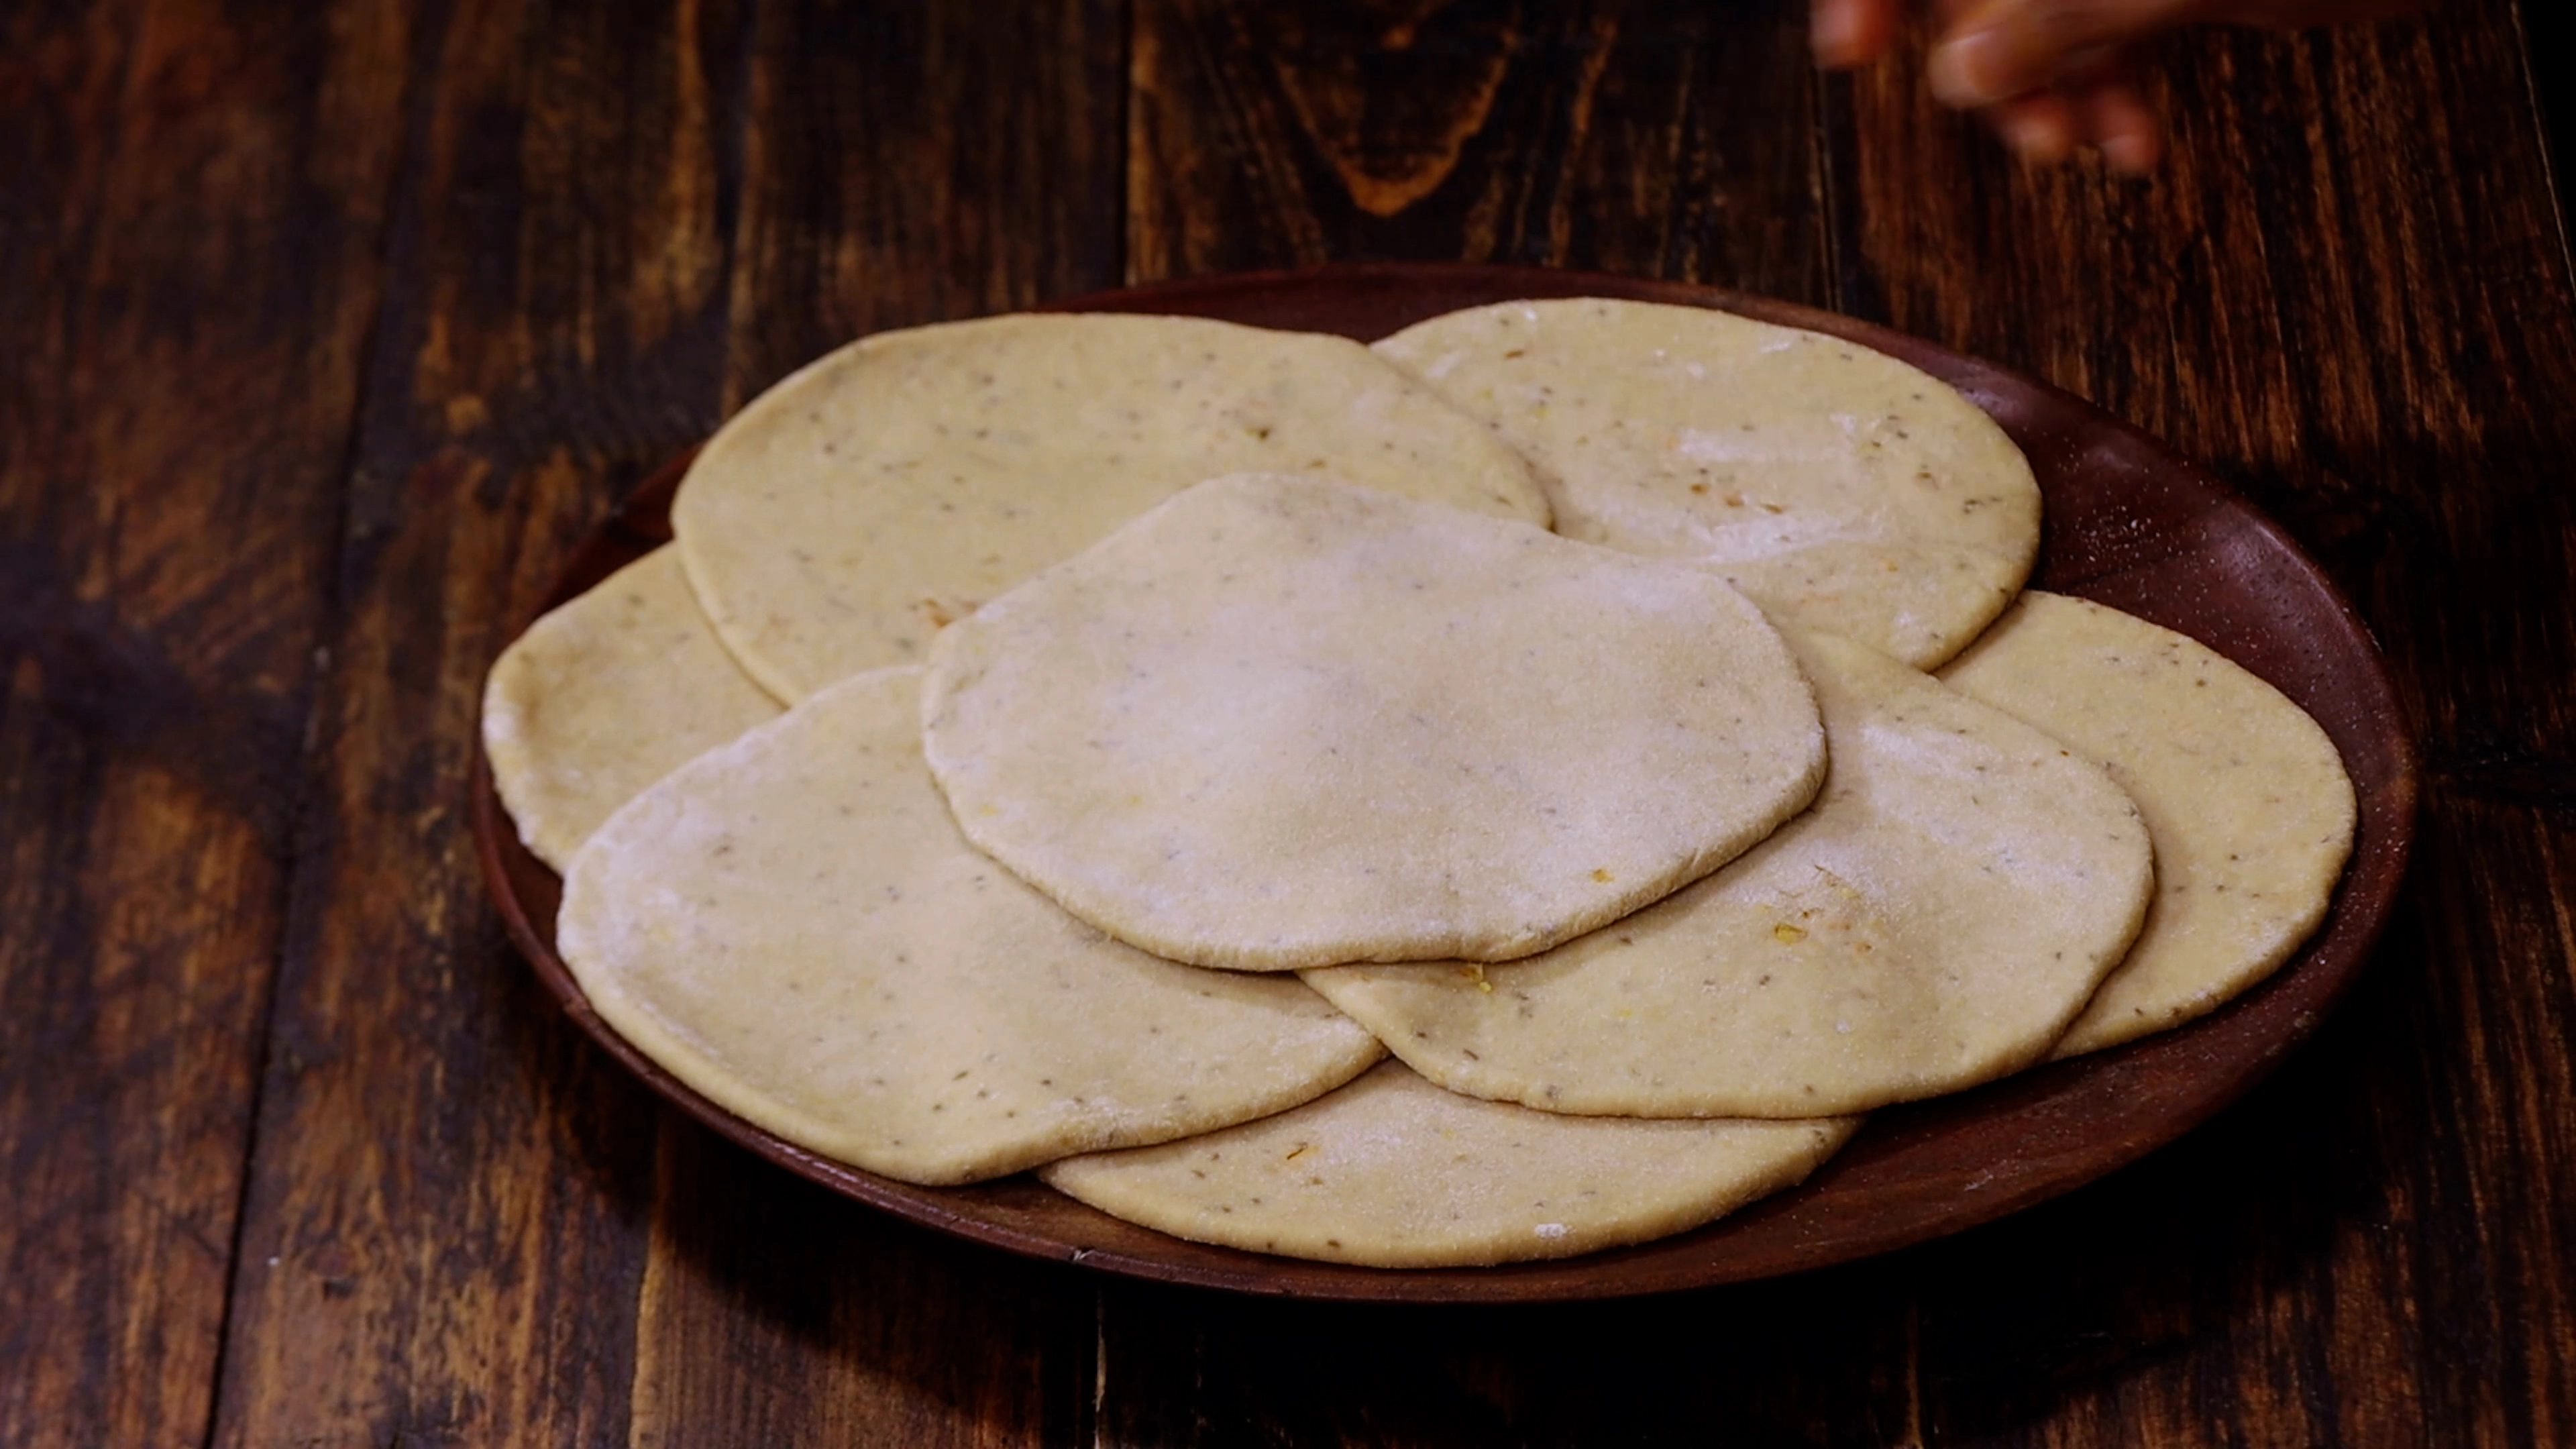
-
Cook the paratha
Heat a tawa and place the paratha on it. Flip and cook both sides while adding ghee. -
Cook until golden
Cook until golden brown spots appear on both sides.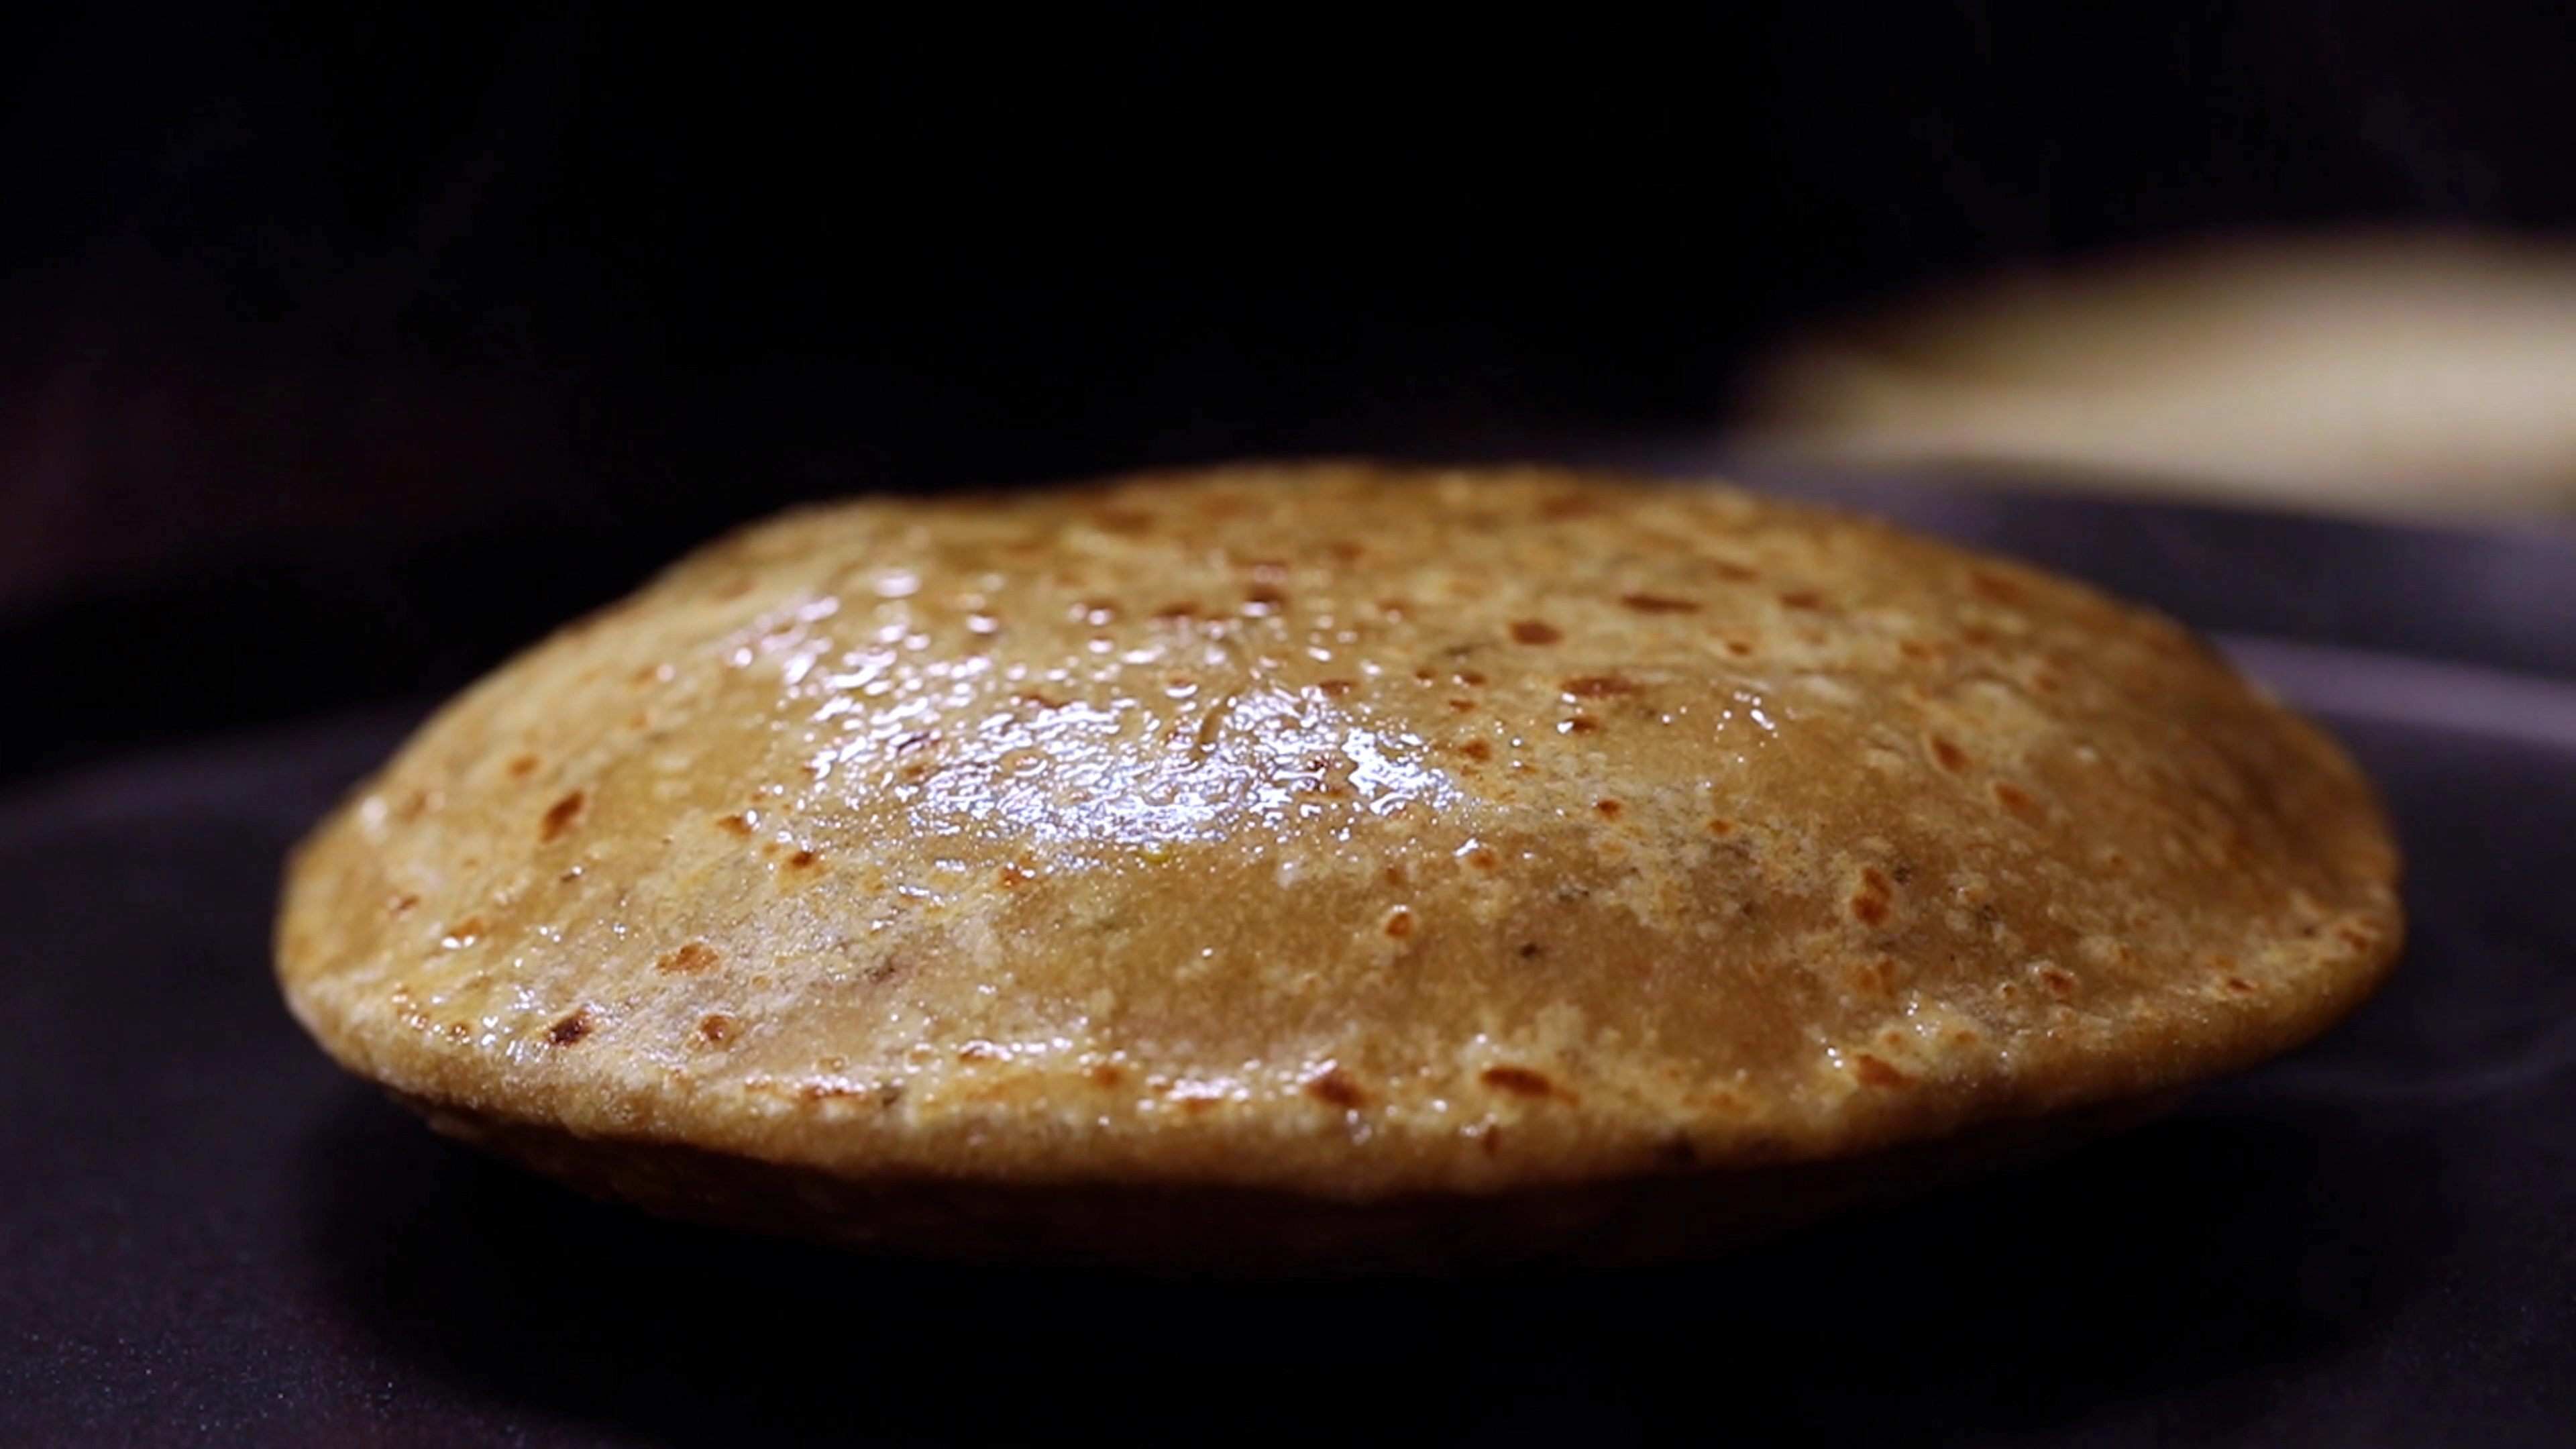
-
Serve hot
Serve the hot Gobi Paratha with curd or pickle.
Equipment
 3")


Affiliate Disclosure: This post contains Amazon affiliate links, i.e., when you buy any product using the links below, we get commissions. but it doesn’t cost you anything extra. If you do purchase any product using the given links, we thank you in advance!
Nutrition Facts
Servings 5
- Amount Per Serving
- Calories 250kcal
- % Daily Value *
- Total Fat 8g13%
- Saturated Fat 2g10%
- Cholesterol 5mg2%
- Sodium 450mg19%
- Potassium 280mg8%
- Total Carbohydrate 38g13%
- Dietary Fiber 5g20%
- Sugars 3g
- Protein 7g15%
- Vitamin A 300 IU
- Vitamin C 15 mg
- Calcium 40 mg
- Iron 2 mg
* Percent Daily Values are based on a 2,000 calorie diet. Your daily value may be higher or lower depending on your calorie needs.