Ever wondered why rasam tastes completely different when you eat it at a South Indian wedding compared to what you make at home?
That deep aroma, mild sweetness, peppery warmth, and comforting heat, that’s not regular rasam. That’s Mysore Rasam.
If you love rasam but feel bored with the usual tomato-pepper version, this Mysore Rasam will completely change how you look at this humble dish. It’s richer, slightly thicker, gently spiced, and has that unmistakable coconut-and-dal depth that comes straight from Karnataka kitchens.
And the best part? You don’t need any store-bought rasam powder. Everything is made fresh, the traditional way.
Why Mysore Rasam Is a Comfort Food Staple
Mysore Rasam comes from Karnataka cuisine, where rasam isn’t just a soup; it’s a digestive tonic, immunity booster, and comfort food rolled into one bowl.
Unlike Tamil-style rasam, which is sharper and more watery, Mysore Rasam is:
- Slightly thicker
- Coconut-based
- Balanced with a hint of jaggery
- Less acidic, more rounded in flavour
That’s why it’s often served as part of bisi oota (traditional Karnataka meal) with rice, ghee, and a vegetable palya.
Ingredients Breakdown
- Ground Masala (The Soul of Mysore Rasam): This freshly roasted masala is what sets Mysore Rasam apart.
- Coriander Seeds, Pepper & Cumin: These three form the backbone. Coriander gives body, pepper adds warmth (not heat), and cumin aids digestion.
- Toor Dal: A small amount roasted into the masala adds thickness and protein without overpowering the rasam.
- Grated Coconut: This is the signature element. Coconut softens the spice, adds mild sweetness, and gives Mysore Rasam its creamy mouthfeel.
- Red Chillies: They add colour and gentle heat. This rasam should warm your throat, not burn it.
- Hing (Asafoetida): Essential for that unmistakable South Indian aroma and for digestion.
Main Rasam Ingredients
- Tamarind Water & Tomato: Together, they bring balanced tang. Tamarind gives depth while tomato adds freshness.
- Cooked Toor Dal: Unlike regular rasam, Mysore Rasam uses more dal, making it nourishing and filling.
- Jaggery: Just a small piece rounds off acidity and spice — you shouldn’t taste sweetness, just balance.
Tempering Ingredients
- Ghee, Mustard & Curry Leaves: This final tempering wakes up all the flavors and makes the rasam aromatic and restaurant-style.
How Mysore Rasam Comes Together
You start by roasting coriander seeds, peppercorns, cumin seeds, and a spoonful of toor dal in a little ghee. This step is crucial: roast only until aromatic, not dark. Once the coconut and red chillies go in, the kitchen will smell incredible. A pinch of hing at the end ties it all together.
After cooling, this gets ground into a smooth paste. This paste is your rasam base, rich, nutty, and fragrant.
In a deep pot, tamarind water and regular water are brought to a boil along with chopped tomatoes, turmeric, and salt. As the tomatoes soften and release flavor, the ground masala is stirred in and gently simmered.
Next comes cooked toor dal, more water, and a tiny piece of jaggery. At this stage, the rasam thickens slightly and turns beautifully aromatic.
Once switched off, fresh coriander is added, followed by a ghee tempering of mustard seeds, red chillies, curry leaves, and hing poured directly on top.
The result? A deeply flavorful rasam that tastes even better with hot rice and ghee.
Pro tip💡:Keep the rasam gently simmering and avoid a rolling boil to preserve its fresh, authentic mysore flavor.
Problems This Recipe Solves
This Mysore Rasam is perfect if:
- You want comfort food during cold or rainy days
- You’re bored of thin, watery rasam
- You need something light yet filling
- You want a naturally digestive-friendly meal
Diet-Friendly Tweaks
- Vegan Swap 🌿
Replace ghee with sesame oil or coconut oil for roasting and tempering.
The flavor changes slightly but remains authentic.
- Gluten-Free
Naturally gluten-free — just ensure your hing is gluten-free.
What Goes Along with Mysore Rasam
Traditionally served with:
- Hot steamed rice
- A generous spoon of ghee
- Cabbage palya, beans poriyal, or potato fry
For a Complete Meal
Add papad and curd on the side for a proper South Indian thali experience.
How to Serve
Serve Mysore Rasam piping hot. Always mix it with rice — this rasam is not meant to be sipped like soup.
For extra comfort, drizzle ghee just before eating.
Packing Tips for Lunch Box
Mysore Rasam travels well if packed correctly.
Tips:
- Slightly thicken it before packing
- Pack rice separately
- Add tempering fresh if possible
Common Pitfalls
- Over-Roasting the Masala
This makes rasam bitter. Roast only till fragrant.
- Too Much Tamarind
Mysore Rasam should be balanced, not sour-heavy.
- Skipping Jaggery
Even a tiny piece makes a huge difference in rounding flavors.
How to Store Mysore Rasam
How to Store
Refrigerate for up to 2 days in an airtight container.
Flavour actually improves the next day.
How to Reheat
How to Reheat Mysore Rasam
Reheat gently on low flame.
Do not boil aggressively; it dulls flavours.
Add a little water if it thickens too much.
Substitutions You Can Try
- No coconut? Use a small spoon of roasted gram (texture changes slightly)
- No tamarind? Use less tomato, but expect a different flavour profile
Mysore Rasam
Description
Mysore rasam is a comforting South Indian classic that’s light, flavorful, and deeply nourishing. Made with freshly ground spices, coconut, tamarind, and tomatoes, this no onion no garlic rasam has a beautiful balance of spice, tang, and warmth. It comes together quickly, needs no deep frying, and pairs perfectly with hot rice and ghee. Simple ingredients, honest flavors, and pure comfort in every spoon — this is the kind of rasam you’ll want to make again and again.
Ingredients
To make ground masala
To make mysore rasam
For tempering
Instructions
Prep Work
-
Soak tamarind
Soak tamarind in warm water and extract thick tamarind water
-
Chop tomatoes
Wash and chop ripe tomatoes finely -
Cook toor dal
Cook toor dal until soft and mash till smooth -
Prep spices
Measure and keep spices ready for roasting -
Wash herbs
Rinse and finely chop coriander leaves
Method
-
Roast spices
Roast coriander seeds, peppercorns, cumin seeds and toor dal on medium-low flame until aromatic
-
Add coconut
Add grated coconut and red chilli, roast till lightly golden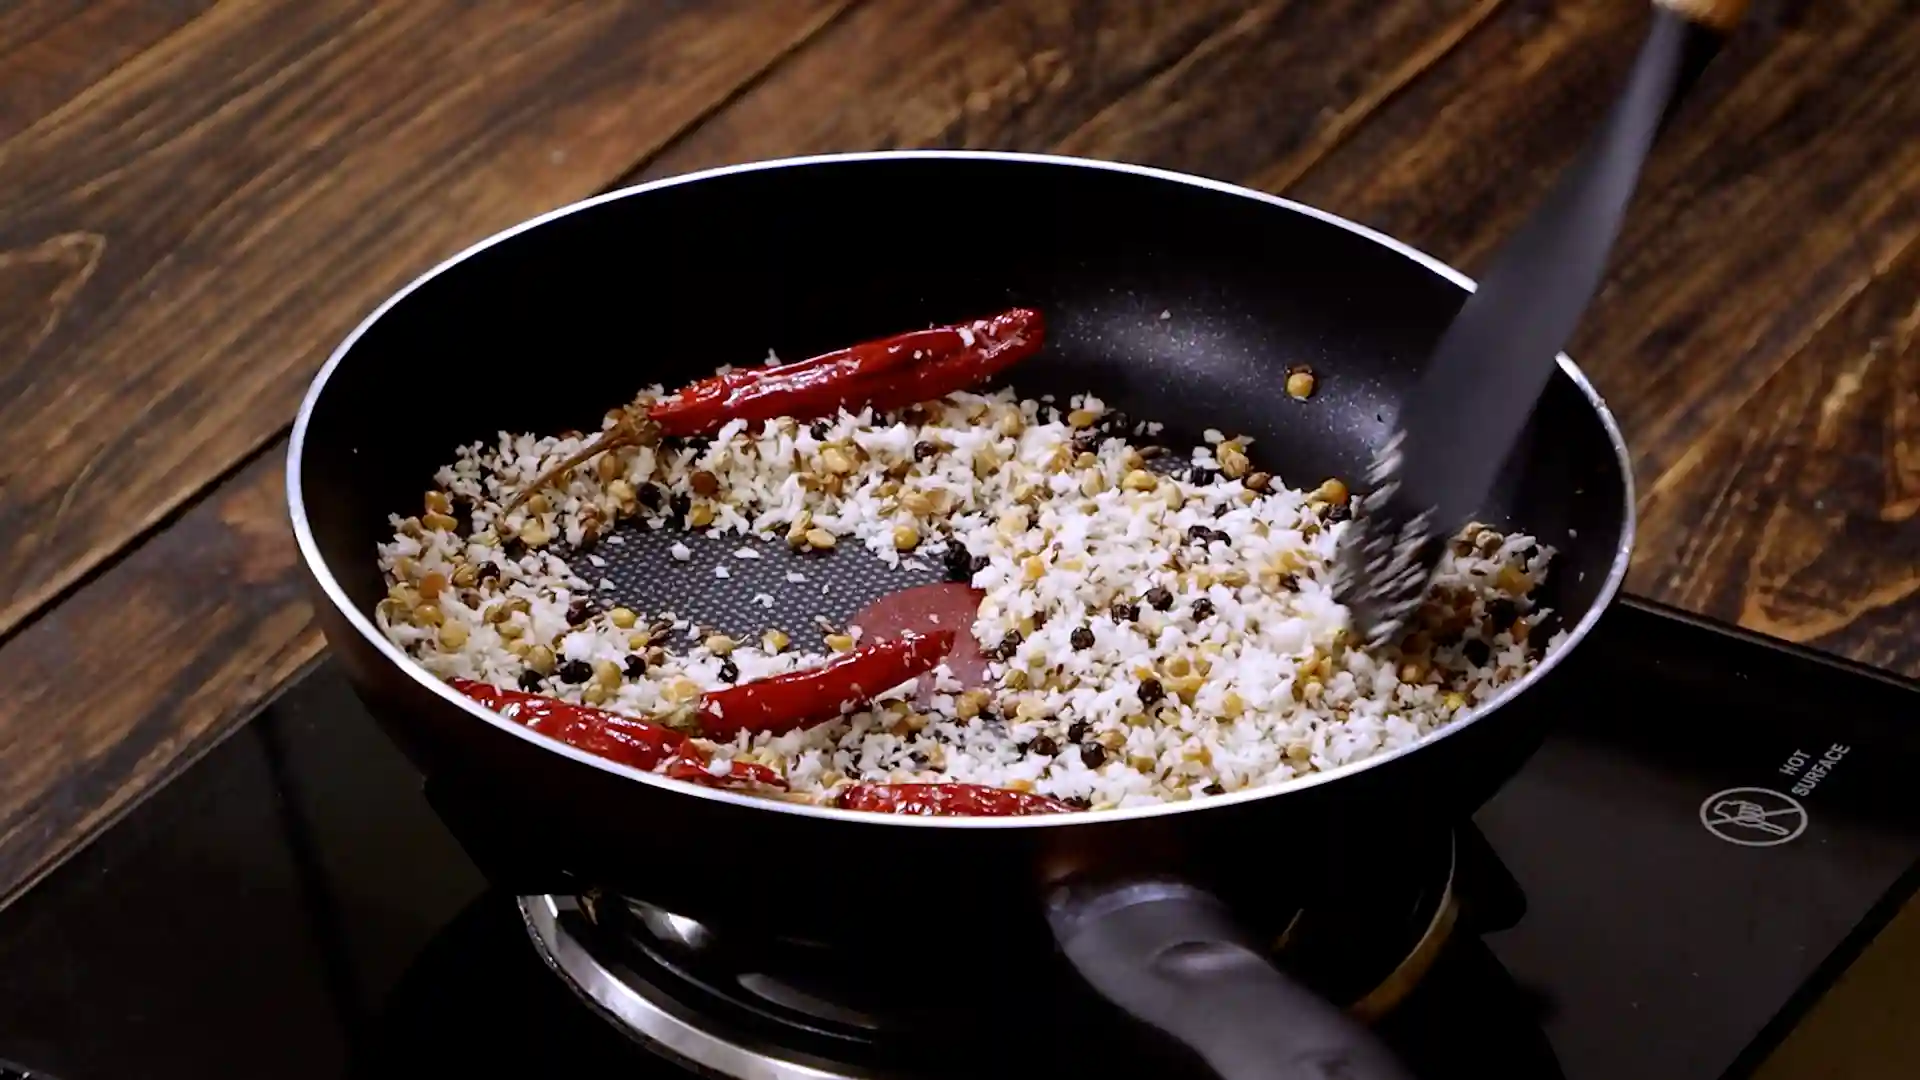
-
Grind masala
Add hing, cool completely and grind to a smooth paste by gradually adding water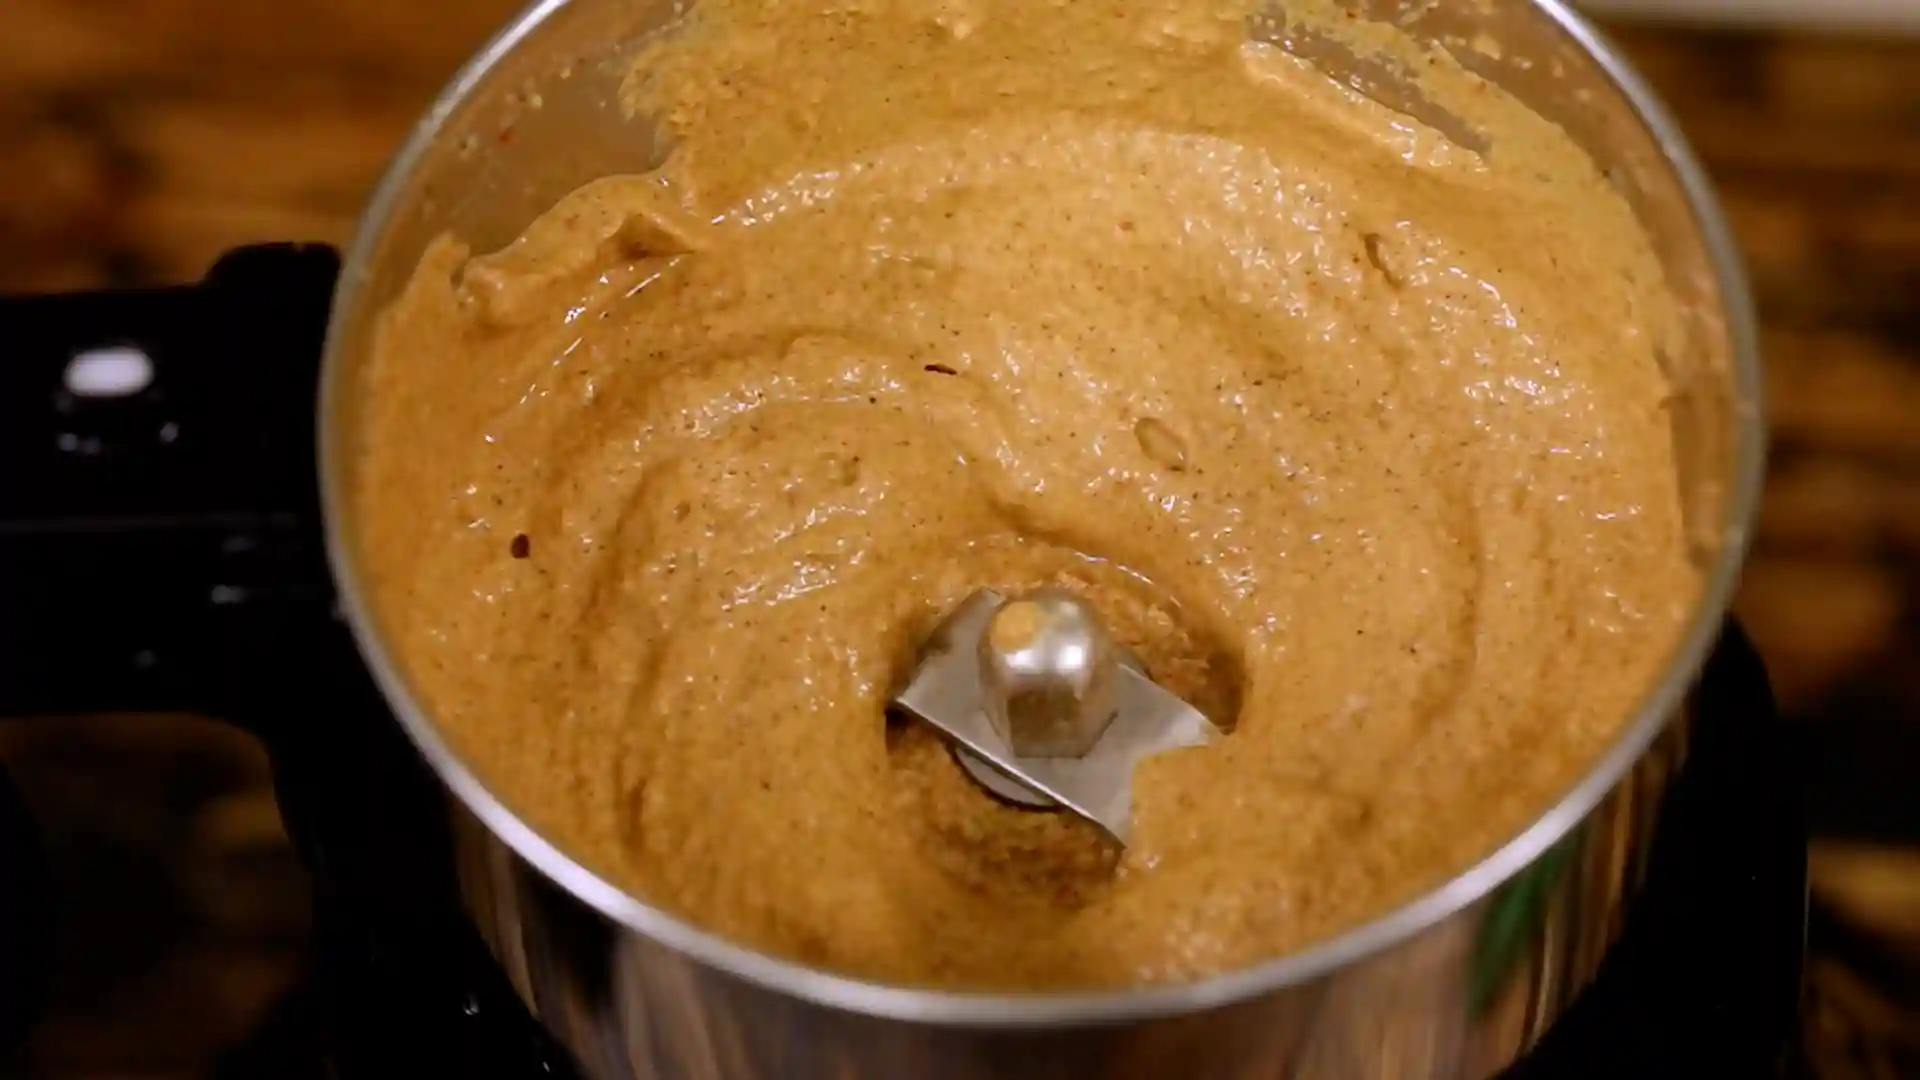
-
Boil base
Boil tamarind water, a little water, tomatoes, turmeric and salt, cook about 5 minutes until tomatoes turn soft
-
Add masala
Stir in ground masala and simmer gently -
Add dal
Add mashed toor dal, more water, jaggery and check for seasoning. Adjust salt if needed -
Simmer rasam
Boil on medium-high flame for 5 minutes -
Finish with coriander
Turn off the heat and mix in coriander leaves -
Temper
Heat ghee, splutter mustard, add red chilli, hing and curry leaves
-
combine
Pour hot tempering over rasam and mix
Equipment
 3")

 5")
Affiliate Disclosure: This post contains Amazon affiliate links, i.e., when you buy any product using the links below, we get commissions. but it doesn’t cost you anything extra. If you do purchase any product using the given links, we thank you in advance!
Nutrition Facts
Servings 4
- Amount Per Serving
- Calories 110kcal
- % Daily Value *
- Total Fat 4g7%
- Saturated Fat 2g10%
- Cholesterol 8mg3%
- Sodium 480mg20%
- Potassium 320mg10%
- Total Carbohydrate 14g5%
- Dietary Fiber 3g12%
- Sugars 3g
- Protein 5g10%
- Vitamin A 620 IU
- Vitamin C 14 mg
- Calcium 58 mg
- Iron 1.8 mg
- Phosphorus 92 mg
- Magnesium 32 mg
* Percent Daily Values are based on a 2,000 calorie diet. Your daily value may be higher or lower depending on your calorie needs.