Ever wished you could make a dosa… without waiting overnight for fermentation?
Here’s your shortcut to a crispy, protein-packed Indian breakfast that’s ready in just 30 minutes.
Moong Dal Dosa (also known as Pesarattu in Andhra cuisine) is a fibre-rich, gut-friendly, and super-nourishing alternative to the regular dosa: no rice, no fermentation, no hassle. Just soak, blend, cook, and eat!
If you’re starting a healthy morning routine or want to sneak more protein onto your family’s plate, this dosa is your new best friend.
Why You’ll Love This Moong Dal Dosa
- High-protein + low-carb = best for weight loss & muscle health
- Great for diabetics and kids
- Digest-friendly since it’s made from lentils
- Ready in minutes — perfect for busy mornings
- Crispy edges + soft inside + delicious earthy flavor
Ingredient Spotlight
Here’s why the ingredients work so well together:
- Moong Dal – The star protein source; gives a soft yet crisp texture
- Red Chillies – Adds gentle heat and color
- Ginger – Helps digestion + boosts flavor
- Cumin Seeds – Adds earthiness and prevents bloating
- Hing (Asafoetida) – Enhances aroma + aids gut health
- Ghee – Gives that restaurant-style crispness
Vegan Swap🌿: use coconut oil or sesame oil instead
How the Recipe Comes Together
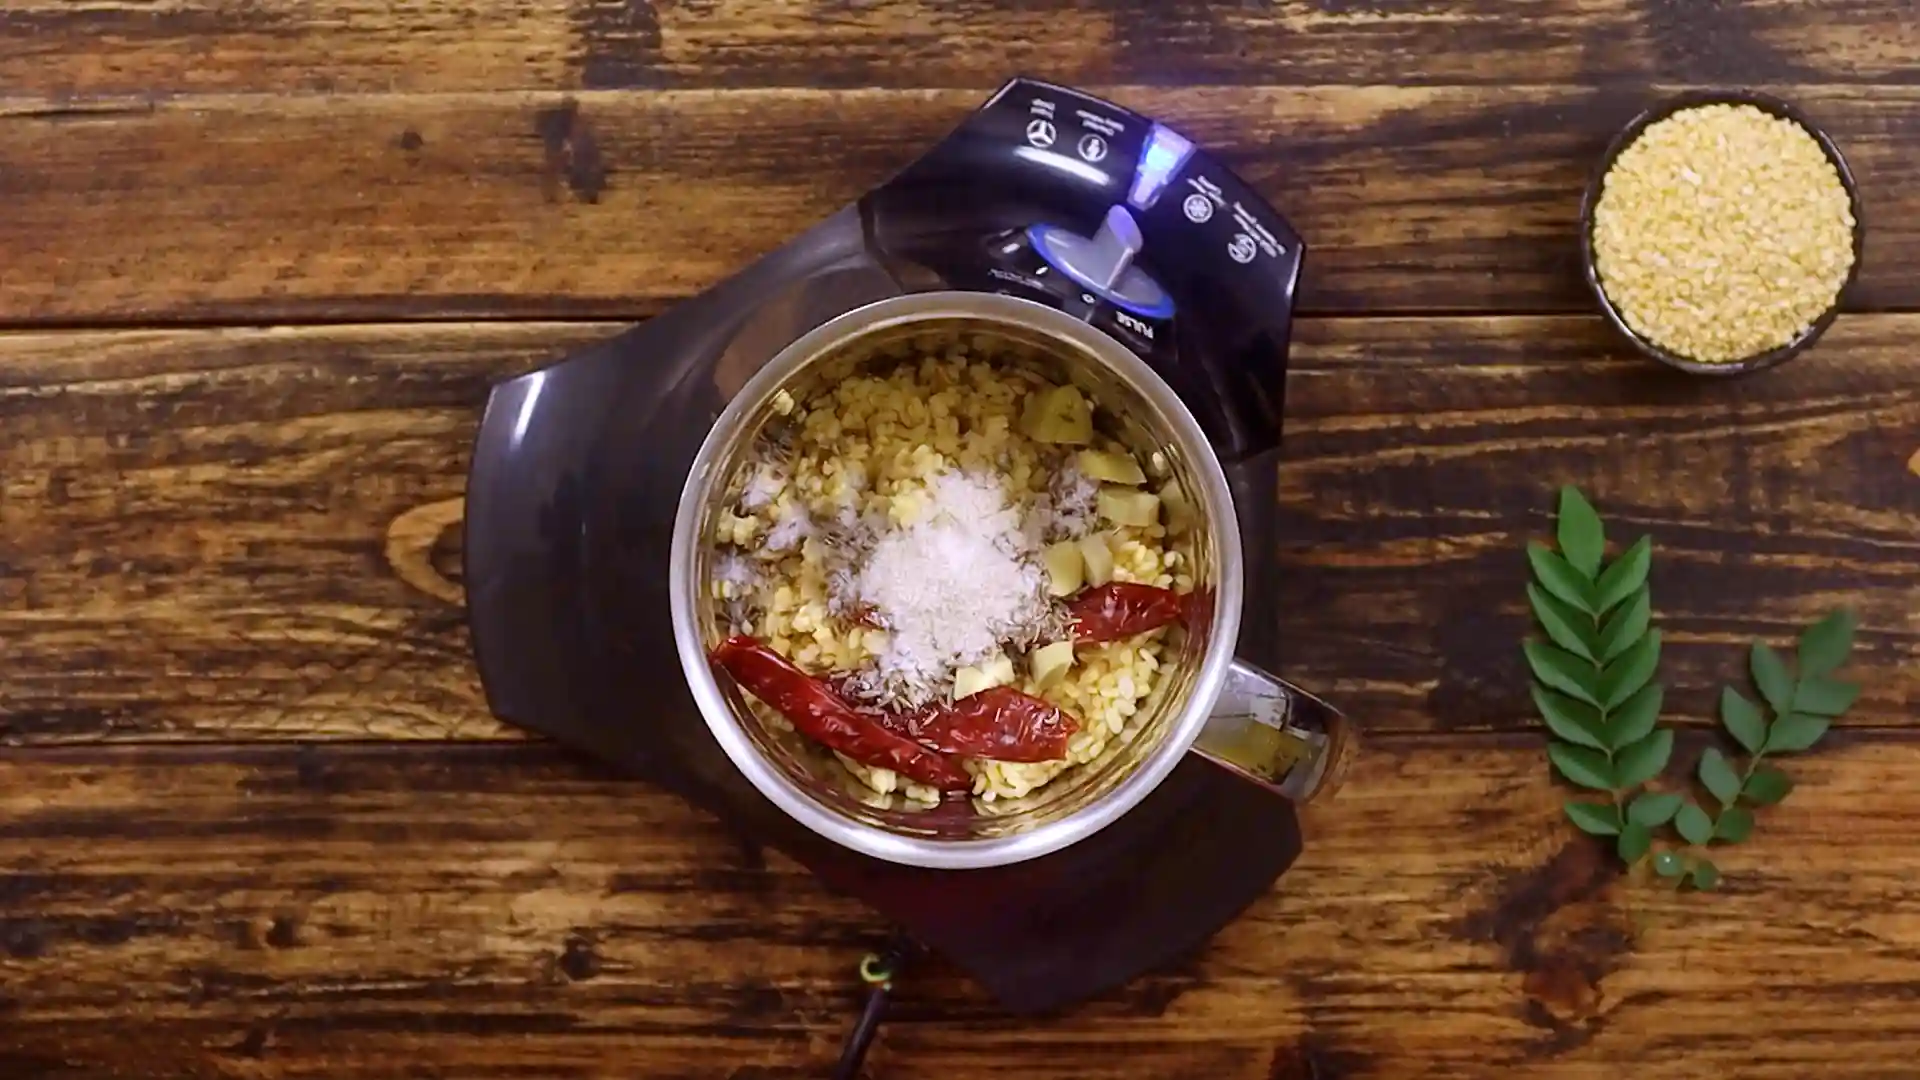
Start by soaking moong dal and chillies — just 30 minutes is enough to soften them perfectly. After draining, grind them with ginger, cumin, hing, and salt. Add water gradually, because what you want is a thick, pourable batter — not too runny.
Heat a dosa tawa until it’s nicely hot. Pour and spread the batter gently with the back of the ladle.
As it cooks, drizzle ghee around the sides — that’s what makes the dosa golden and crisp.
Let the base turn deep golden before flipping. Once cooked on both sides, take it off the pan… and it’s eating time.
Pro Tip💡: If the dosa isn’t spreading well, your batter is too thick — add just 1-2 tablespoons of water and try again.
What Goes Along With Moong Dal Dosa
- Coconut chutney — classic perfection
- Tomato chutney — spicy + tangy lift
- Mint chutney — refreshing combo
- Sambar — for a full South Indian breakfast plate
- Peanut chutney — high protein paired with high protein!
How to Serve
Serve fresh off the tawa — crisp edges guaranteed.
If packing for lunch, make slightly thicker dosas so they stay soft longer.
Packing for Lunchboxes
- Line the box with butter paper to prevent sticking
- Let the dosa cool slightly before closing the lid
- Pair with thick chutney in a leak-proof container
- Perfect for kids and office lunch!
Party or Bulk Preparation
You can soak + grind batter in advance for up to:
- Refrigerator: 1 day before
- Just bring to room temperature before making dosas.
How to Store Moong Dal Dosa Batter
In the fridge: Up to 24 hours.
How to Reheat Moong Dal Dosa
Instead of microwaving:
- Heat a tawa
- Place dosa for 30–40 seconds each side
It becomes good as fresh!
Substitutions
| Ingredient | Substitute |
| Moong Dal | Masoor Dal / Urad Dal mix |
| Ghee | Sesame Oil (vegan) |
| Red Chillies | Green chillies or chili flakes |
| Asafoetida | Skip for gluten-free strict diets |
Other Related Recipes You Might Like:-
- Green Gram Dosa (Weight Loss Recipe) – another healthy, protein-packed dosa made with whole green gram.
- Multigrain Dosa – wholesome dosa made with a blend of nutritious grains.
- Soft Bun Dosa – soft, fluffy dosa perfect for breakfast or dinner.
- Besan Ka Chilla – quick gram flour pancake, a great alternative to dal-based dosas.
- Instant Rava Uttapam – instant, thick uttapam loaded with veggies.
- Instant Rava Paniyaram – quick paniyarams made with rava for a soft and crispy bite.
- Tomato Dosa – flavour-packed dosa with a tangy tomato blend.
- Peanut Chutney – creamy and bold chutney that pairs beautifully with dal-based dosas.
Moong Dal Dosa
Description
A quick and healthy twist on traditional dosa, this instant moong dal dosa needs no fermentation and comes together in minutes. It’s crisp, light, naturally high in protein, and perfect for busy mornings, kids, or anyone looking for a simple, wholesome meal without extra effort.
Ingredients
To make moong dal dosa
Instructions
Prep Work
-
Soak dal and chillies
Soak moong dal and red chilli in enough water for about 30 minutes until softened.
-
Drain and prep for grinding
Drain the soaked dal and chillies and keep ready for grinding -
Prepare ginger
Roughly chop the ginger for easier grinding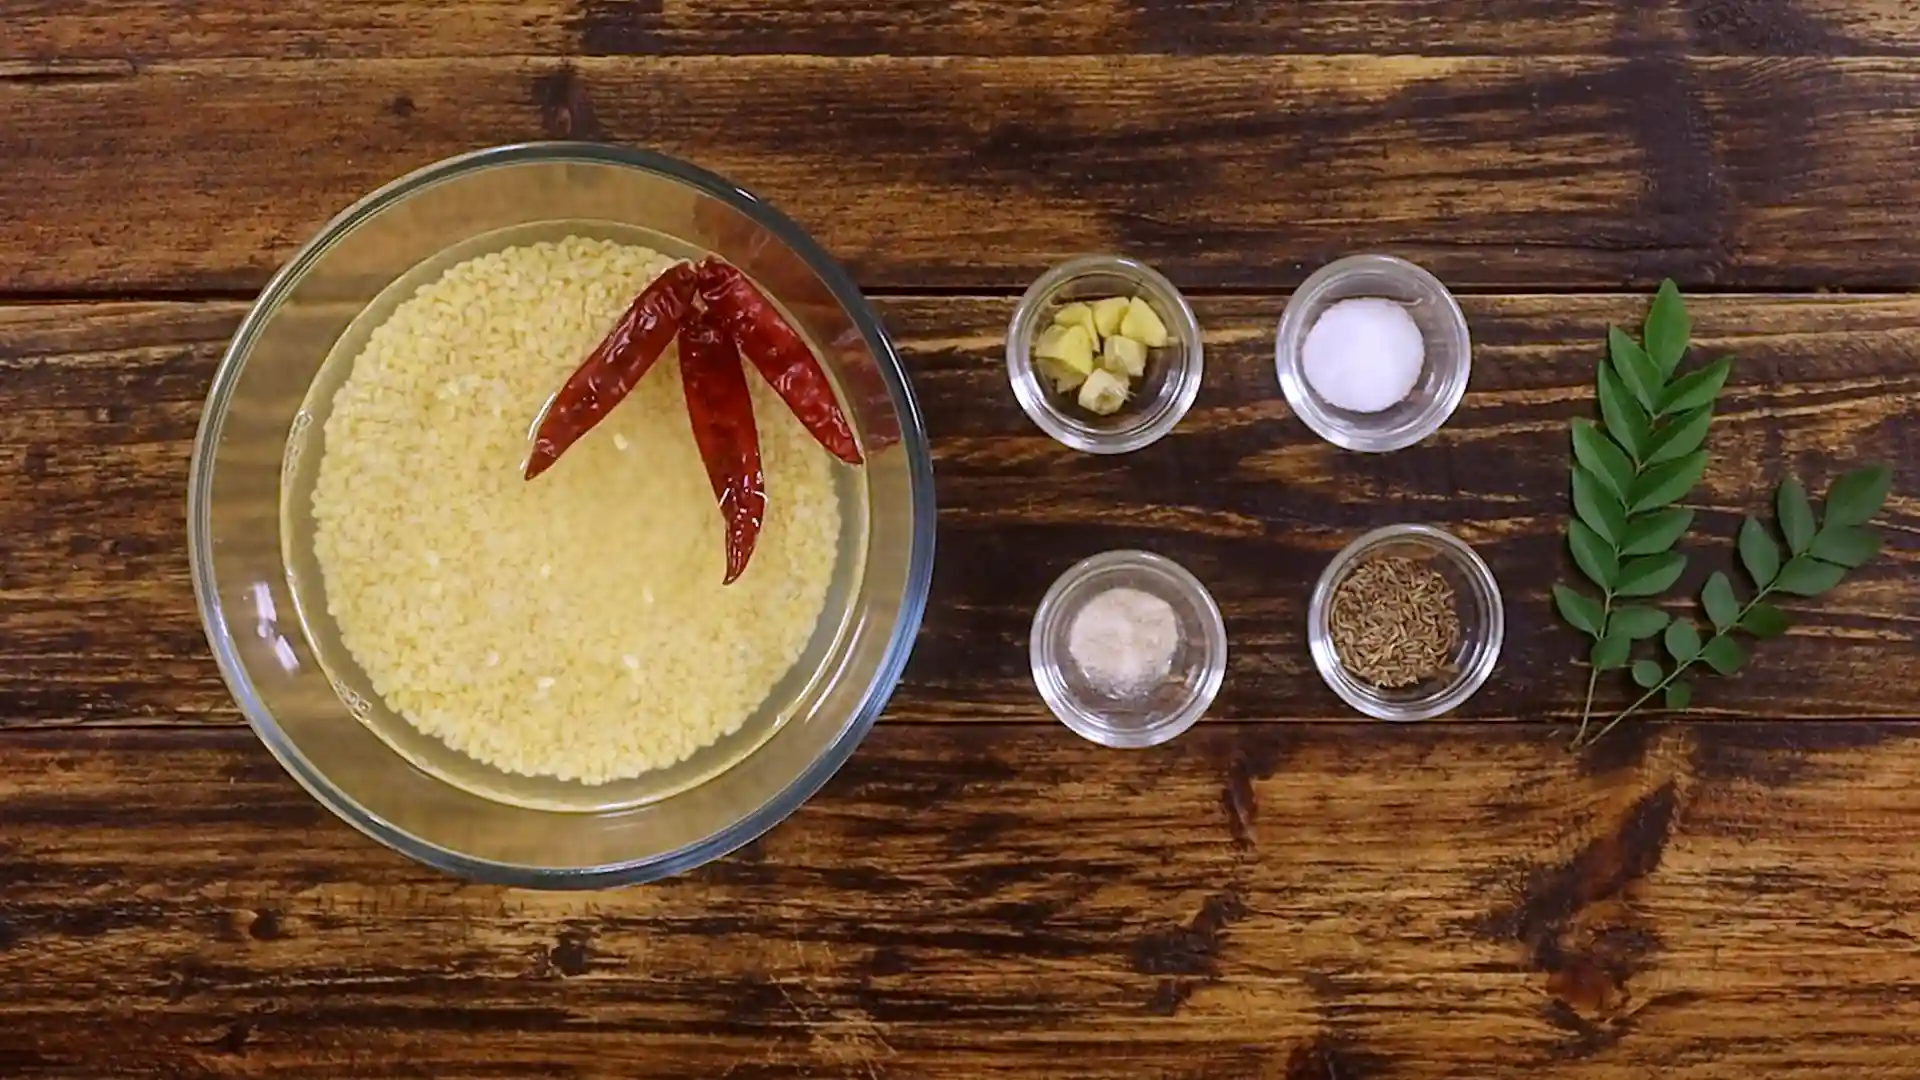
-
Heat tawa
Preheat the tawa before you start making dosas
Method
-
Grind base mixture
Add soaked dal, red chilli, ginger, cumin seeds, salt and hing to a mixer jar and grind without water first
-
Adjust batter consistency
Add a little water gradually and grind to get a thick but pourable batter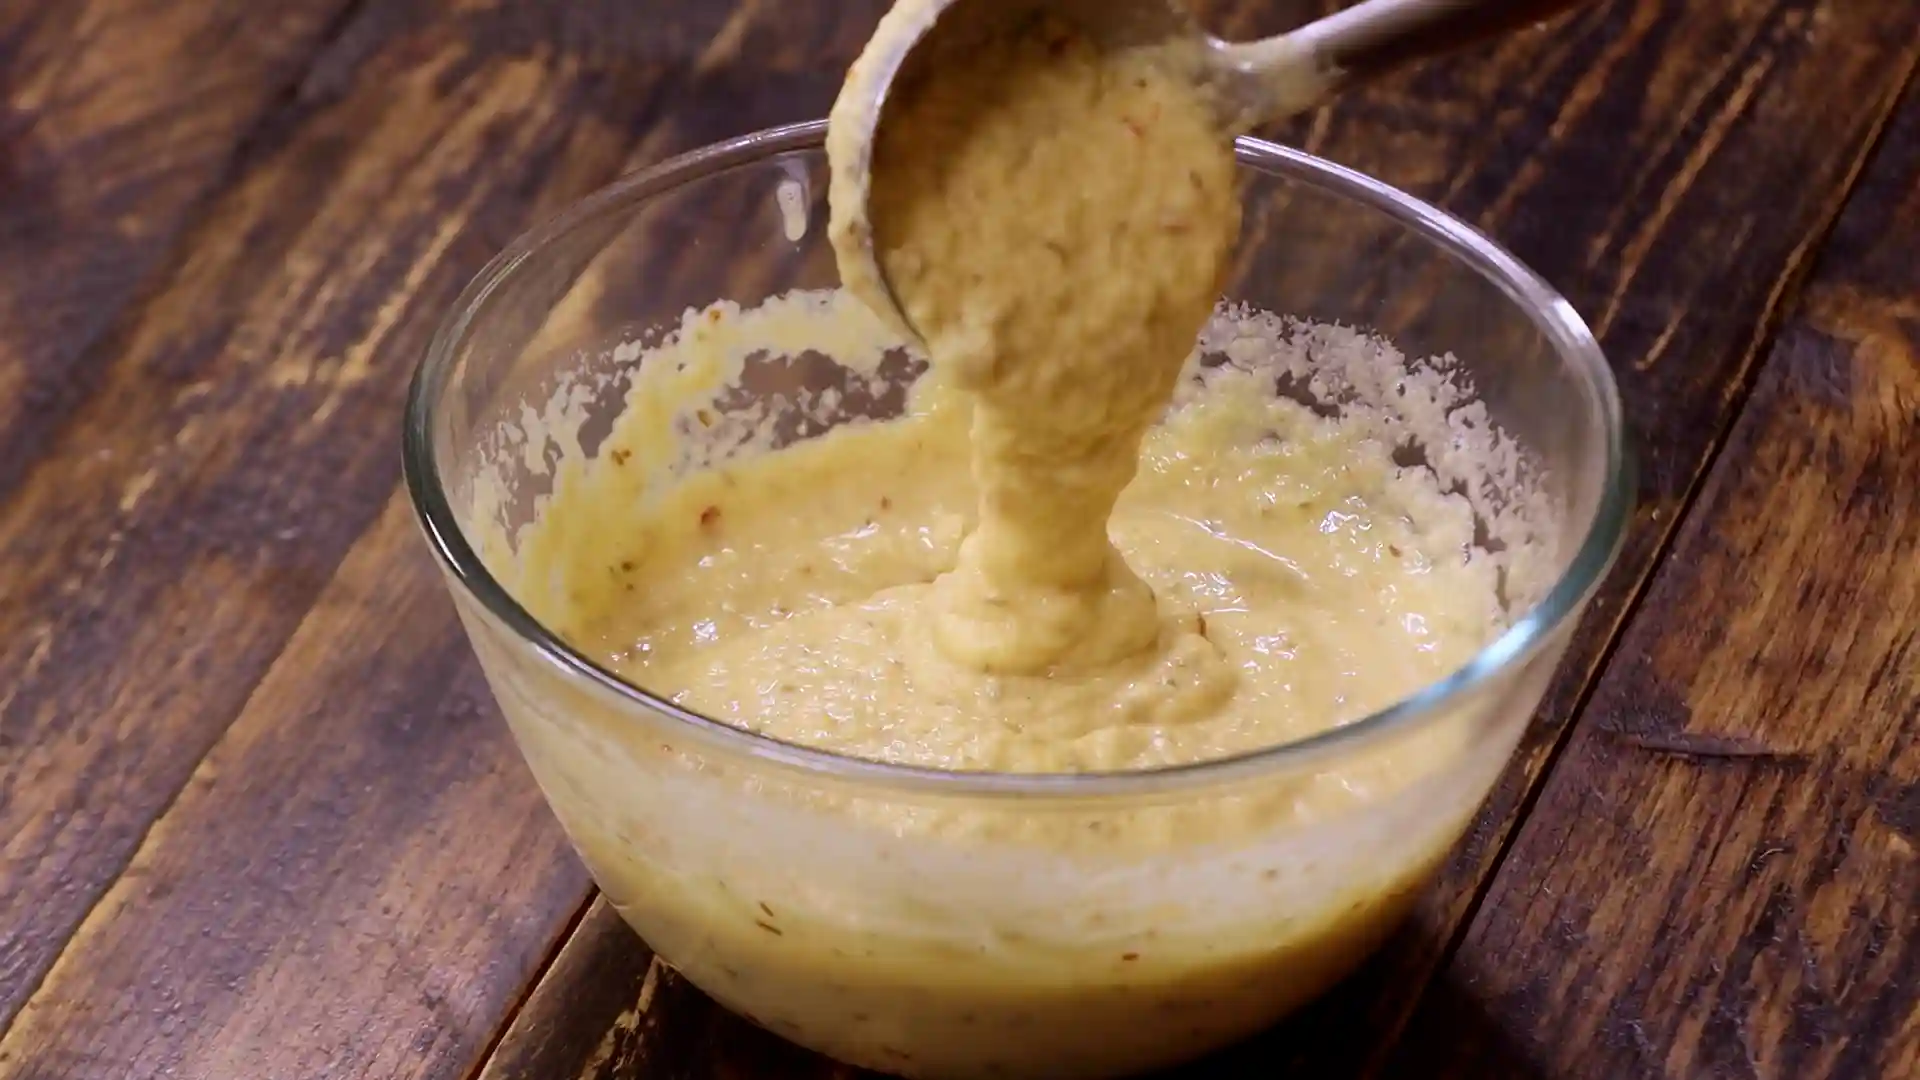
-
Check seasoning
Taste the batter and adjust the consistency by diluting it by water and seasoning if needed -
Start cooking dosa
Pour a ladle of batter onto the hot tawa and spread evenly -
Add ghee
Drizzle ghee around and on the center of the dosa while cooking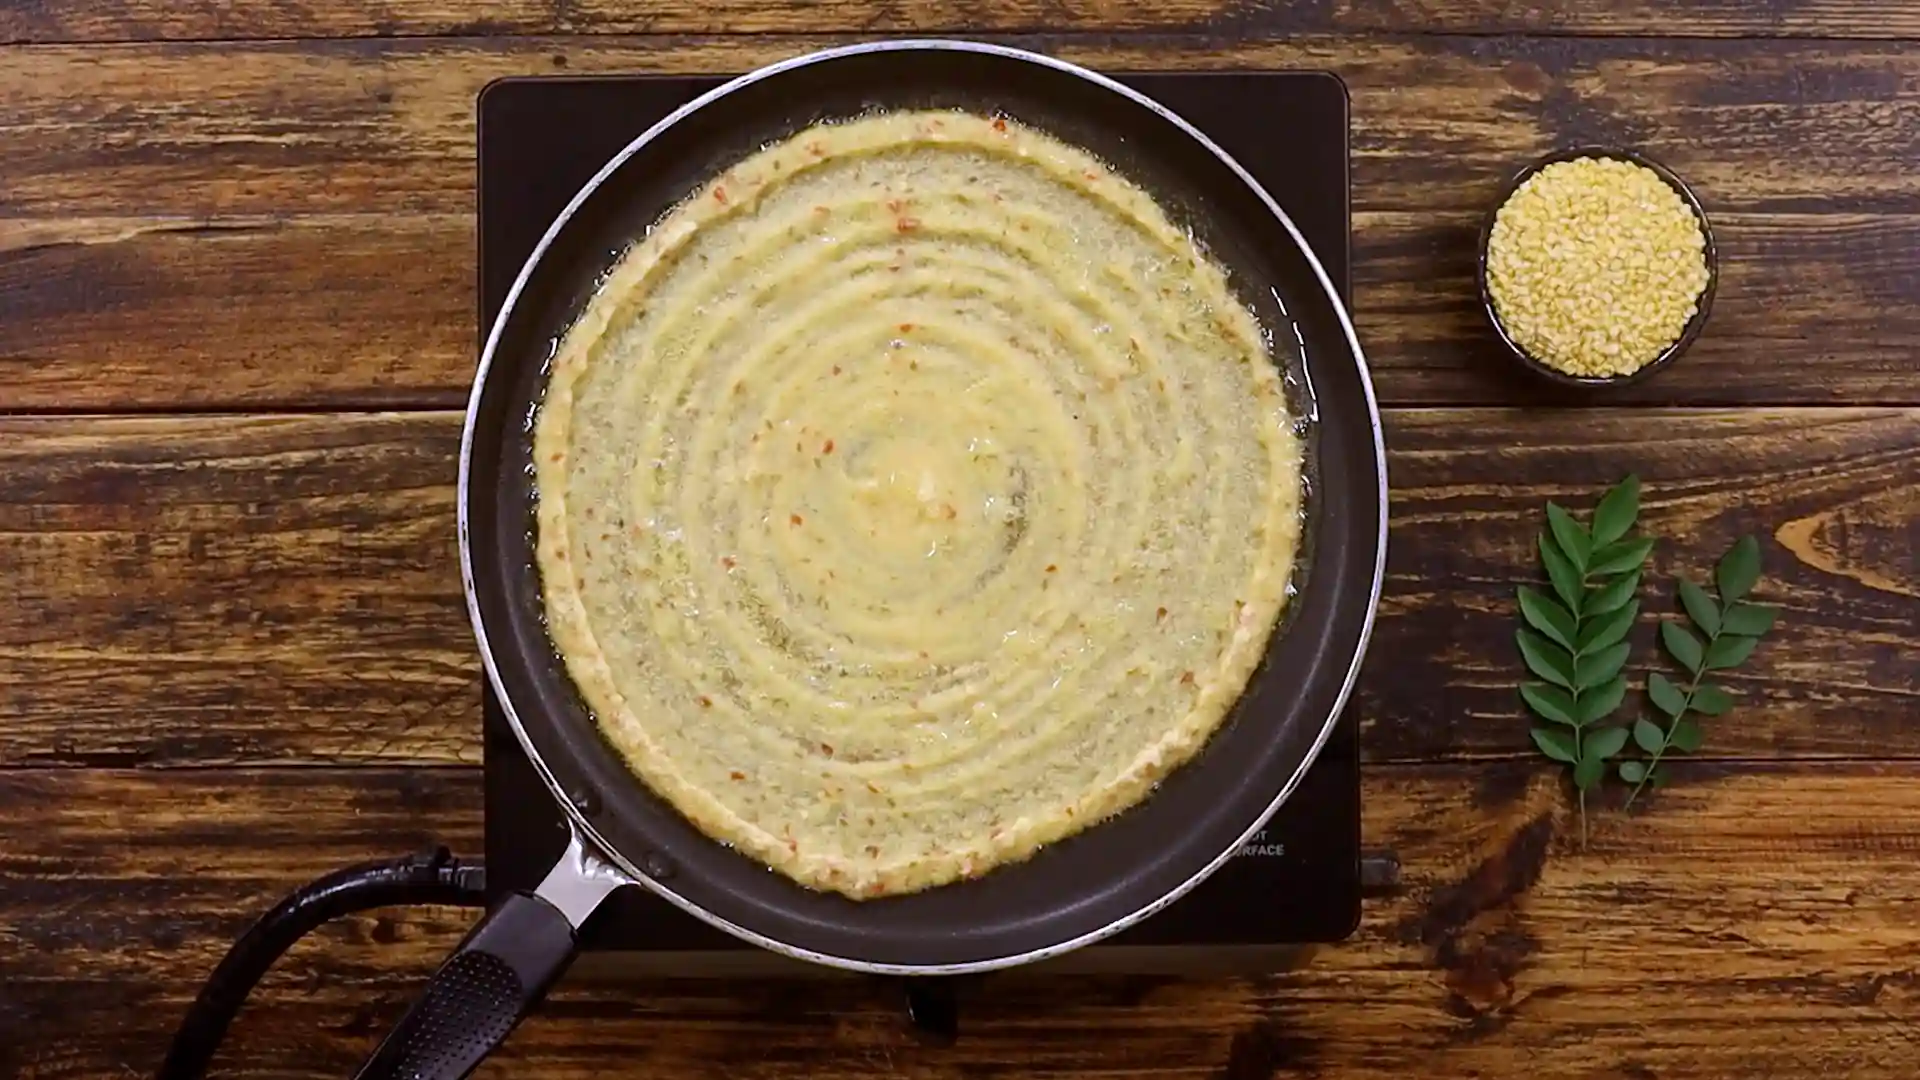
-
Cook first side
Cook until the bottom turns golden and crisp -
Flip dosa
Flip carefully and cook the other side until done -
Finish and serve
Remove once crisp and serve hot with chutney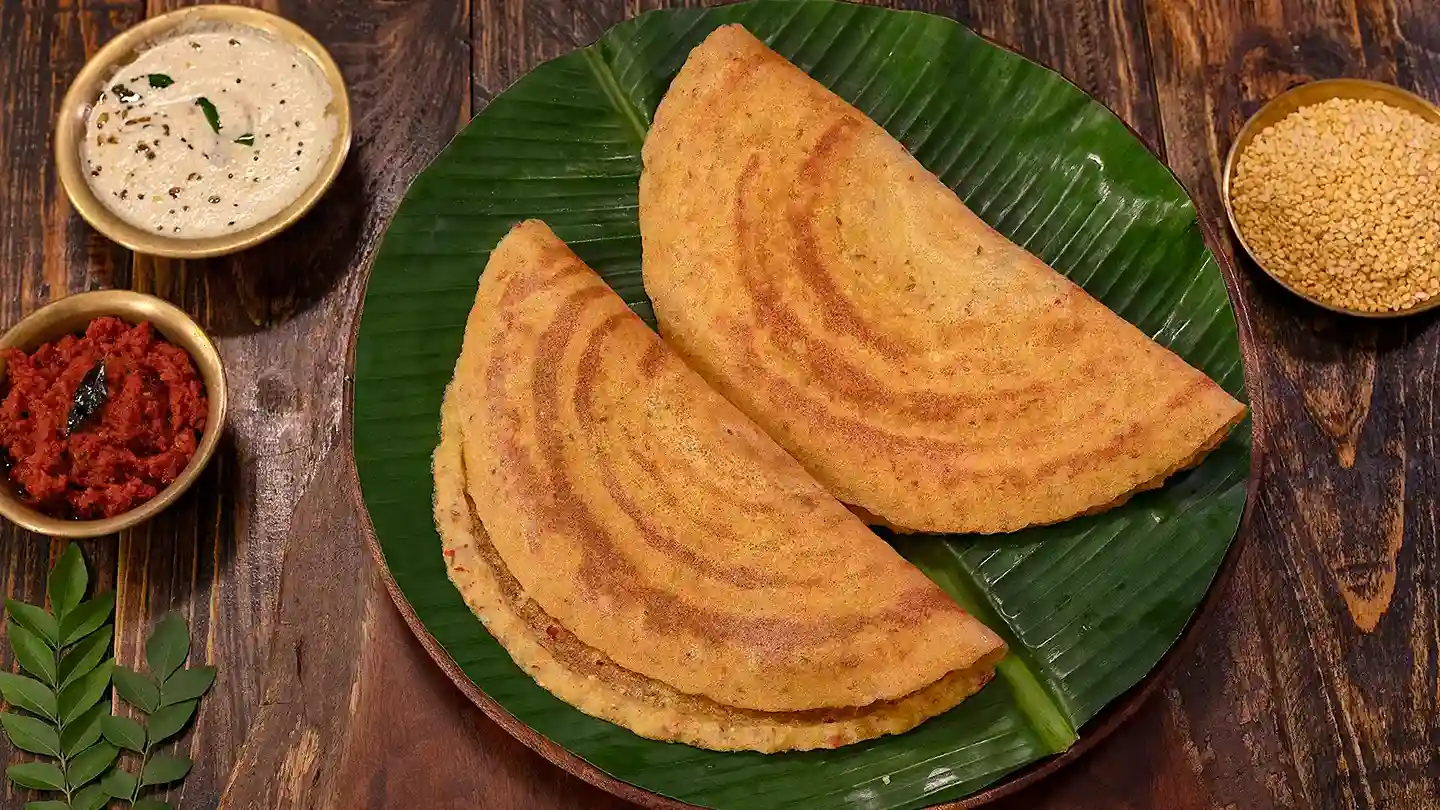
Equipment
 3")
 4")

Affiliate Disclosure: This post contains Amazon affiliate links, i.e., when you buy any product using the links below, we get commissions. but it doesn’t cost you anything extra. If you do purchase any product using the given links, we thank you in advance!
Nutrition Facts
Servings 2
- Amount Per Serving
- Calories 160kcal
- % Daily Value *
- Total Fat 4g7%
- Saturated Fat 2g10%
- Sodium 180mg8%
- Potassium 350mg10%
- Total Carbohydrate 22g8%
- Dietary Fiber 3g12%
- Protein 10g20%
- Calcium 25 mg
- Iron 2 mg
- Phosphorus 90 mg
- Magnesium 40 mg
- Zinc 1 mg
* Percent Daily Values are based on a 2,000 calorie diet. Your daily value may be higher or lower depending on your calorie needs.